
TRD Suspension Bushes - Fitting
3 posters
Page 1 of 1

TRD Suspension Bushes - Fitting
![]() Quandry Mon Aug 08, 2011 12:27 pm
Quandry Mon Aug 08, 2011 12:27 pm
What are they: Uprated rubber bushes, designed to be a direct replacement for original MK2 turbo suspension bushes.
http://trdparts.jp/english/parts_bush-sw20.html


Why stick with rubber instead of polyurethane?
In my case I want to try and retain good shock dampening as my car is strictly a road car. I do like a performance upgrade though and I really like how (mostly) TRD products are an easy and direct fit. I've had polyurethane previously on a Celica road car and I found that the ride suffered a bit and the bushes could be noisy. That was many years ago and maybe poly has come on since then, but that was enough reason for me to treat myself to these seeing as I am a big TRD fan.
When do you need these
If your suspension bushes are getting a bit sloppy or starting to look like marshmallow, that's normally a good time
Where do you get them:
Any TRD authorised reseller can supply these. I got mine from RHDJapan, but you can also get them from Fensport, Lithia Toyota, Nengun, NewEra and a host of other TRD resellers
http://www.rhdjapan.com/trd-suspension-bushing-set-mr2-sw20-60002
Who makes them: TRD -duh!
How do you fit them:
With Coffee at hand, I am ready for action
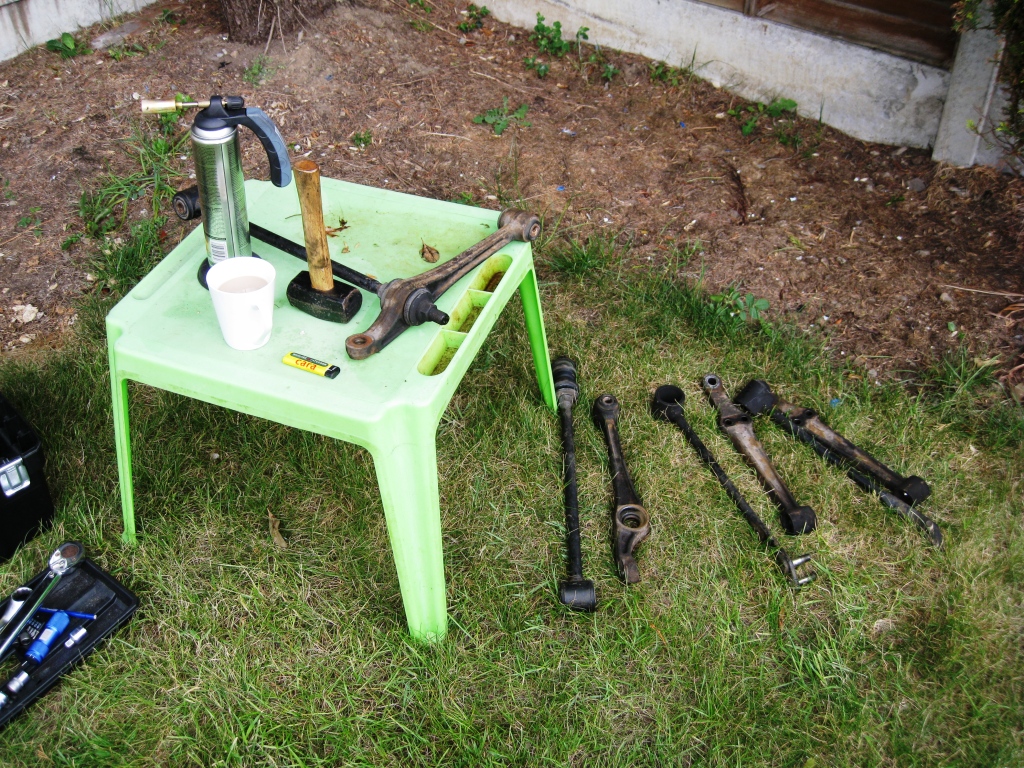
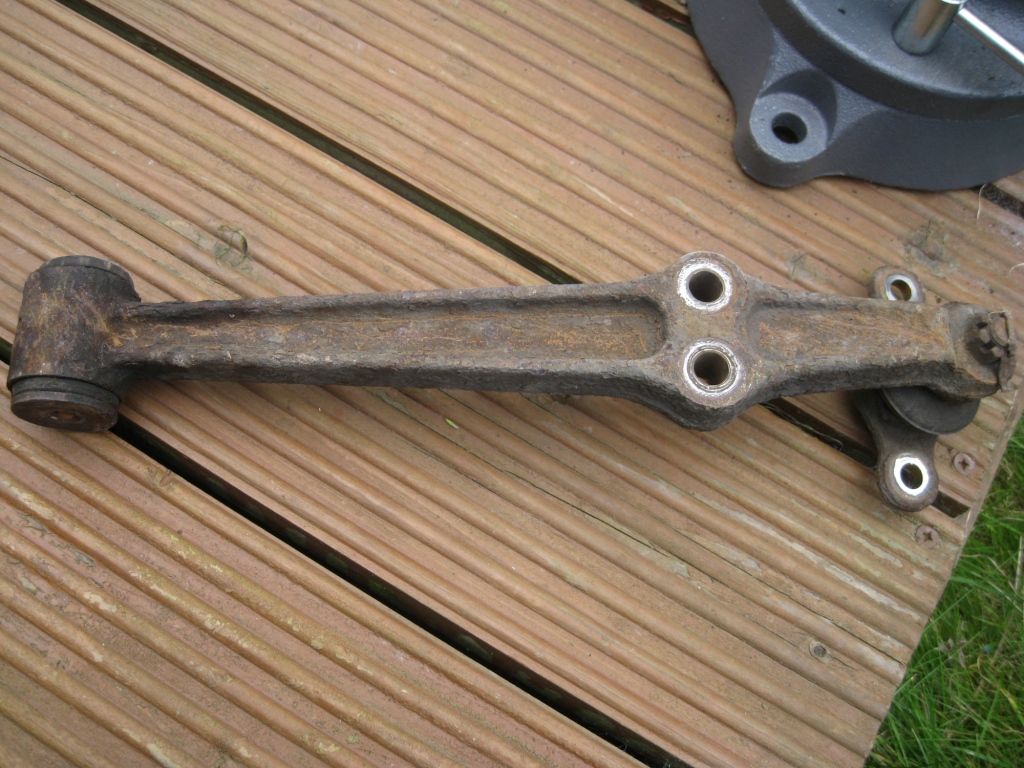
I had done some bushes last weekend so this time round I only had four more bushes to remove, took about 15-20 minutes to melt them all out of there. You can make the job quicker (a little) by lining them up.

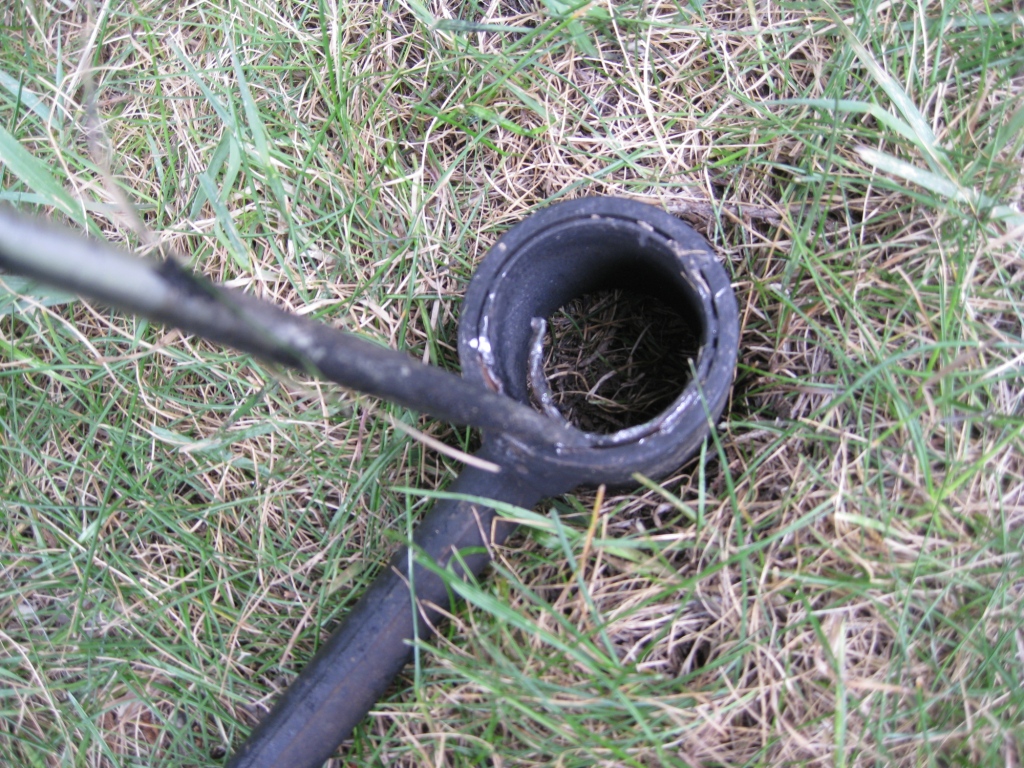
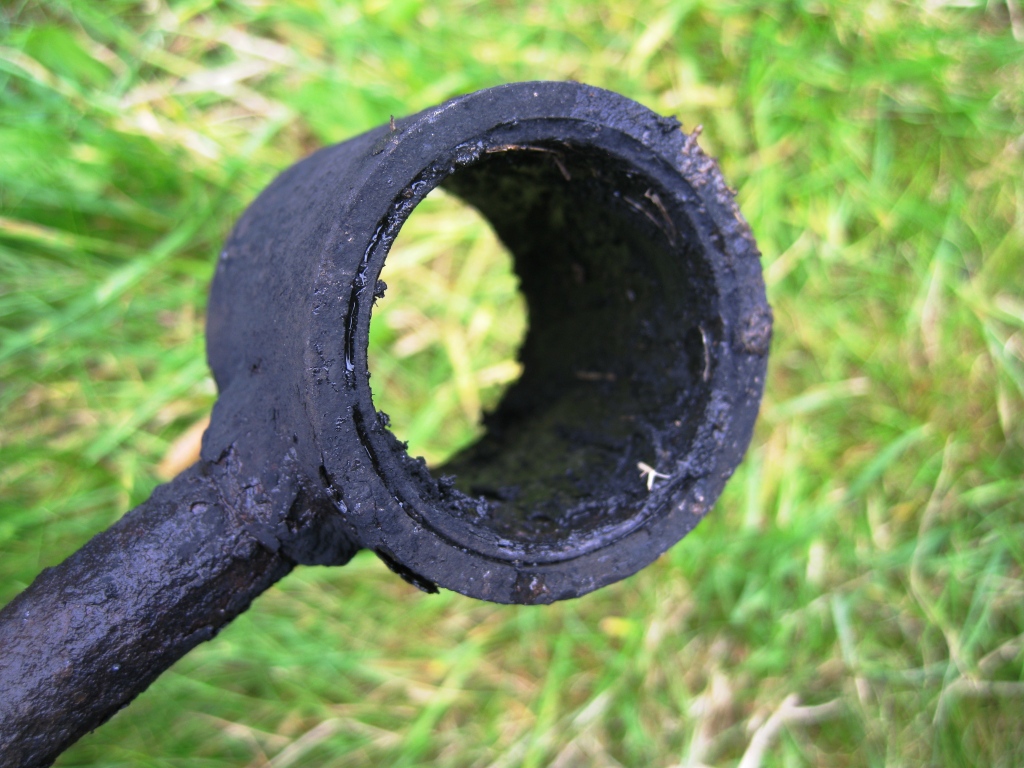
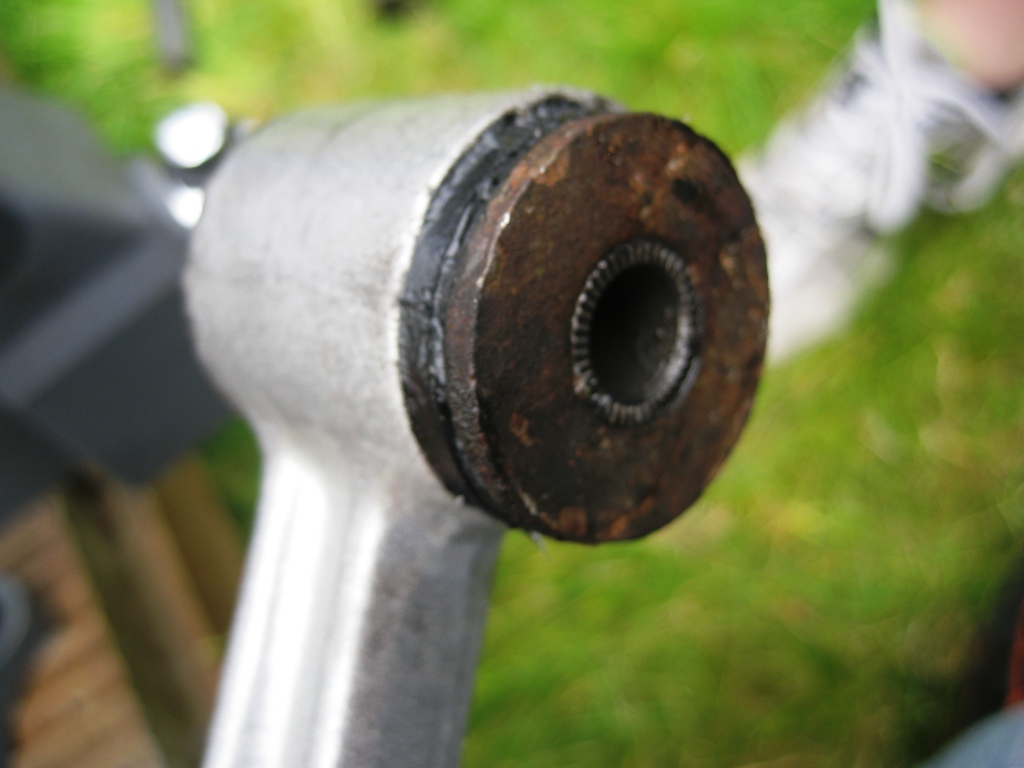
The only ones that are really tricky are these front anti dive rods that have a steel sleeve insert that is part of the bush itself.
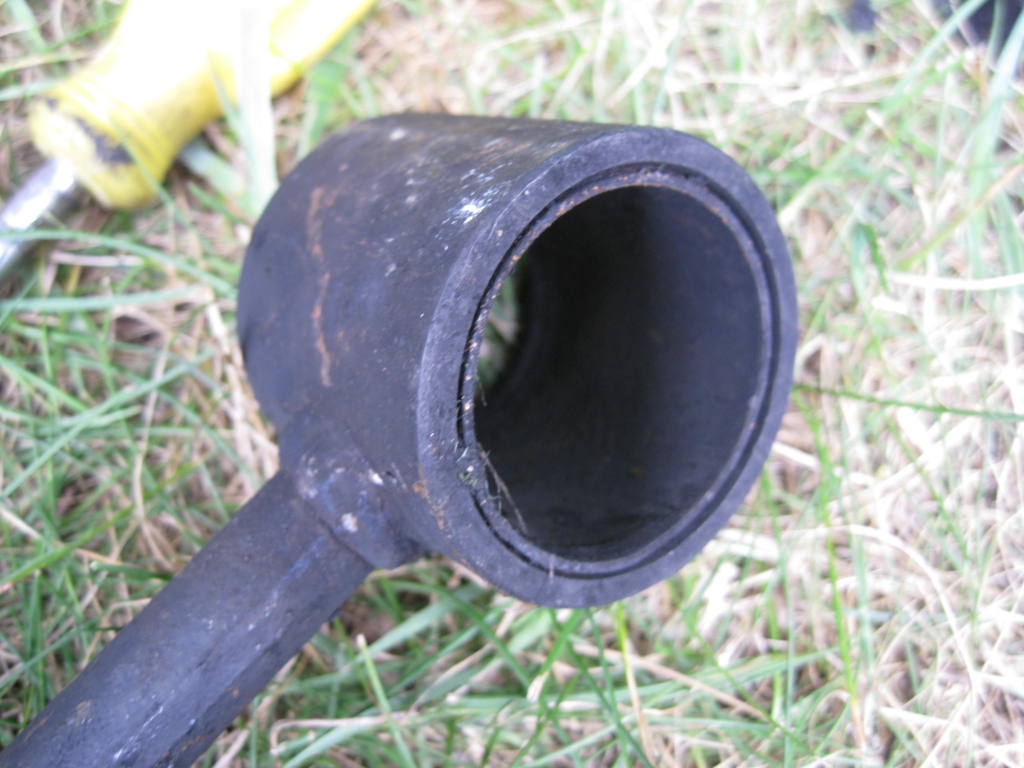
First I tried the lazy way of just whack it with a wedge, but that didn't work.

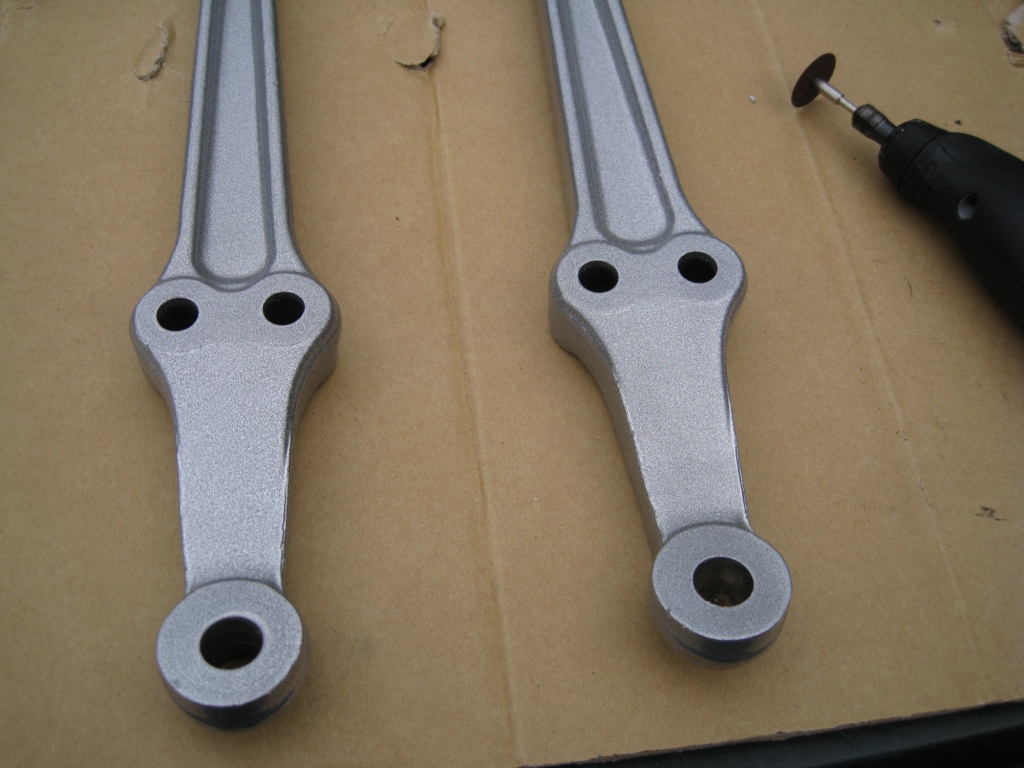
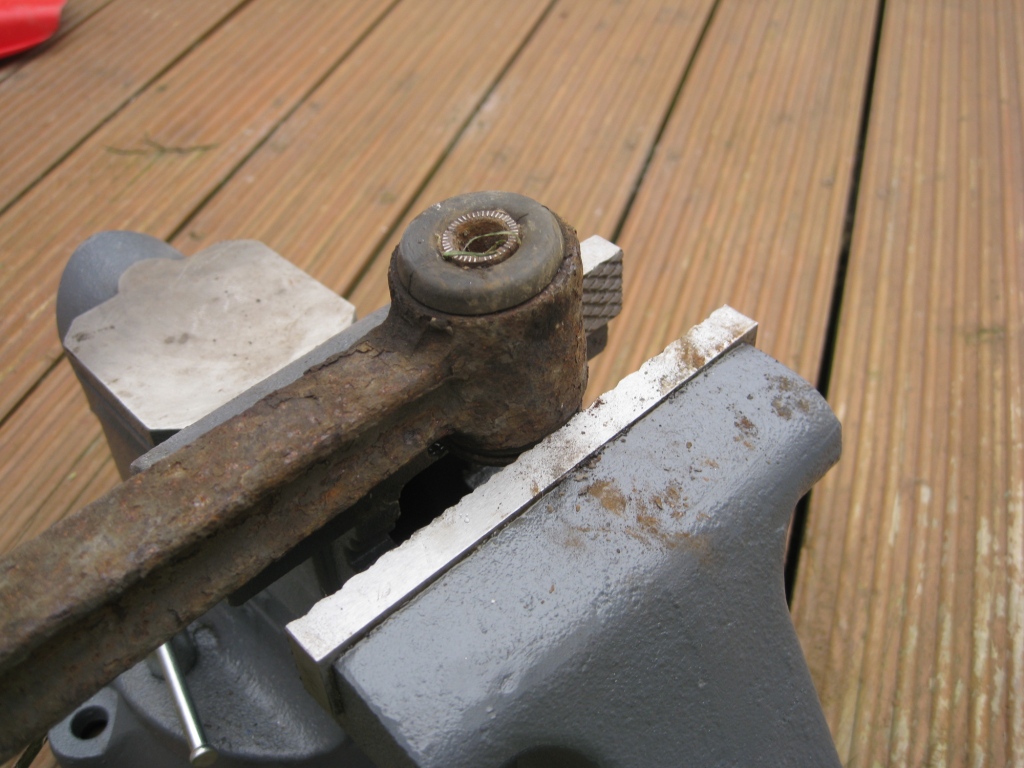
Next I tried a hacksaw, like they described in the IMOC writeup, however I only had a junior hacksaw (and no vice)and it took a lot of time to do not very much. So I dug out an old friend - DREMEL :cheer:
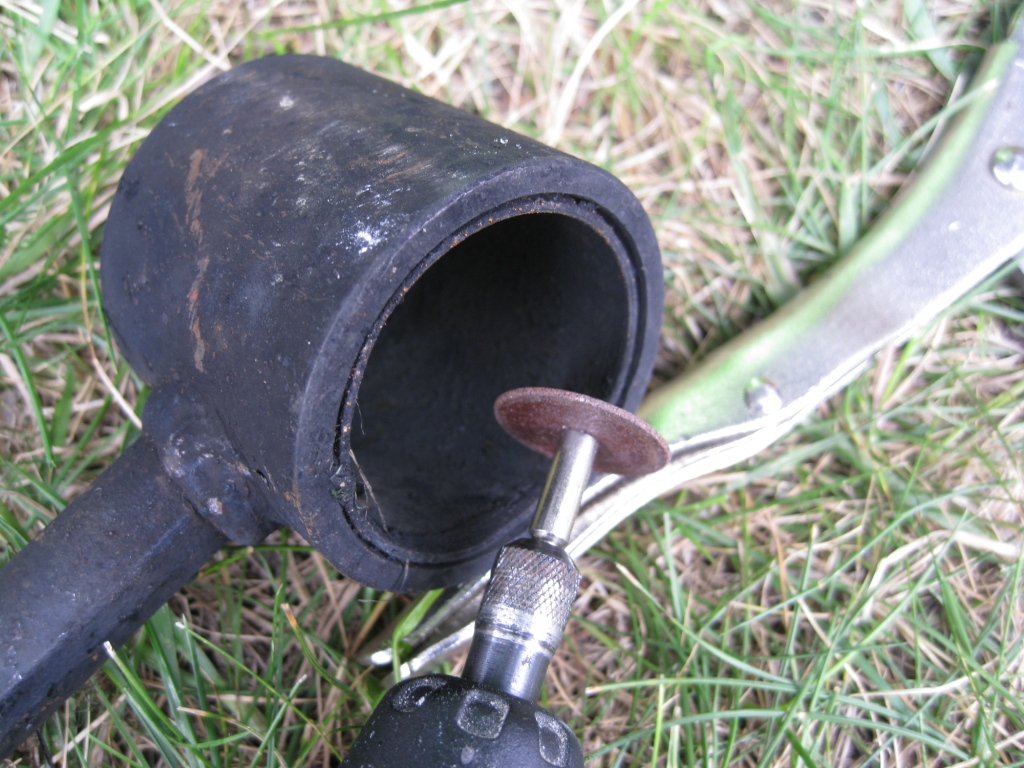
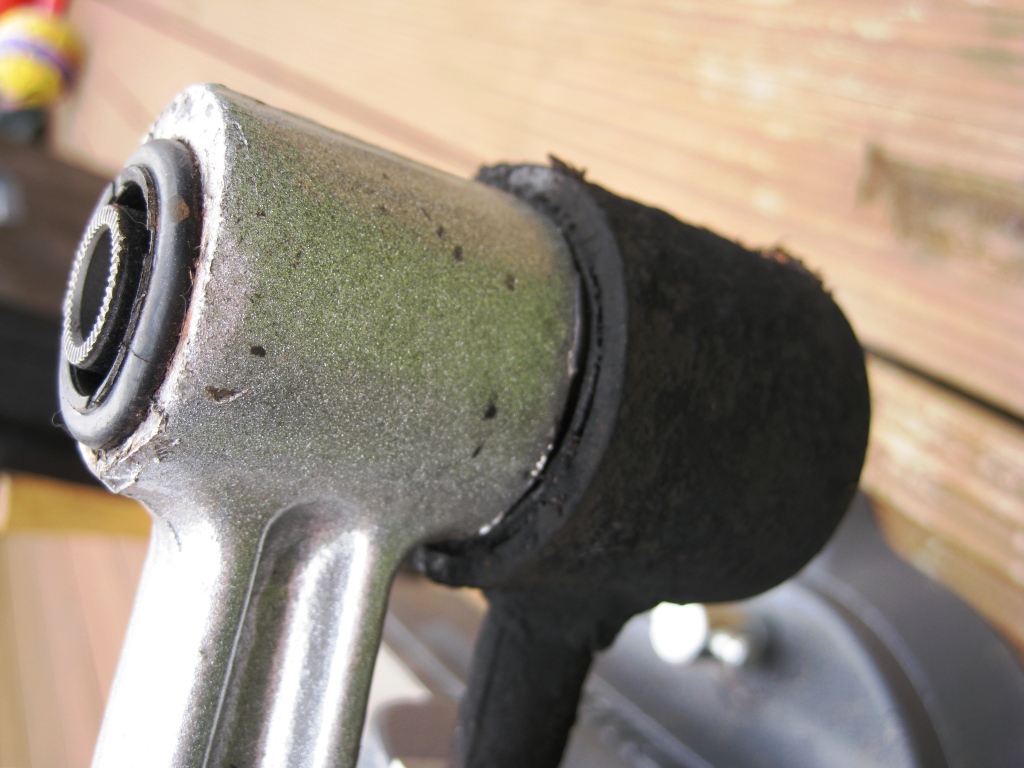
After a minute or two on each side, I had cut through the insert
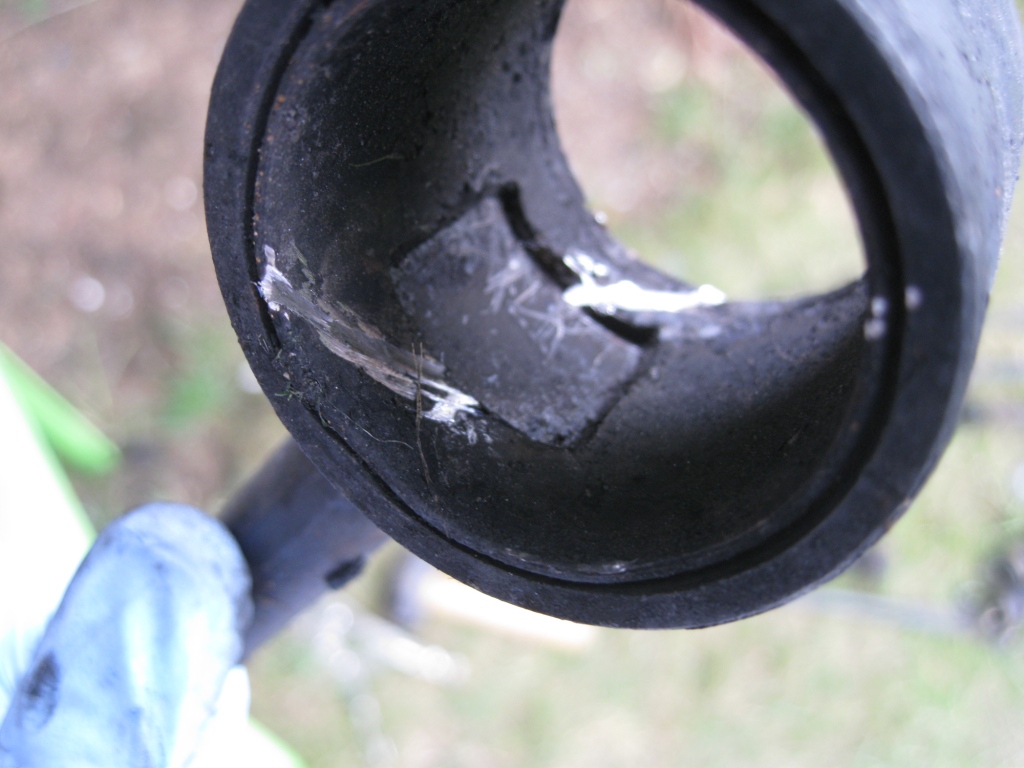
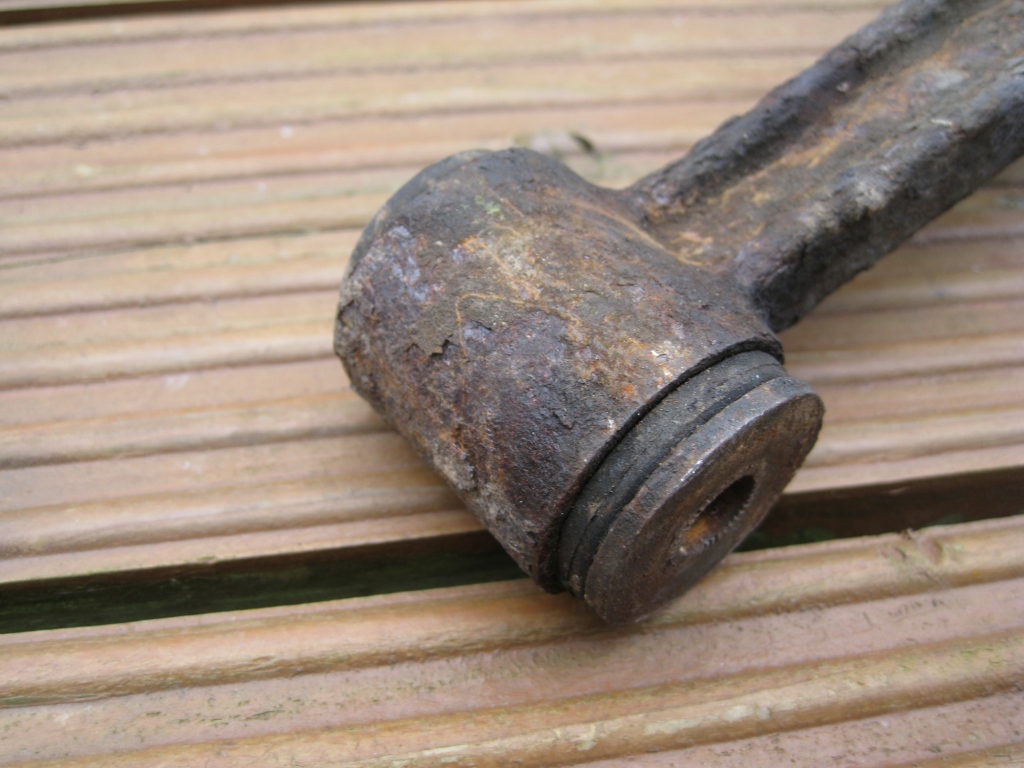
Then using a screwdriver it was possible to beat in and prise out the insert to free it up some:
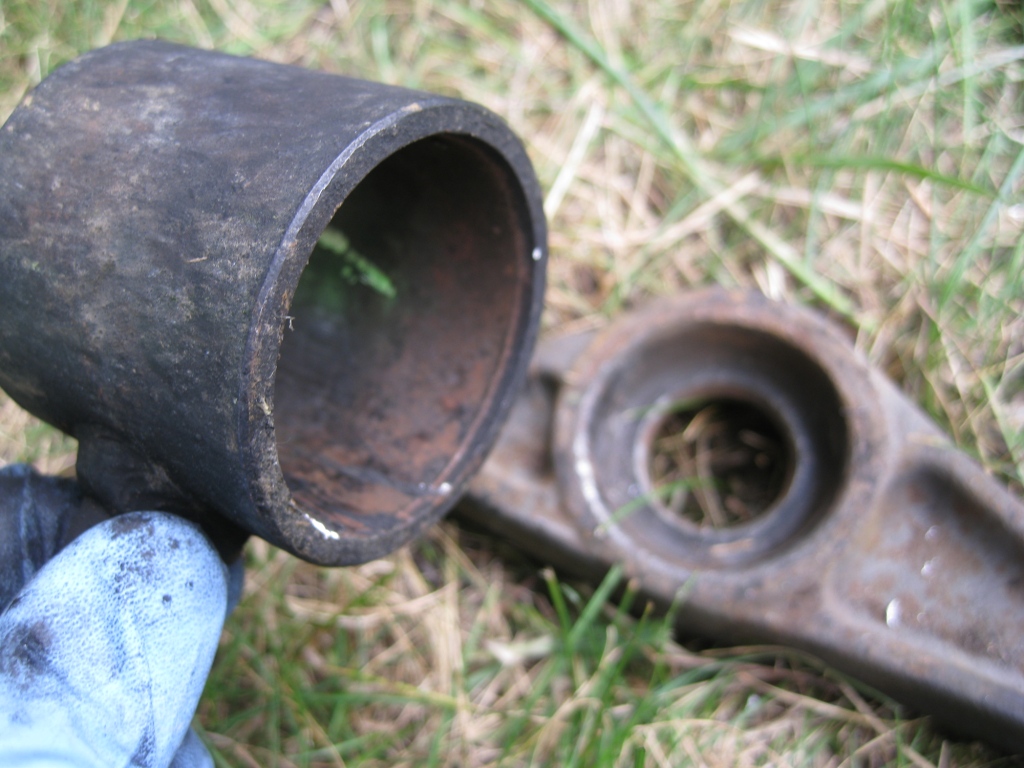
Even though it's looking like it's not connected, don't be fooled. After 20 odd years it just doesn't want to leave home.

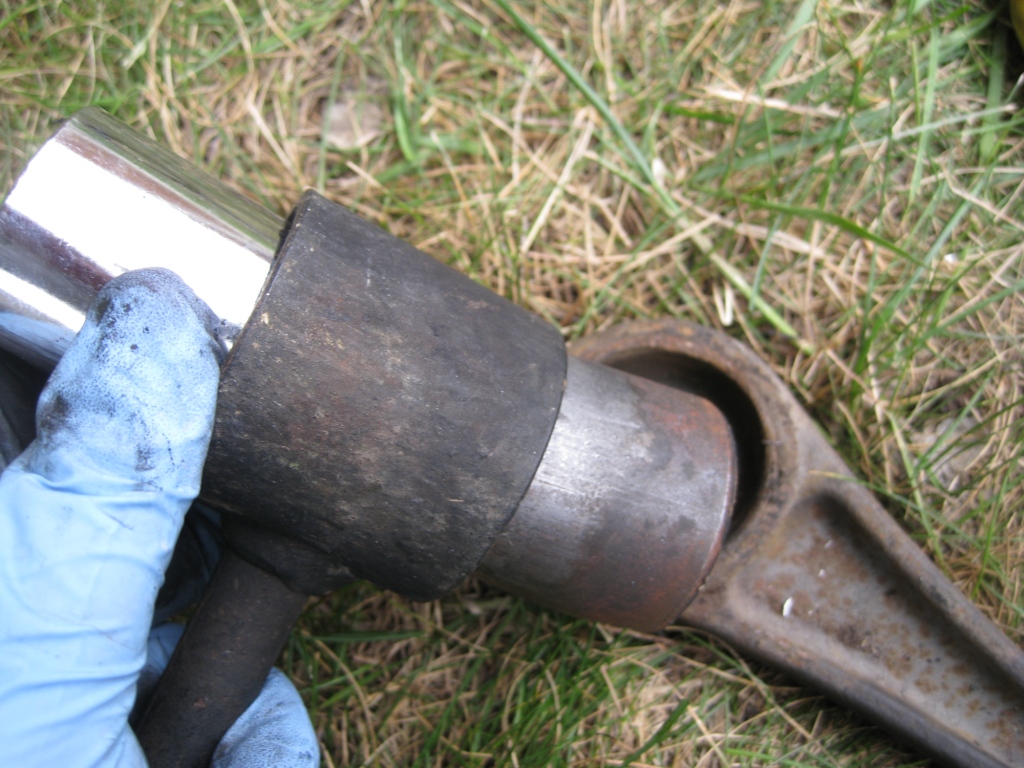
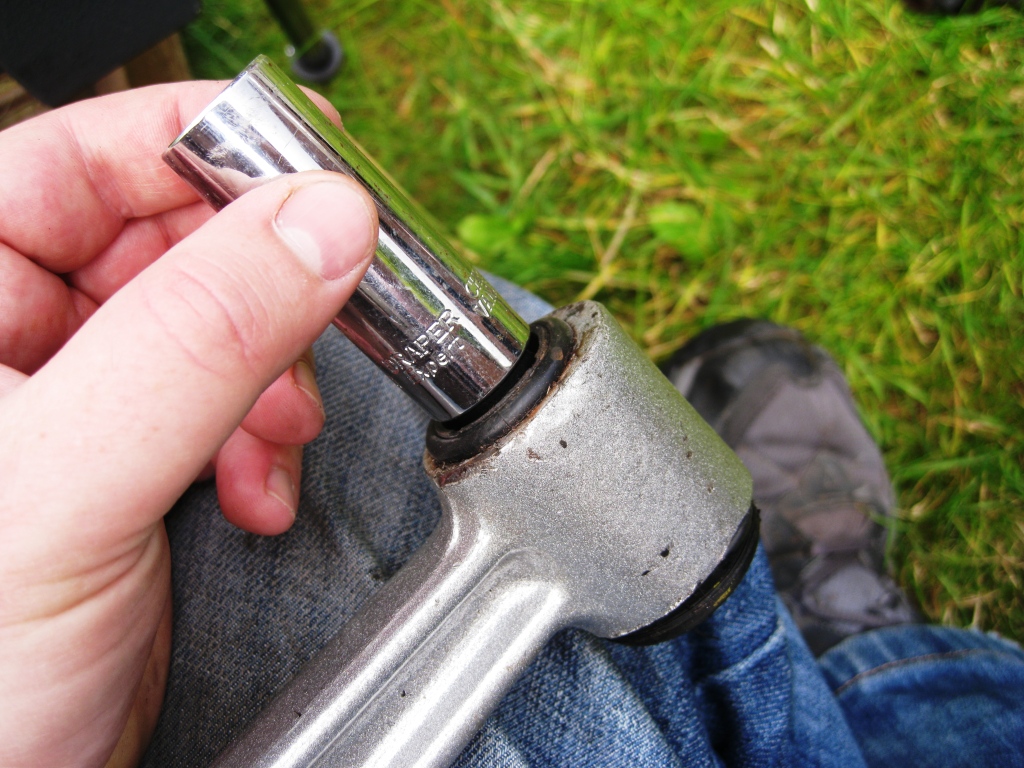
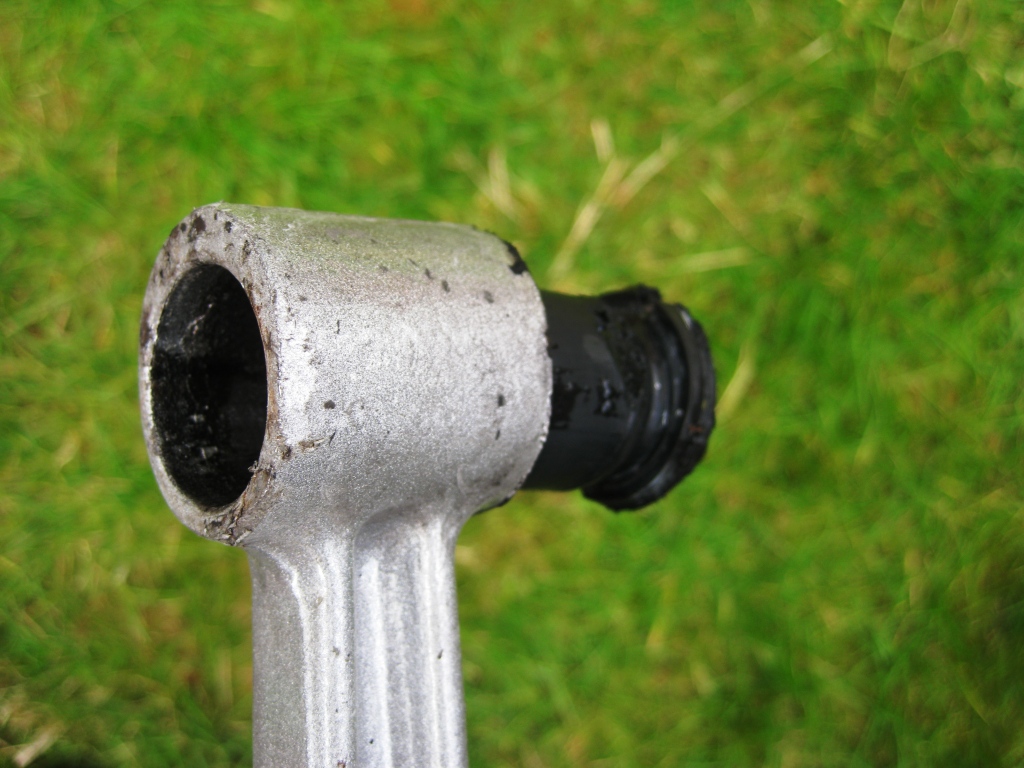
So using a large socket as a drift, it was time for a few short and sharp shocks

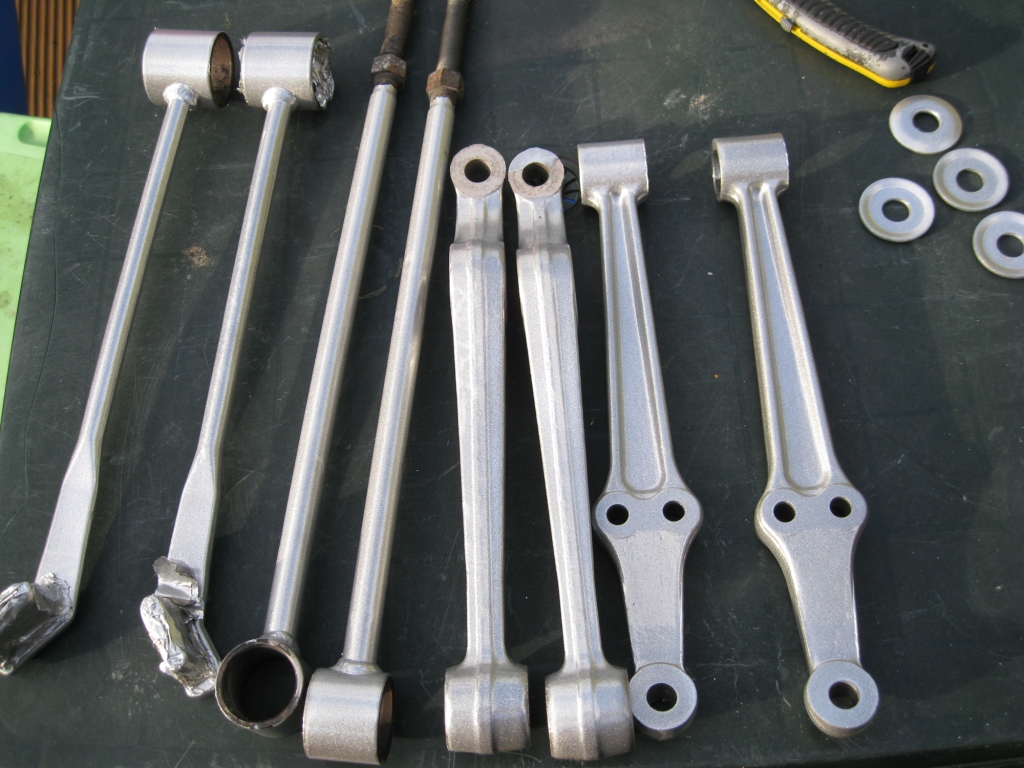
And hey presto, we're too cool for school and ready to head to the powdercoaters:
Well I dropped by the powdercoater and picked up my suspension components

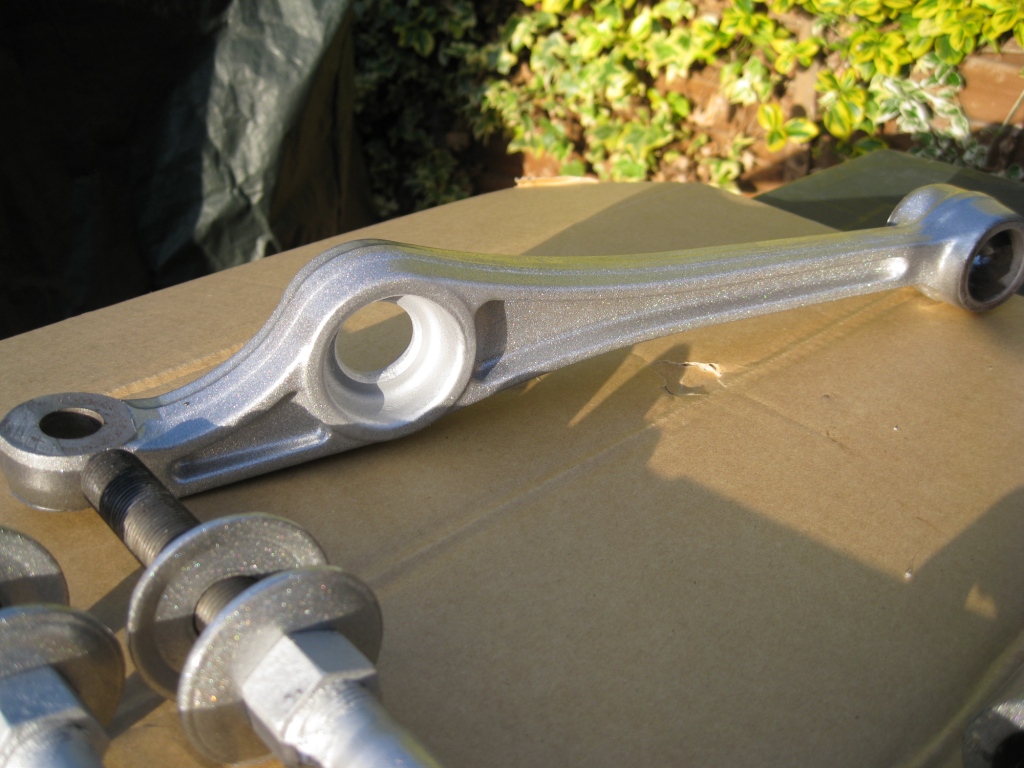
Looking good

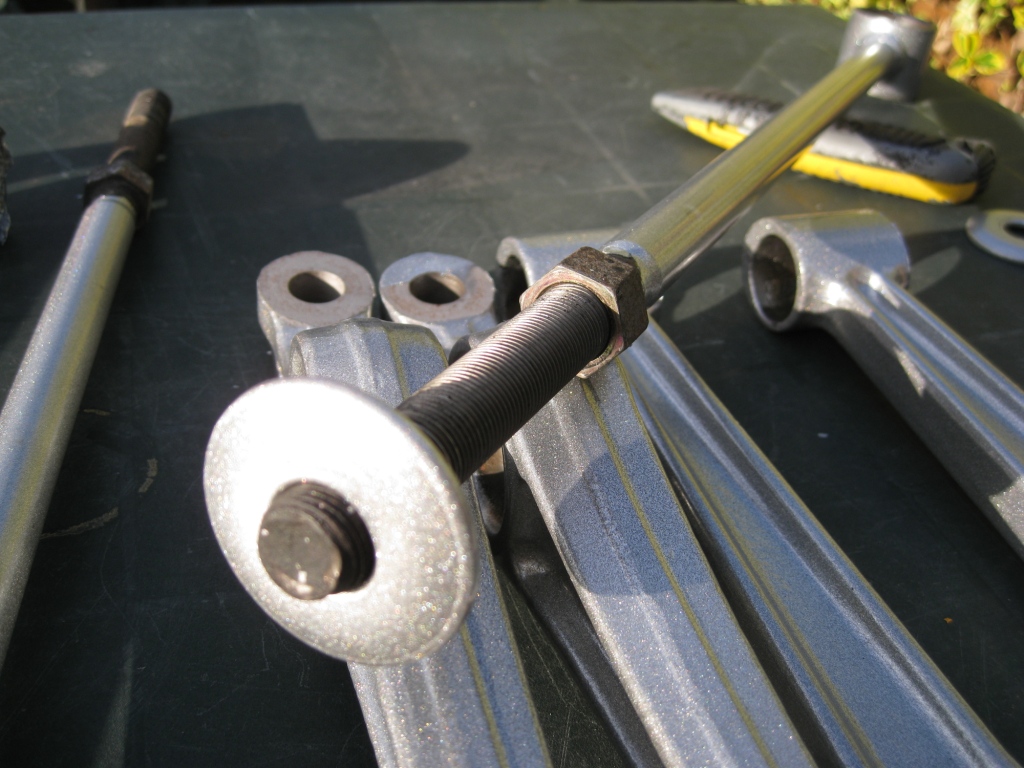
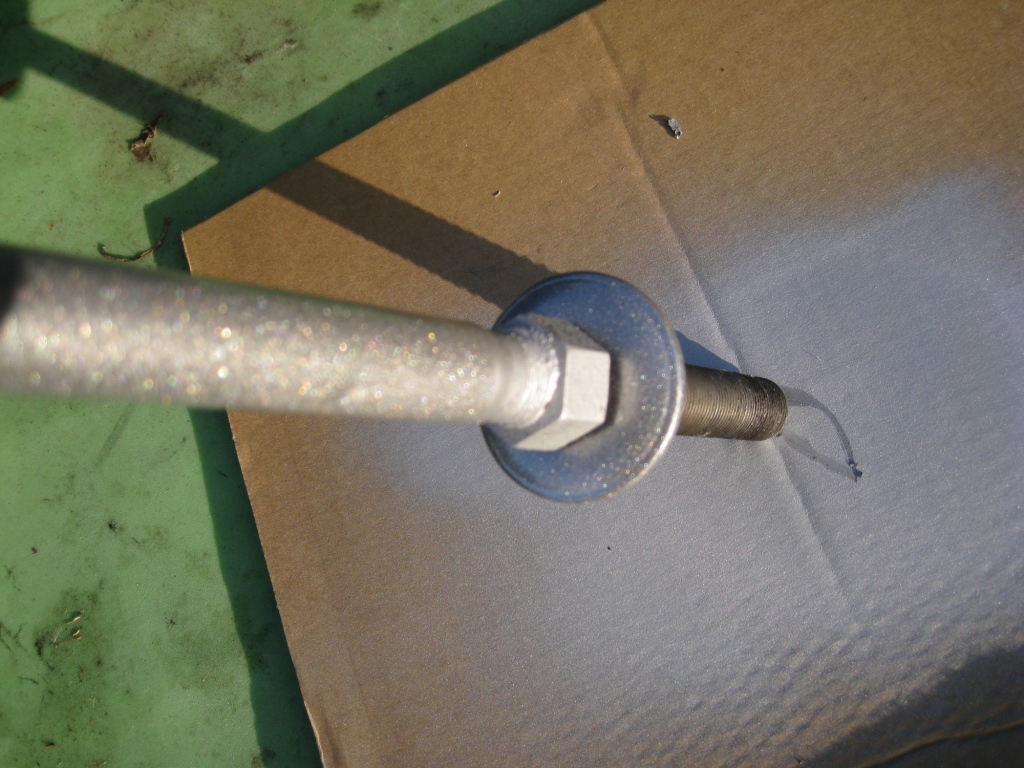
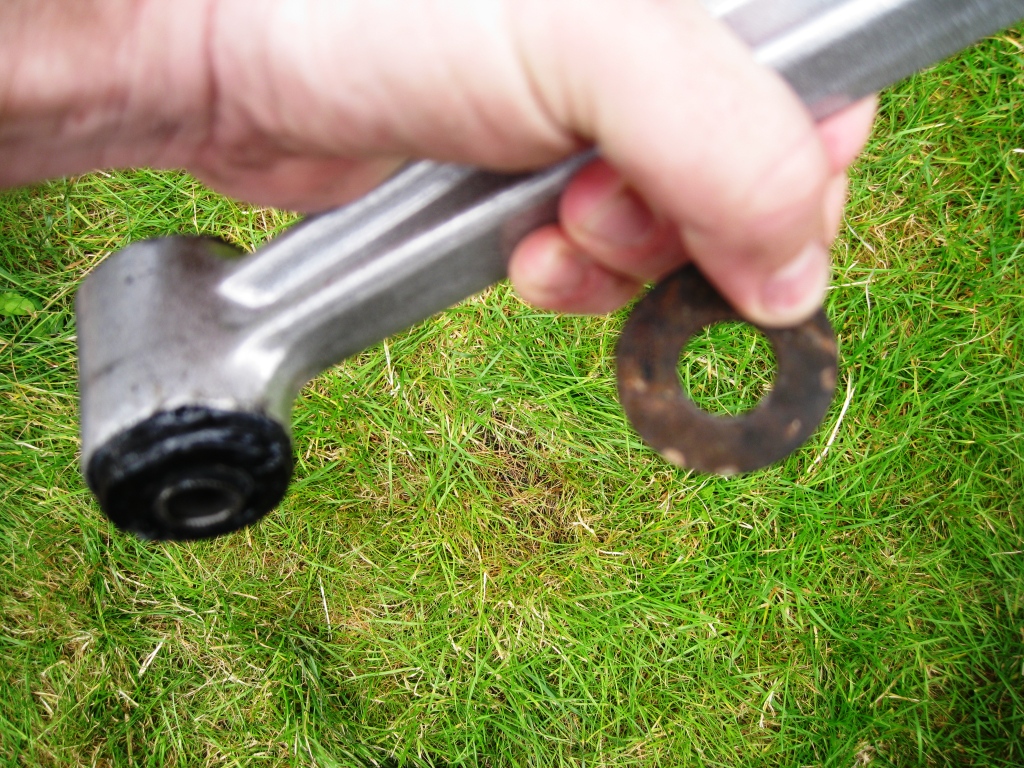
I tried to tape off any area where there is thread or a hole, because the powdercoat is so thick it just won't work for surfaces that are supposed to mate. Here's an example, this suspension washer for the rear arms would not slide over the thread, by running it back and forward a bit it goes on ok as the inside powdercoat wheres down. That would not be so easy if the whole thread was coated though..
In the past I've found it better to 'over tape' and then spray a light coat of similar coloured paint on to the part, if it's not being viewed in close up, no one even notices.

Unfortunately though my powdercoater got a little overzealous with and must have lost some of my tape.. So for these guys I need to strip off the area where the two surfaces will mate
Still looks good on the part you can see
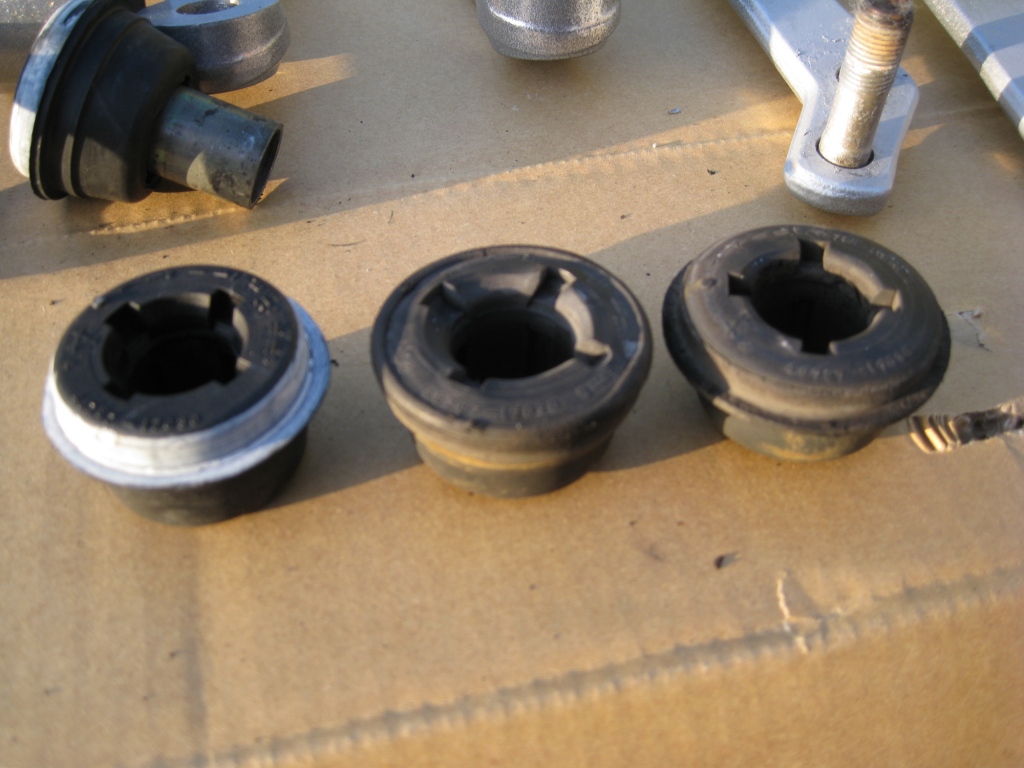
so I figured I would have a go at the bushings. Old on the left, new on the right

The TRD bushings have the same part number as the Toyota ones, they're only really identifiable by the white paint on the edge (that rubs off easilly...)
These ones went easily enough

But as for the others, they're super tight in the holes...
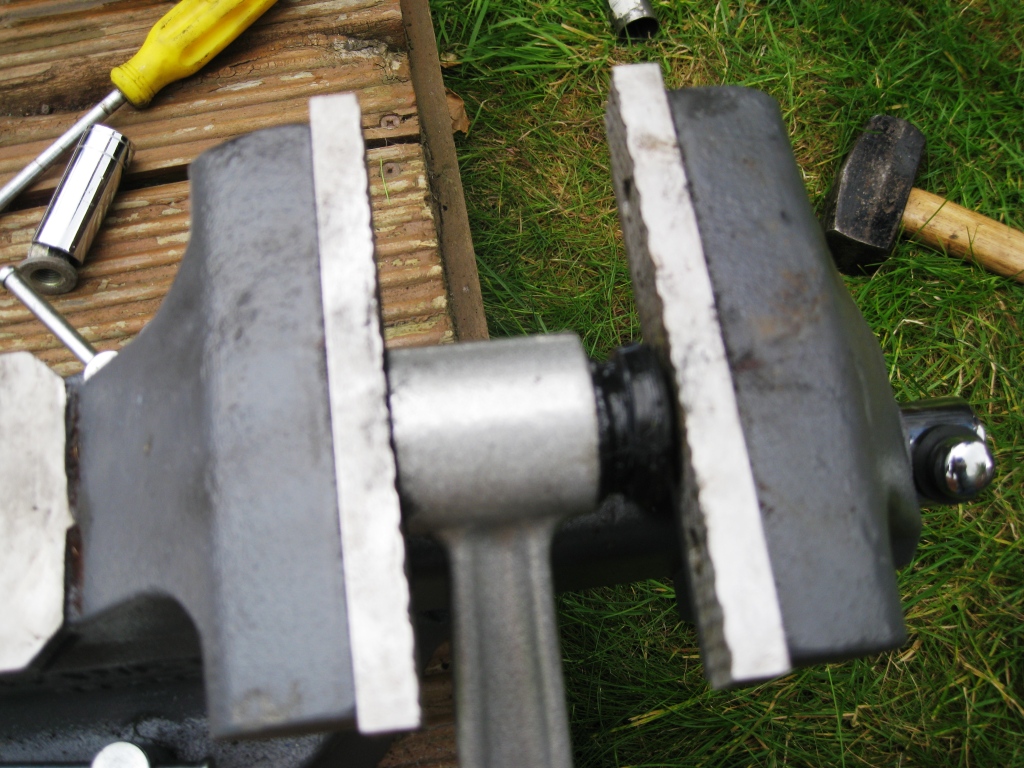
Step1: apply some Lithium grease to the bush on the end that will be pushed in first. Also lube up the inside of the corresponding socket.
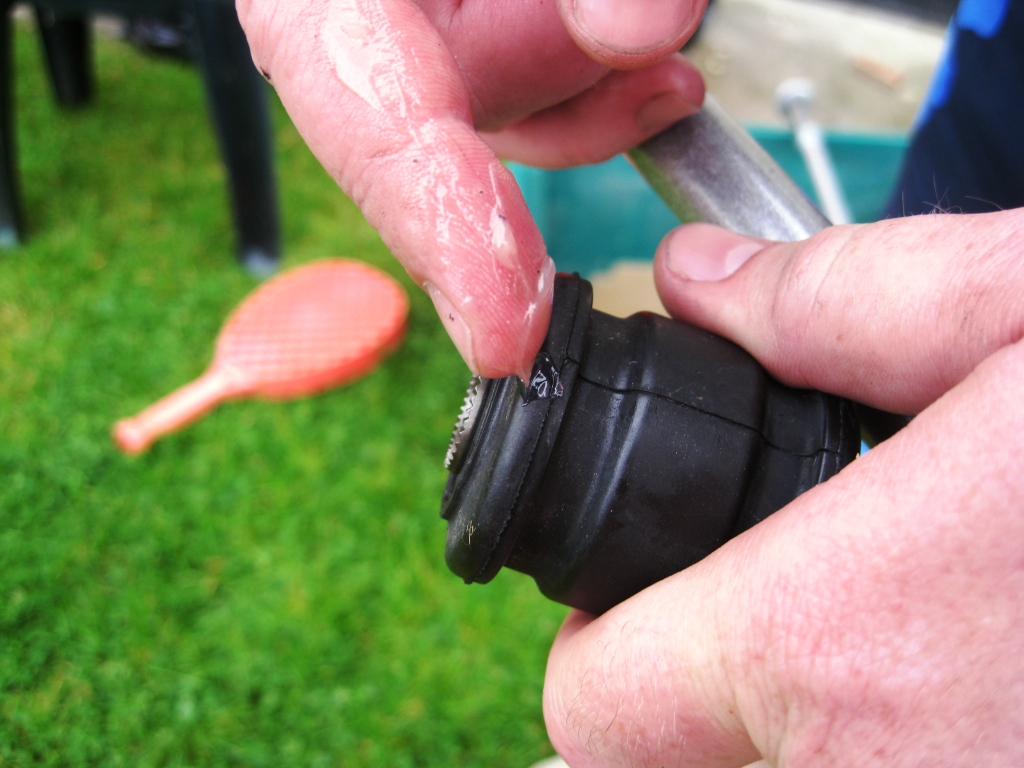
Step2: sit it in place with the corresponding arm in the vice being careful to get it as straight as possible. Start winding in the vice to push the rubber inside. At this point if you don't have it straight enough the bush can fly out at an angle and get dirty from the ground. Dirt/grass brushes straight off rubber, but if it is greased it is a full cleanup job. That's why I recommend only greasing the first bit.
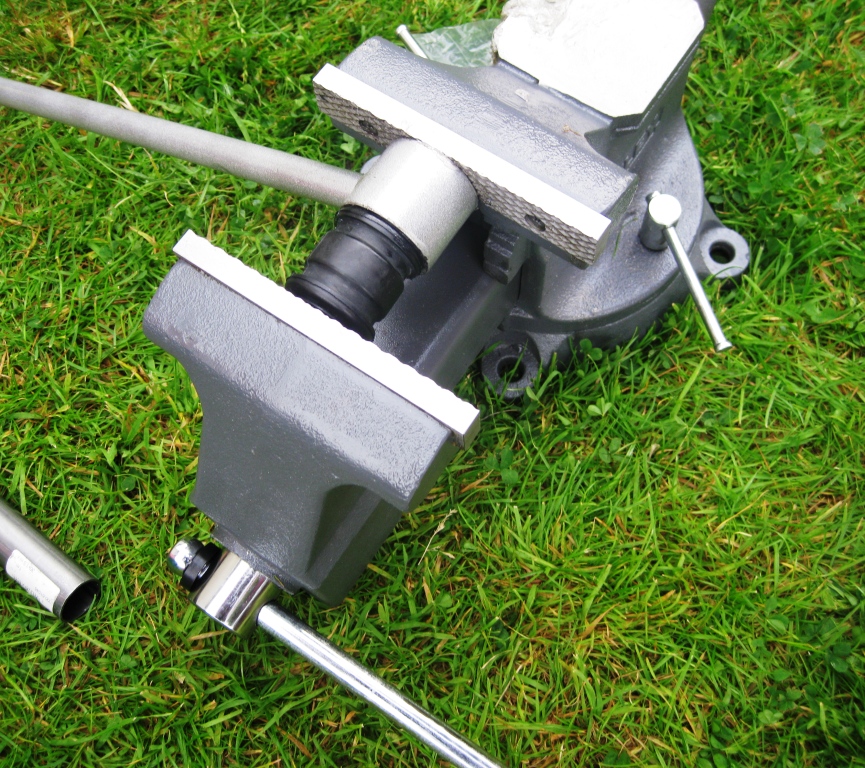
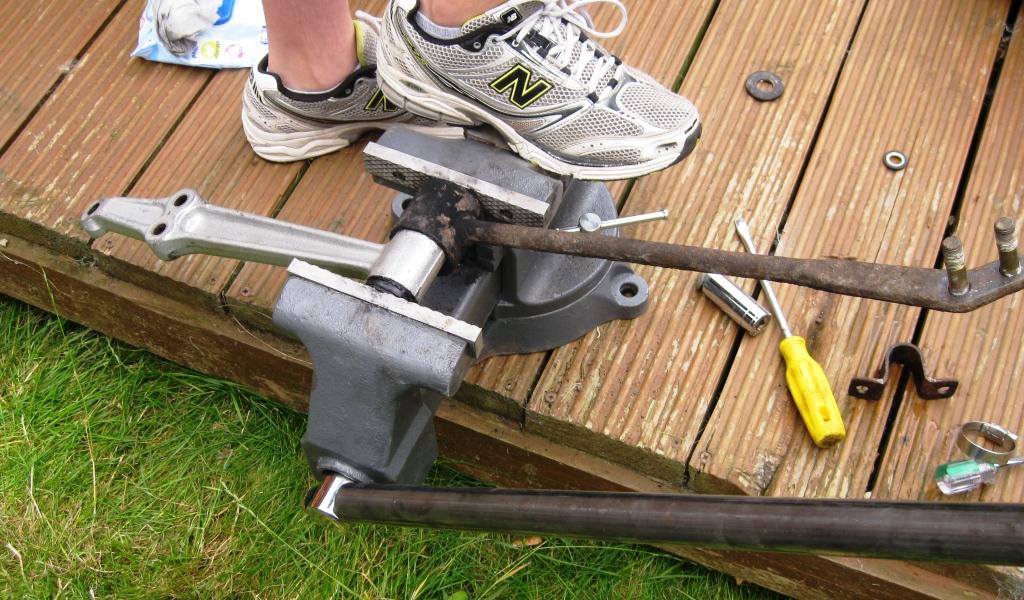
Step3: Now that the bush is being held in place and won't fly out you can put grease all around the rest of it. At around about this point it becomes necessary to use the pole extension and have someone stand on the vice (if it's not bolted to a heavy bench).

Step4: These little rubber suckers are hard super tight also! So you might like to have two handy helpers in place to hold the vice from various angles. Around about this time you want to also put a second arm behind the first socket to ensure that you can get the bush pushed all the way through
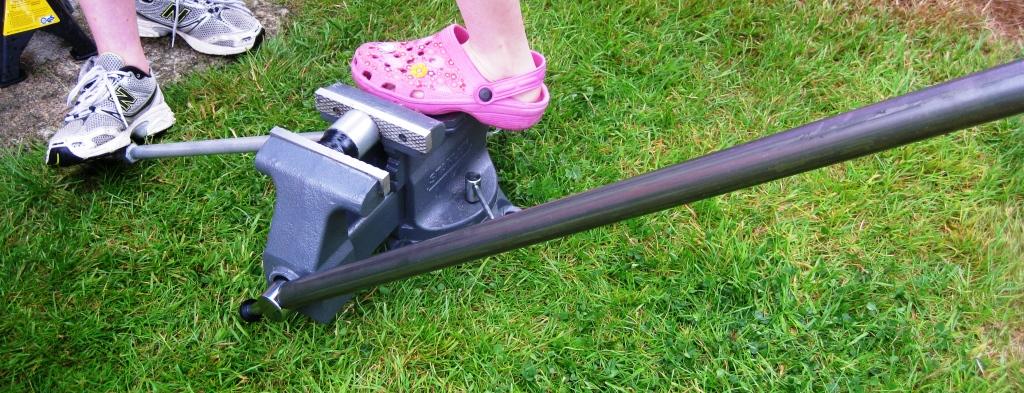
Eventually they push in there and when you take the arm out of the vice the rubber pops out each side to sit properly. Really I was wondering if I would break the vice, break my arm, break the bush, break the rod etc etc, it takes a shedload of pressure to get these things in there so be prepared to fit them to what seems like destruction!
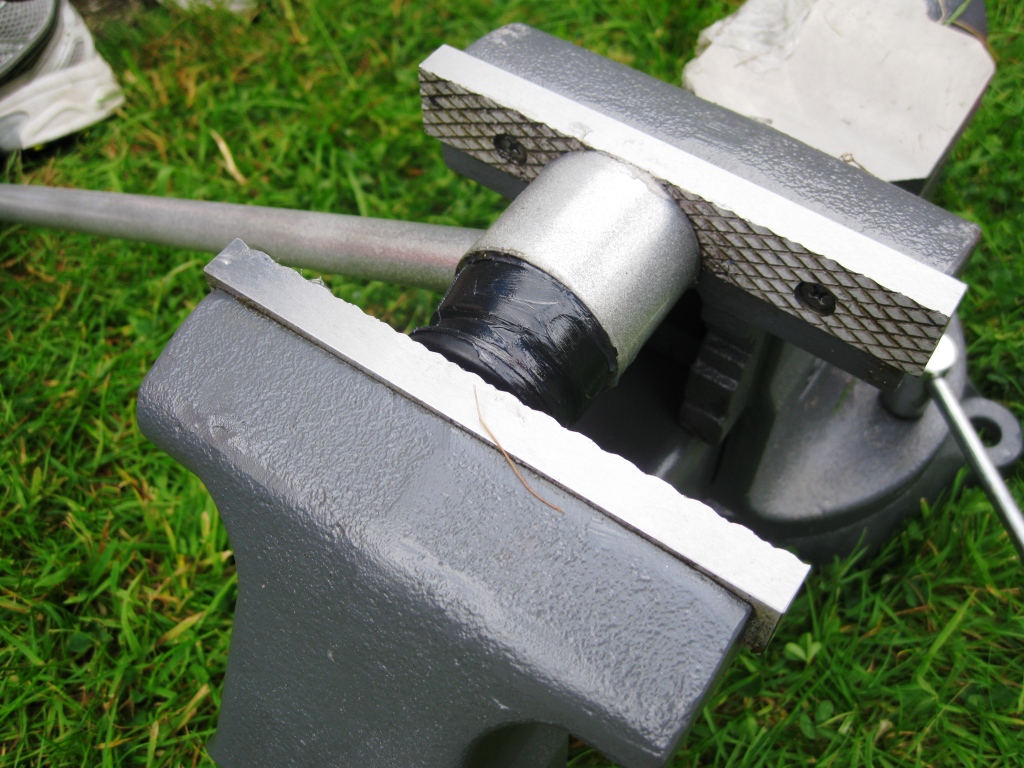
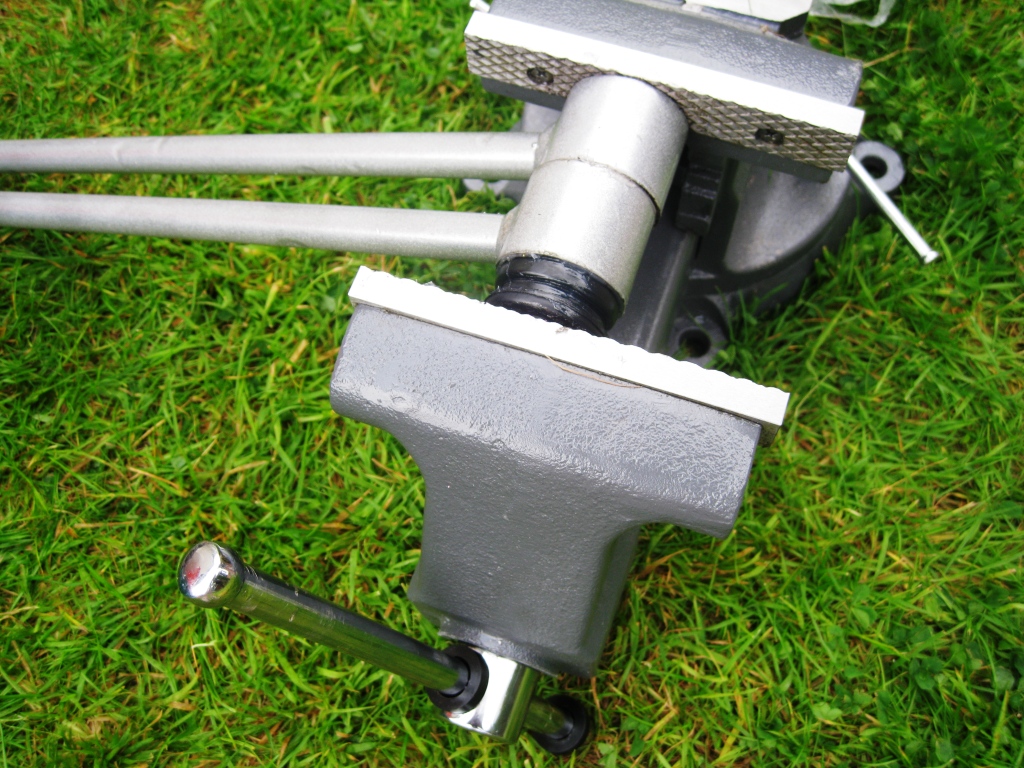
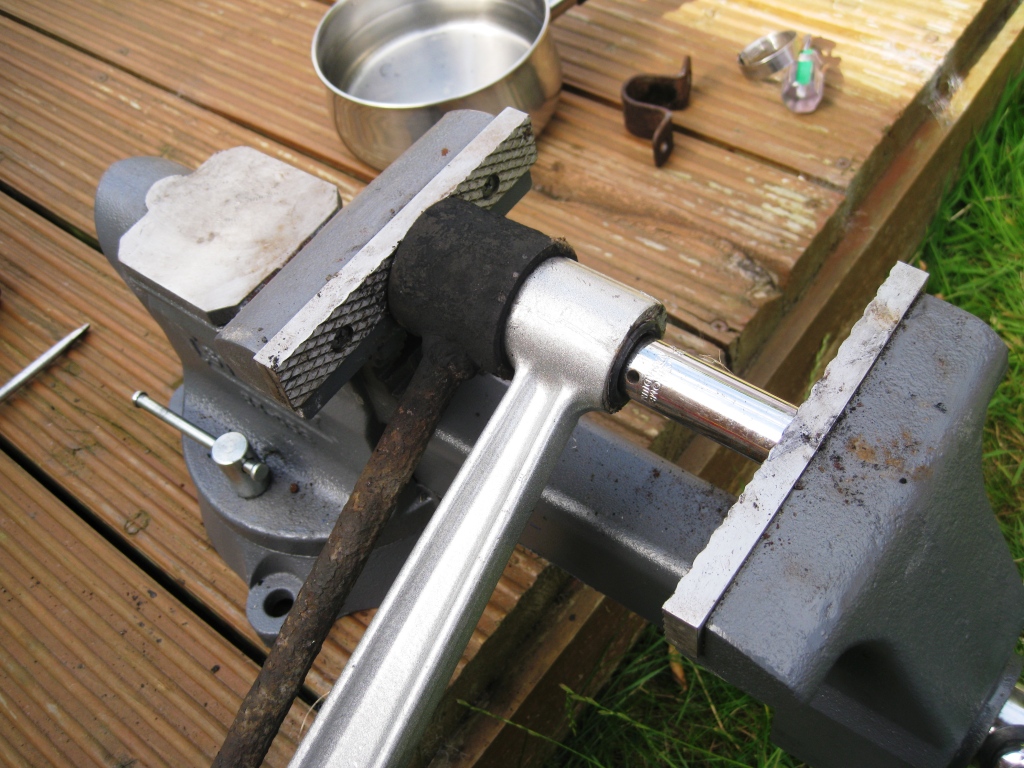
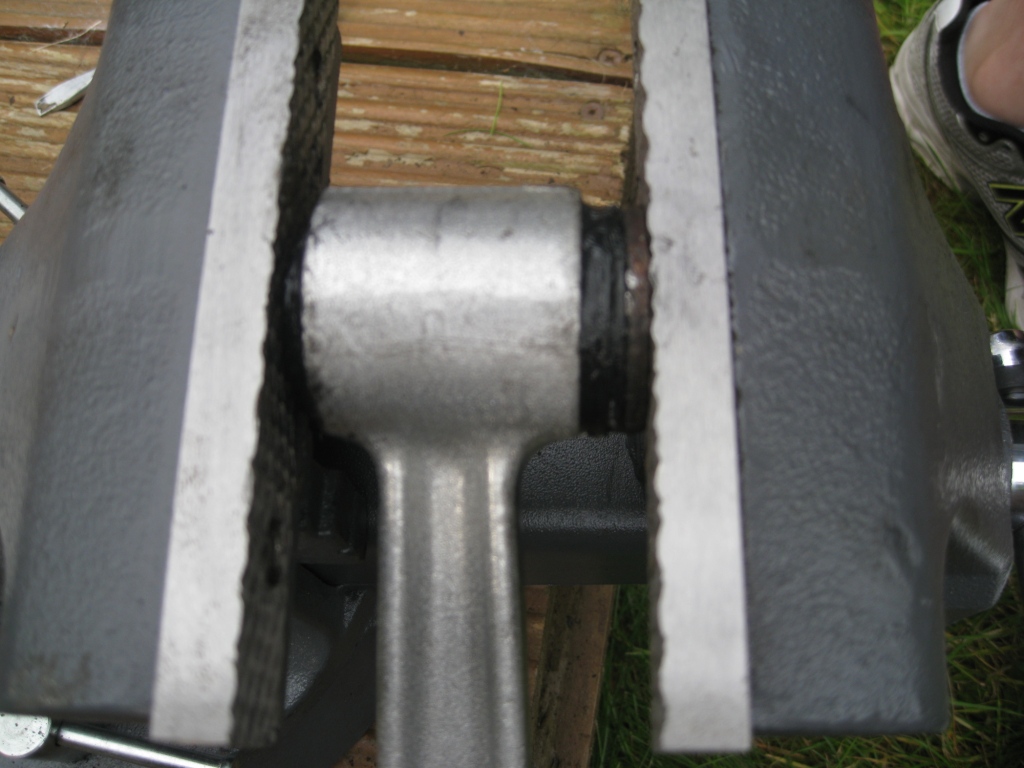
This weekend I am going to try using a stainless steel clamp in the vice as the spacer. I don't know if it will be deep enough or if it will hold under the intense force, however if it does then it will be a handy solution as you can see in this picture it can easily be adjusted for size.

Next Steps I have now finished pushing in all the bushings (glad it's over really), my next step is to take off the old arms and fit my newly uprated ones. Standby for updates!
http://trdparts.jp/english/parts_bush-sw20.html
Why stick with rubber instead of polyurethane?
In my case I want to try and retain good shock dampening as my car is strictly a road car. I do like a performance upgrade though and I really like how (mostly) TRD products are an easy and direct fit. I've had polyurethane previously on a Celica road car and I found that the ride suffered a bit and the bushes could be noisy. That was many years ago and maybe poly has come on since then, but that was enough reason for me to treat myself to these seeing as I am a big TRD fan.
When do you need these
If your suspension bushes are getting a bit sloppy or starting to look like marshmallow, that's normally a good time
Where do you get them:
Any TRD authorised reseller can supply these. I got mine from RHDJapan, but you can also get them from Fensport, Lithia Toyota, Nengun, NewEra and a host of other TRD resellers
http://www.rhdjapan.com/trd-suspension-bushing-set-mr2-sw20-60002
Who makes them: TRD -duh!
How do you fit them:
With Coffee at hand, I am ready for action
I had done some bushes last weekend so this time round I only had four more bushes to remove, took about 15-20 minutes to melt them all out of there. You can make the job quicker (a little) by lining them up.
The only ones that are really tricky are these front anti dive rods that have a steel sleeve insert that is part of the bush itself.
First I tried the lazy way of just whack it with a wedge, but that didn't work.
Next I tried a hacksaw, like they described in the IMOC writeup, however I only had a junior hacksaw (and no vice)and it took a lot of time to do not very much. So I dug out an old friend - DREMEL :cheer:
After a minute or two on each side, I had cut through the insert
Then using a screwdriver it was possible to beat in and prise out the insert to free it up some:
Even though it's looking like it's not connected, don't be fooled. After 20 odd years it just doesn't want to leave home.
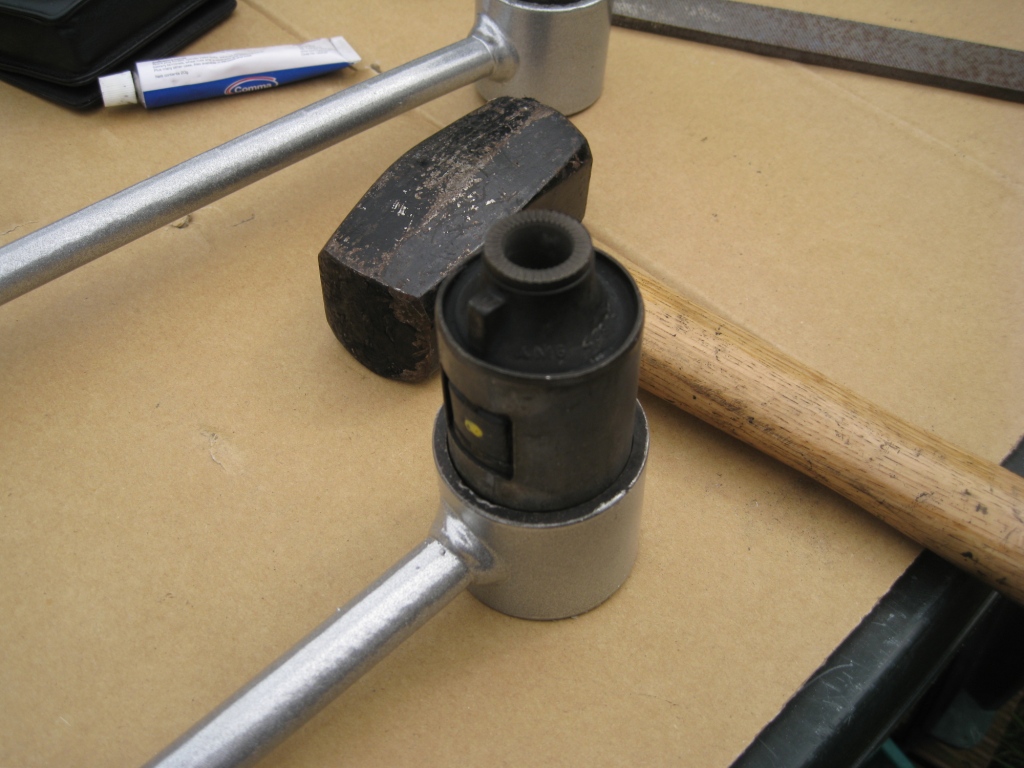
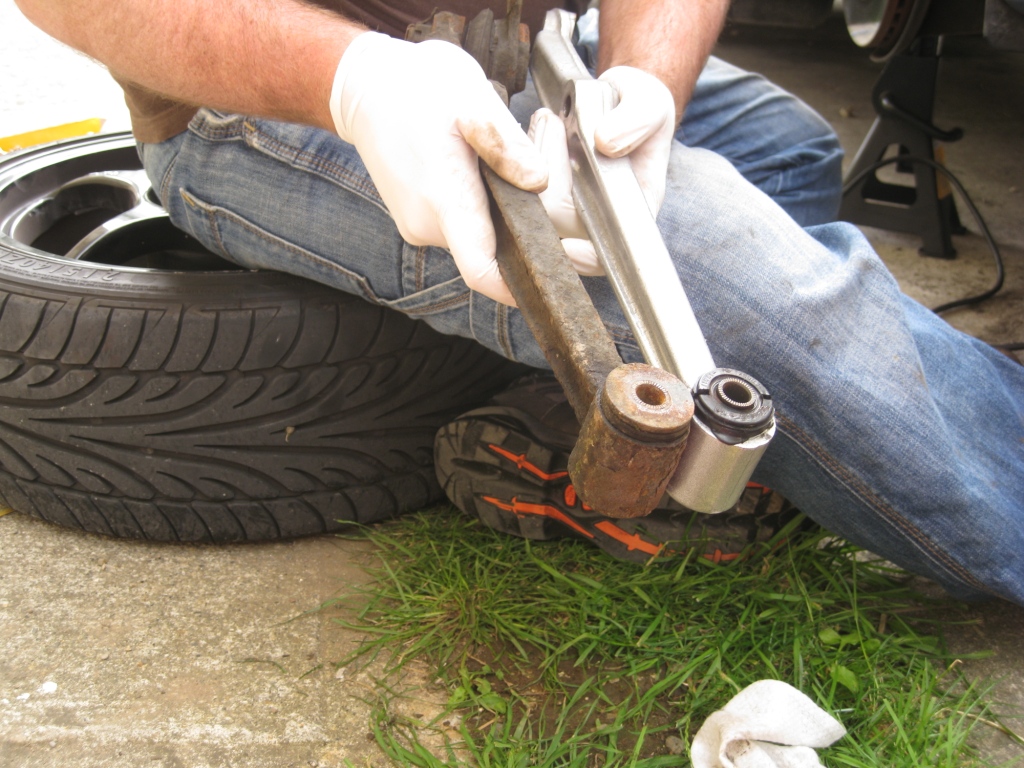
So using a large socket as a drift, it was time for a few short and sharp shocks
And hey presto, we're too cool for school and ready to head to the powdercoaters:
Well I dropped by the powdercoater and picked up my suspension components
Looking good
I tried to tape off any area where there is thread or a hole, because the powdercoat is so thick it just won't work for surfaces that are supposed to mate. Here's an example, this suspension washer for the rear arms would not slide over the thread, by running it back and forward a bit it goes on ok as the inside powdercoat wheres down. That would not be so easy if the whole thread was coated though..
In the past I've found it better to 'over tape' and then spray a light coat of similar coloured paint on to the part, if it's not being viewed in close up, no one even notices.
Unfortunately though my powdercoater got a little overzealous with and must have lost some of my tape.. So for these guys I need to strip off the area where the two surfaces will mate
Still looks good on the part you can see
so I figured I would have a go at the bushings. Old on the left, new on the right
The TRD bushings have the same part number as the Toyota ones, they're only really identifiable by the white paint on the edge (that rubs off easilly...)
These ones went easily enough
But as for the others, they're super tight in the holes...
Step1: apply some Lithium grease to the bush on the end that will be pushed in first. Also lube up the inside of the corresponding socket.
Step2: sit it in place with the corresponding arm in the vice being careful to get it as straight as possible. Start winding in the vice to push the rubber inside. At this point if you don't have it straight enough the bush can fly out at an angle and get dirty from the ground. Dirt/grass brushes straight off rubber, but if it is greased it is a full cleanup job. That's why I recommend only greasing the first bit.
Step3: Now that the bush is being held in place and won't fly out you can put grease all around the rest of it. At around about this point it becomes necessary to use the pole extension and have someone stand on the vice (if it's not bolted to a heavy bench).
Step4: These little rubber suckers are hard super tight also! So you might like to have two handy helpers in place to hold the vice from various angles. Around about this time you want to also put a second arm behind the first socket to ensure that you can get the bush pushed all the way through
Eventually they push in there and when you take the arm out of the vice the rubber pops out each side to sit properly. Really I was wondering if I would break the vice, break my arm, break the bush, break the rod etc etc, it takes a shedload of pressure to get these things in there so be prepared to fit them to what seems like destruction!
This weekend I am going to try using a stainless steel clamp in the vice as the spacer. I don't know if it will be deep enough or if it will hold under the intense force, however if it does then it will be a handy solution as you can see in this picture it can easily be adjusted for size.
Next Steps I have now finished pushing in all the bushings (glad it's over really), my next step is to take off the old arms and fit my newly uprated ones. Standby for updates!
Quandry- Posts : 6
Join date : 2010-09-30
Location : Ireland -

Re: TRD Suspension Bushes - Fitting
![]() Admin Mon Aug 08, 2011 1:09 pm
Admin Mon Aug 08, 2011 1:09 pm
Brilliant write up and nice pics! :-)
Take some photos when you put the arms back too...
Take some photos when you put the arms back too...
Admin- Admin
- Posts : 438
Join date : 2009-02-17 -
Re: TRD Suspension Bushes - Fitting
![]() Infamous Mon Aug 08, 2011 4:34 pm
Infamous Mon Aug 08, 2011 4:34 pm
Great write up as usual Quandry!
Very helpful
Very helpful
Infamous- Posts : 98
Join date : 2011-01-25
Location : Ireland
Fitting!
![]() Quandry Mon Aug 29, 2011 2:01 pm
Quandry Mon Aug 29, 2011 2:01 pm
I've updated my TRD bush install thread here: http://www.mr2.ie/mr2-forum/28-how-twos/34164-mk2-how-to-replace-suspension-bushings-rubber
And here's a copy for convenience
I guess another option is to go out and buy stainless steel nuts, however I want to save up for some TRD engine mounts so painted ones will have to do!
So I wanted to crack on with fitting my TRD bushings as I spent so much time getting to the point of having them ready to fit, and also that the old arms are looking pretty rusty and won't pass our yearly roadworthy test here.
With my trusty Clarke electric rattle gun in hand, I headed in to what I thought would be a 20minute job...
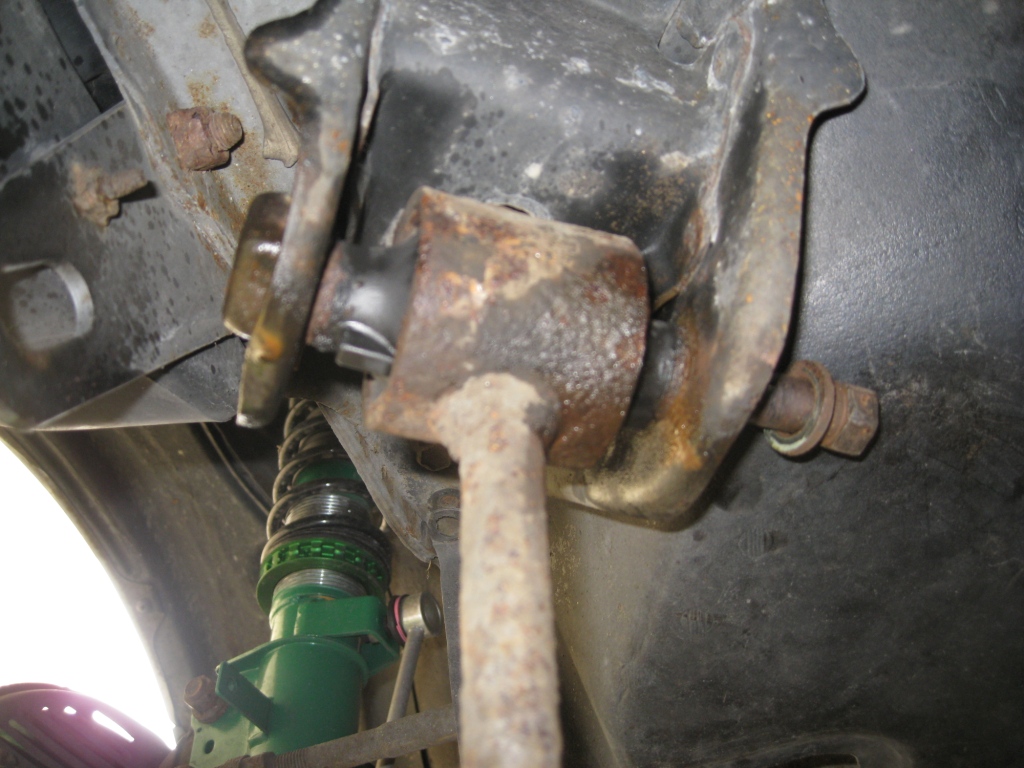
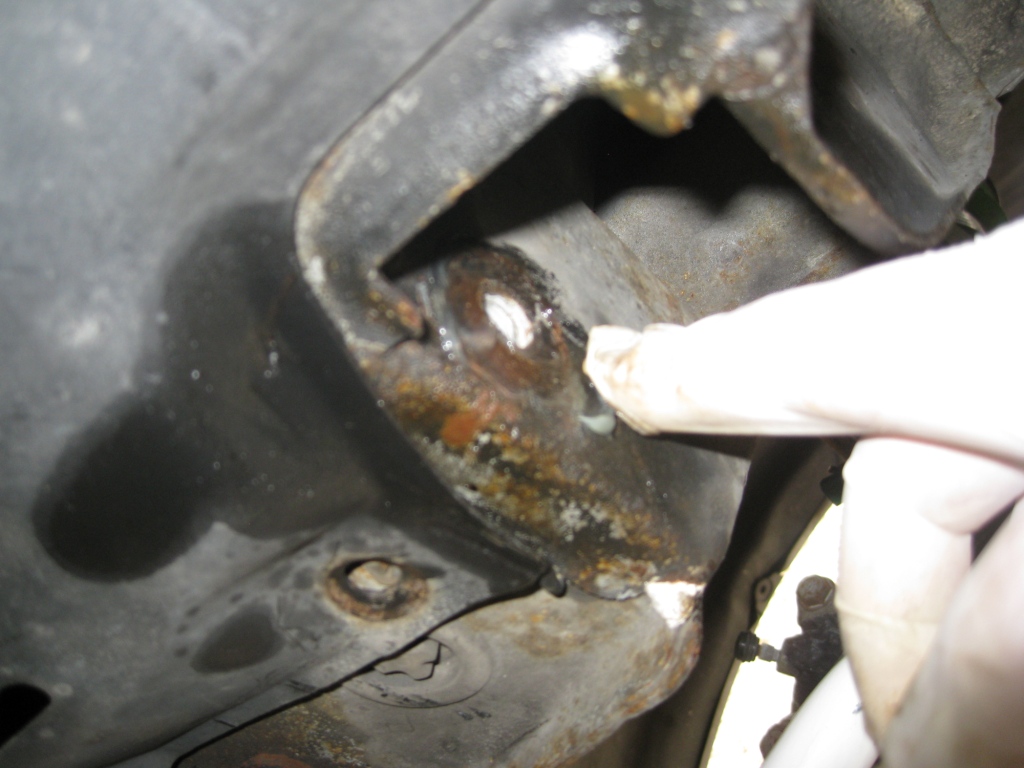
This is the corner I started in, front drivers side
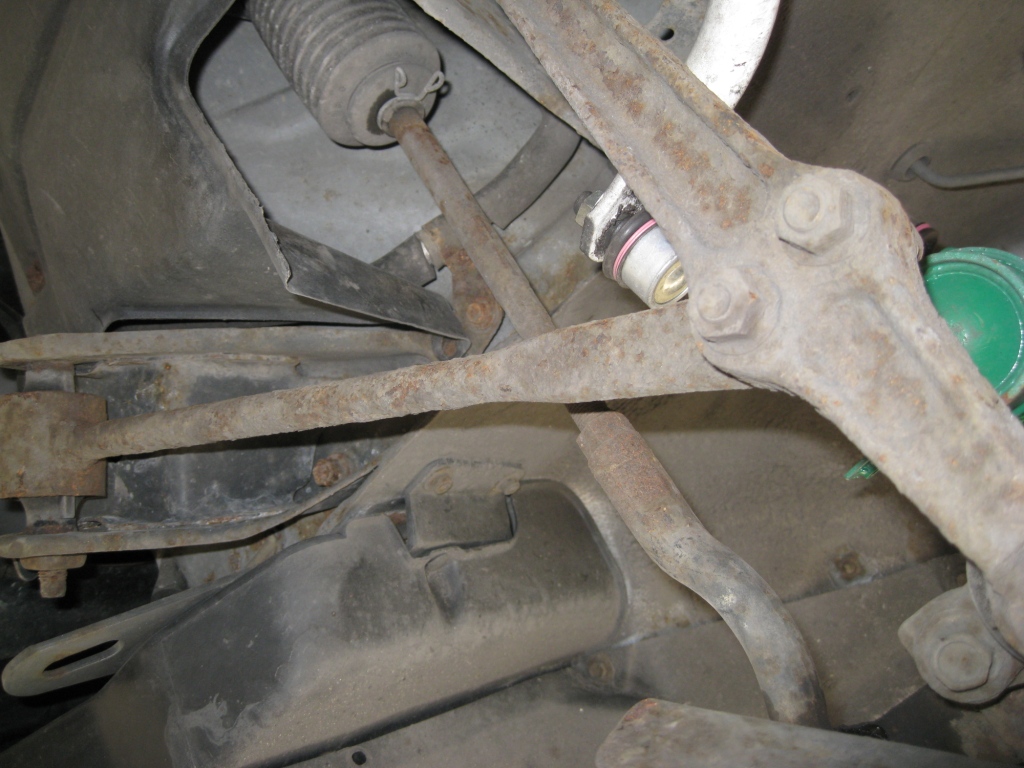
I'll be going for a de-rust and underseal treatment soon by the look of these pics..

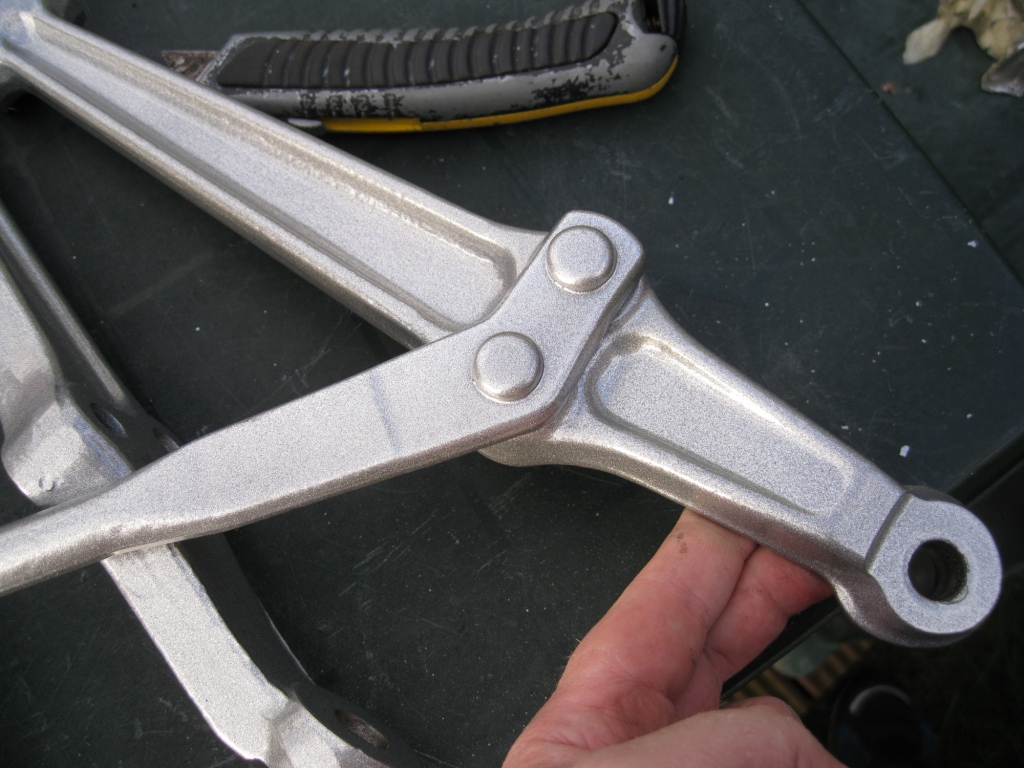
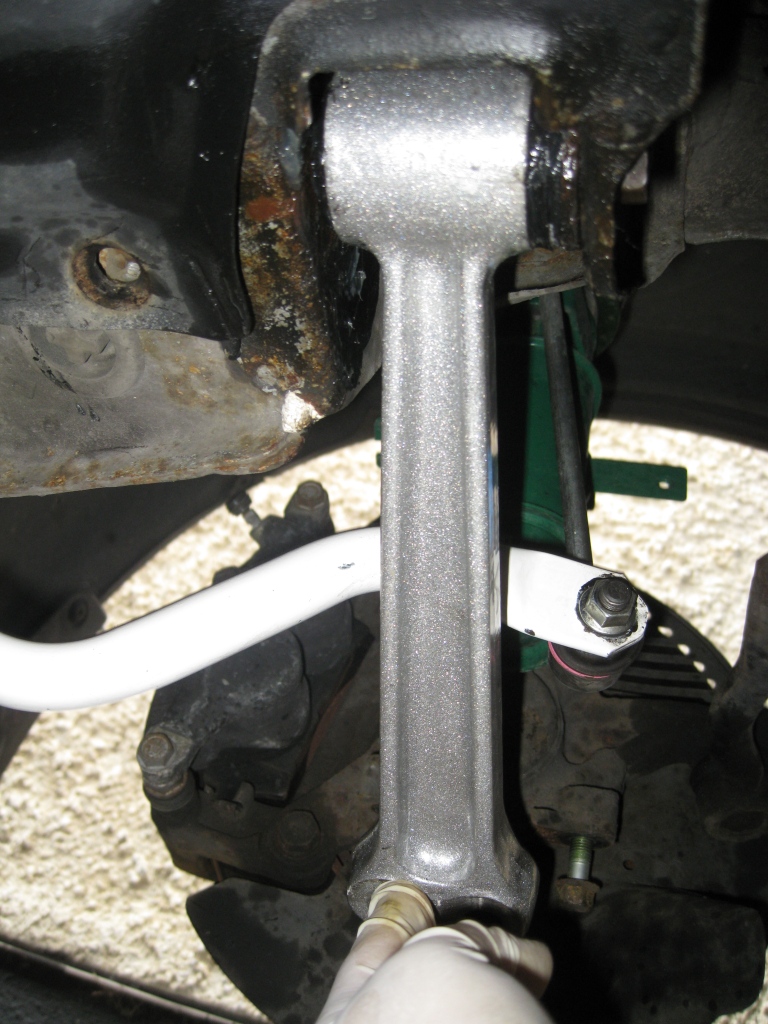
New arm is the right length/shape (always a good start), looks much nicer and will be a lot firmer in the corners
I chose to start at the front, wow the tension rod was SERIOUSLY hard to remove. I broke a few tools on this guy. Basically I think it's had 20 years in there at the front of the car collecting every bit of grit grime, water, heating up/cooling off etc. so the main bolt was almost coated in muddy rust by the time I got it out. My only regret was that I did not spray it in WD40 overnight to let it sit. Thankfully the back arms were out when I did my engine swap so hopefully they should not be anywhere near as hard. I found that by disconnecting the underarm from the tension rod and strut and swinging it down out of the way I had a lot more space to work with and this helped me get 'the demon arm' off the car finally.
not happy...
happy ...
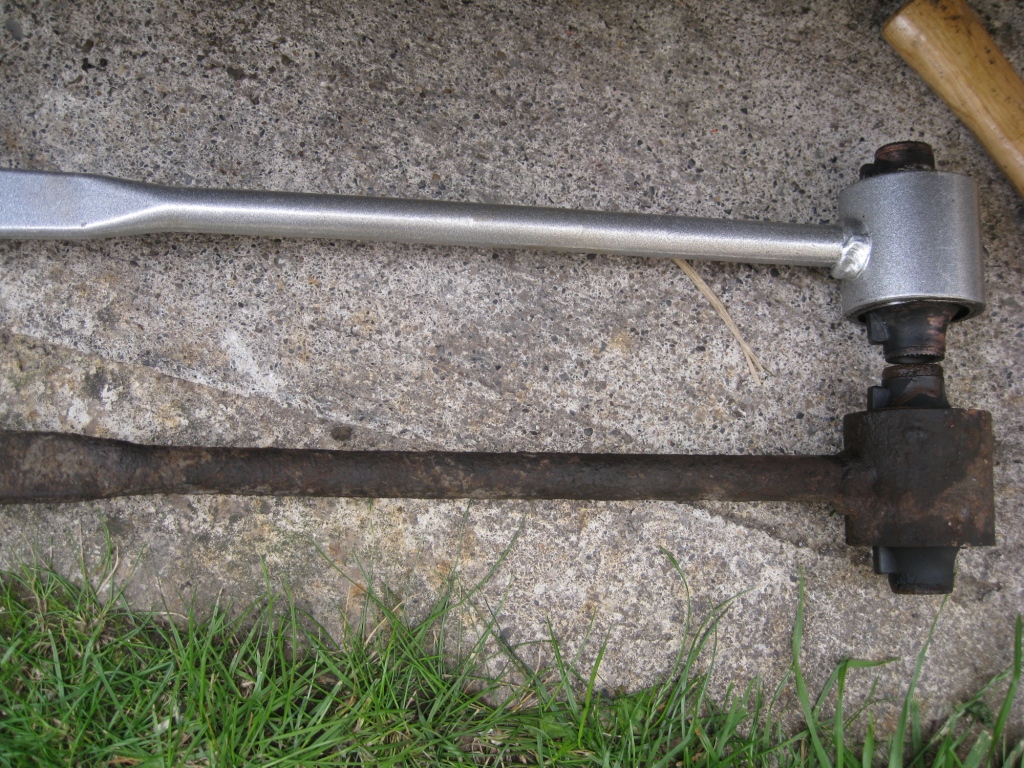
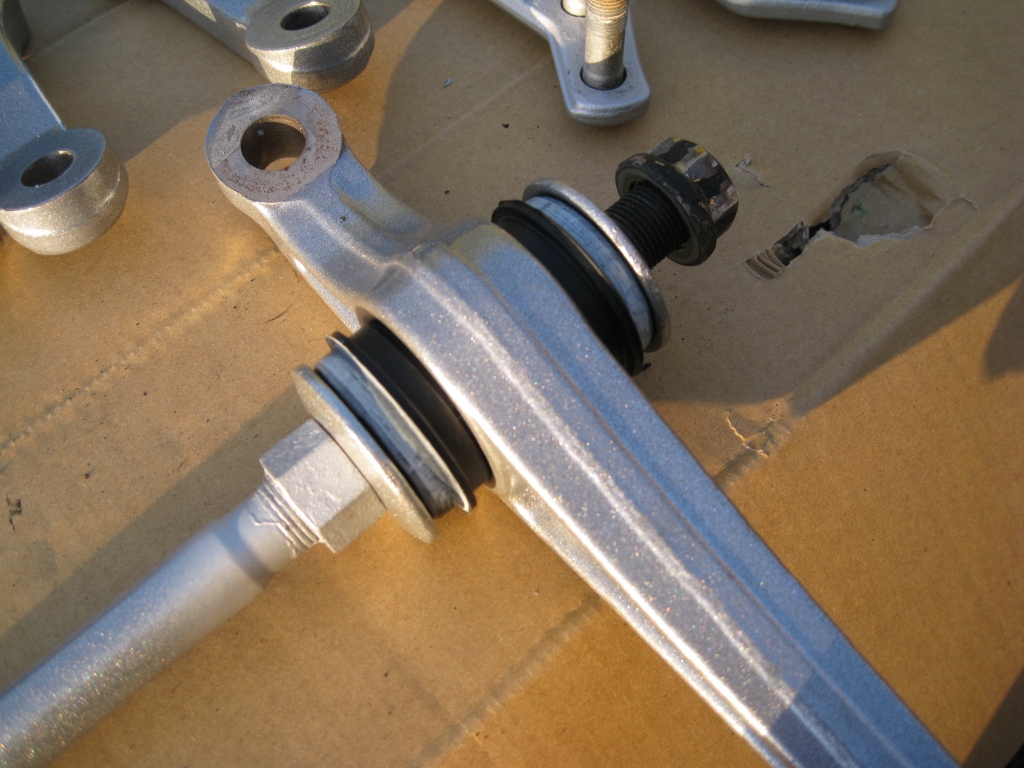
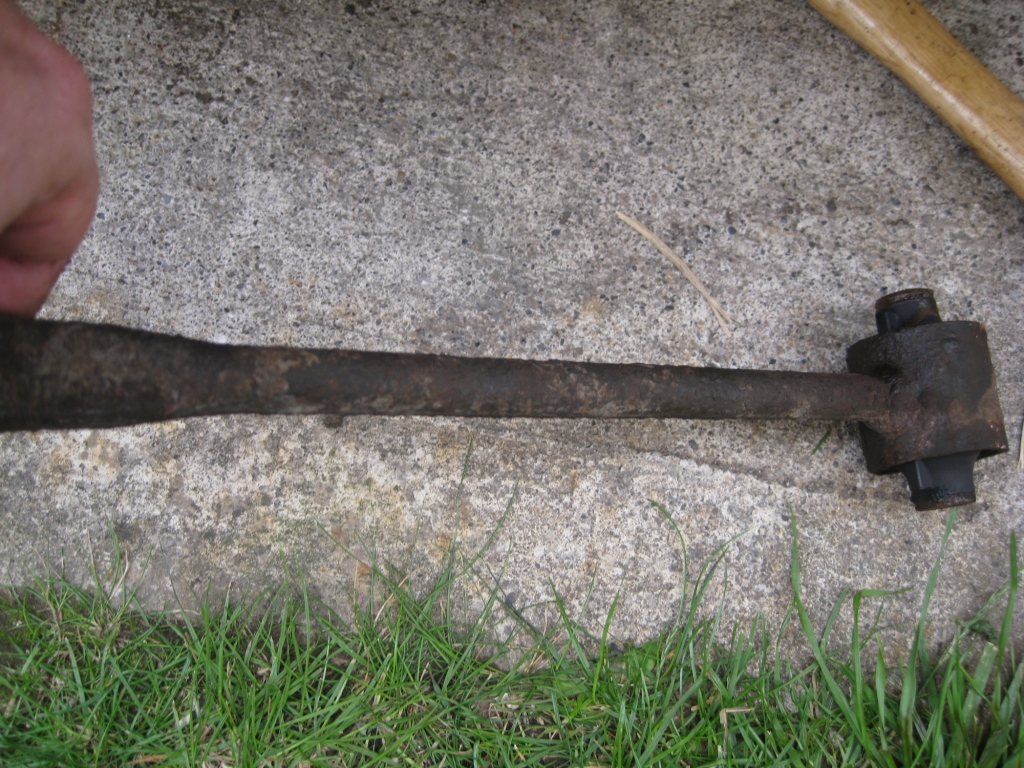
Old arm versus new arm. Note the thick metal washer on the front

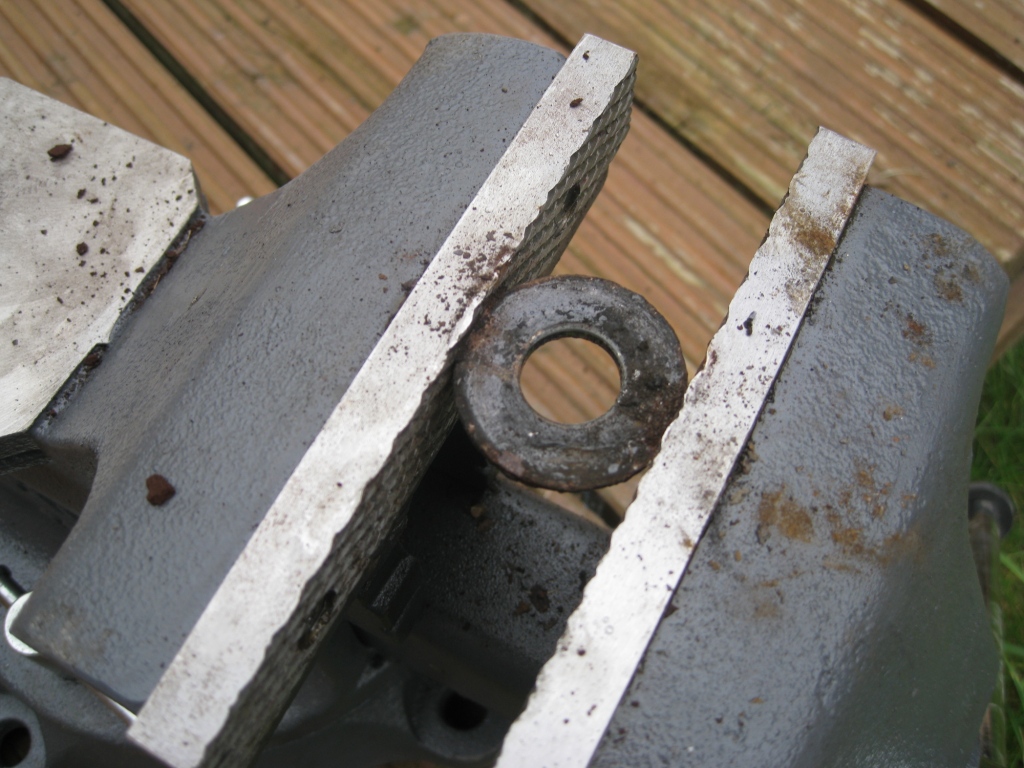
This job would have been easier if I had ordered new washers from Toyota, however I didn't do my research well enough and did not know they were there. So I had to make a plan to remove the existing ones and fit them on my new arms. Well this is easier said than done, as you can see after nearly 20 years they are practically chemically welded with rust on to the bushing centre insert. So I figured that to remove them would require either blow torch, a hammer, vice, or possibly all three I decided to start with the vice.
The guy we want to get off is on the outer RHS
Chomp chomp, MR vice is hungry today
Then with some twisting, turning, and a good whack with the hammer... Success!
Putting the washer in place I was able to press fit it on to the centre with the vice. It would be nice to have it colour coded and to protect it from further rust but I will be greasing the hell out of it to install it anyway so hopefully it should be ok.
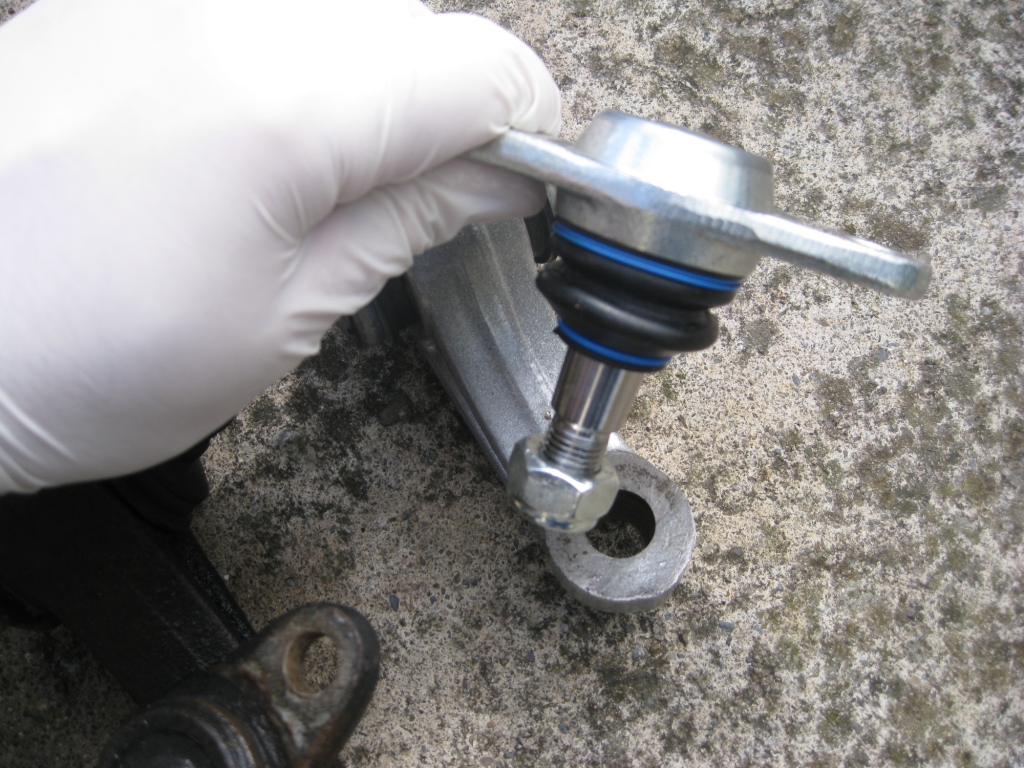
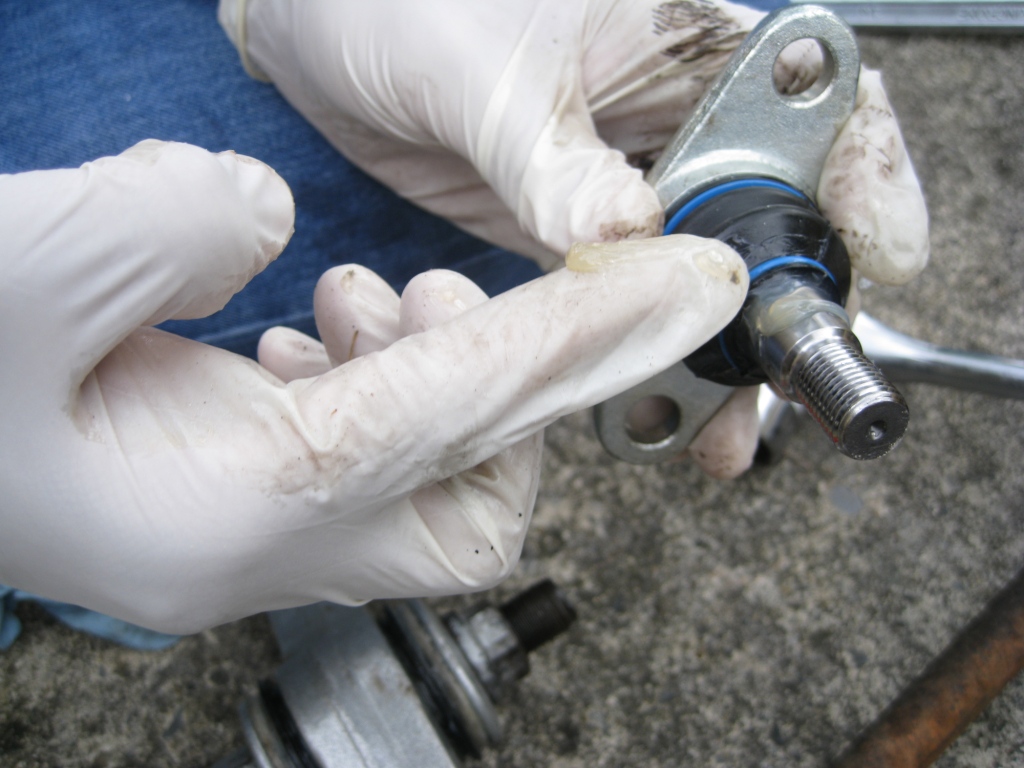
I also took the opportunity to switch out the ball joints, opting for genuine Toyota courtesy of tcb spares
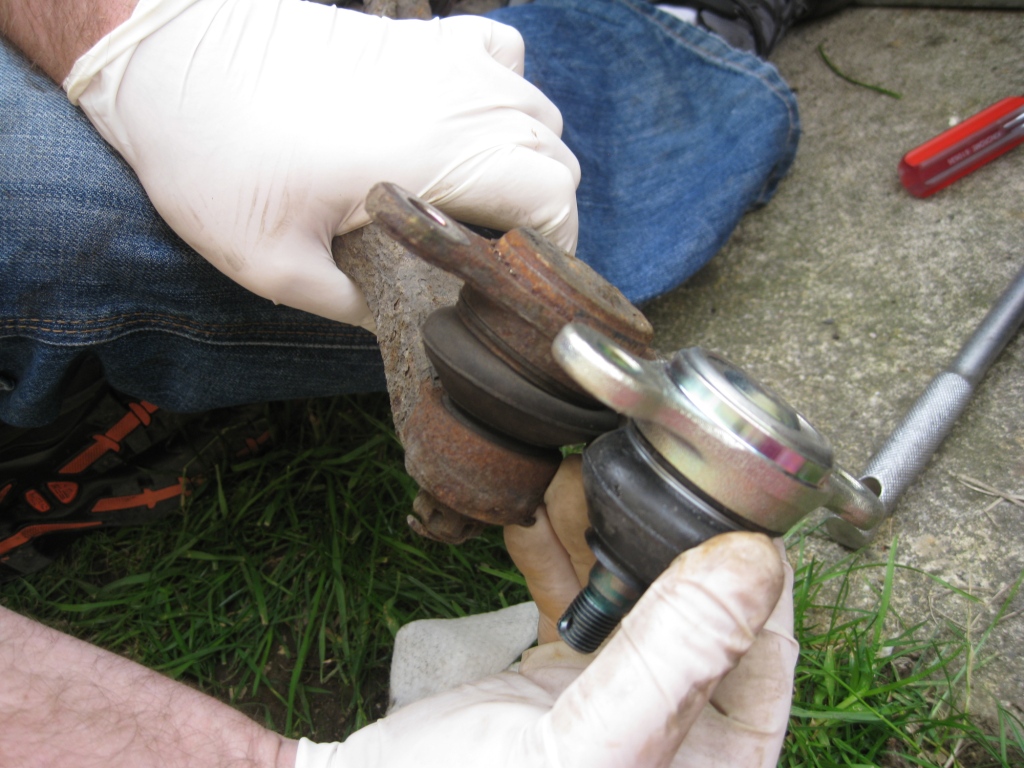
Some LM automotive grease to smooth the install
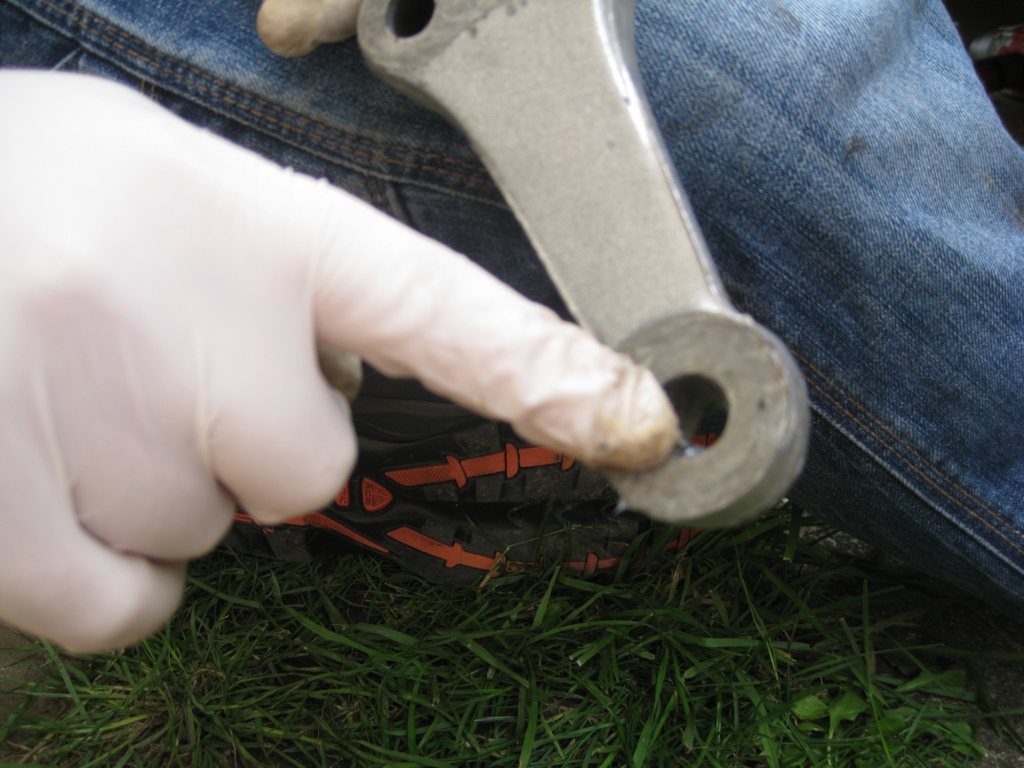
Ball joint in place and torqued up to BGB specs, it's time to retain the castle nut with the cotter pin.
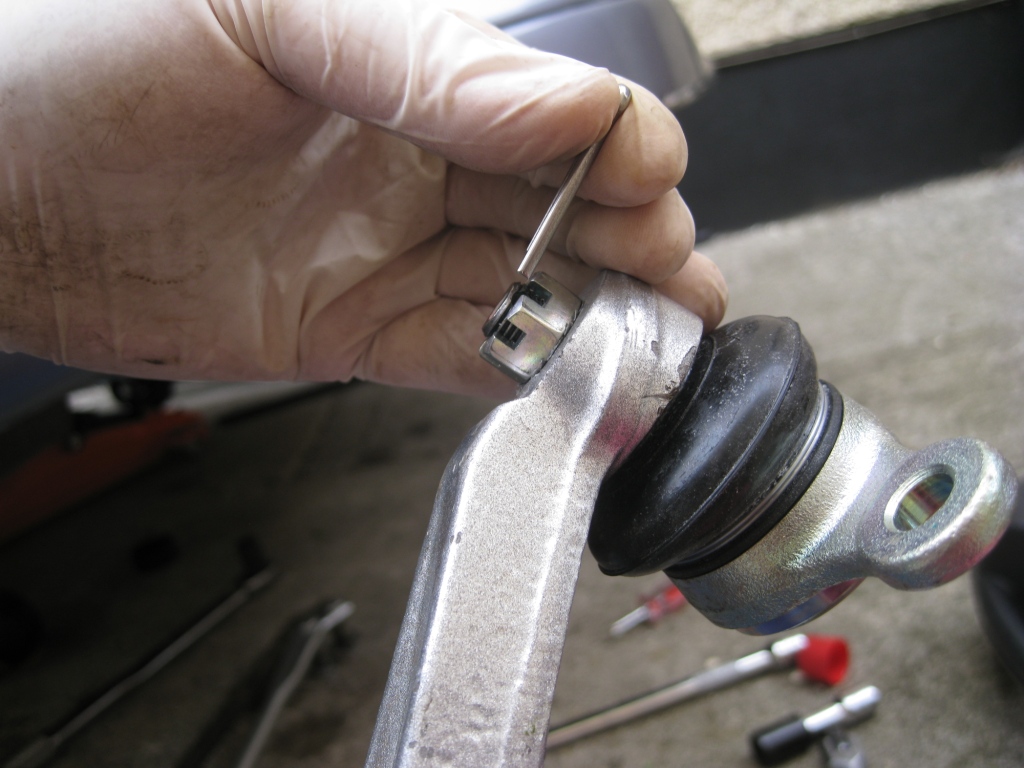
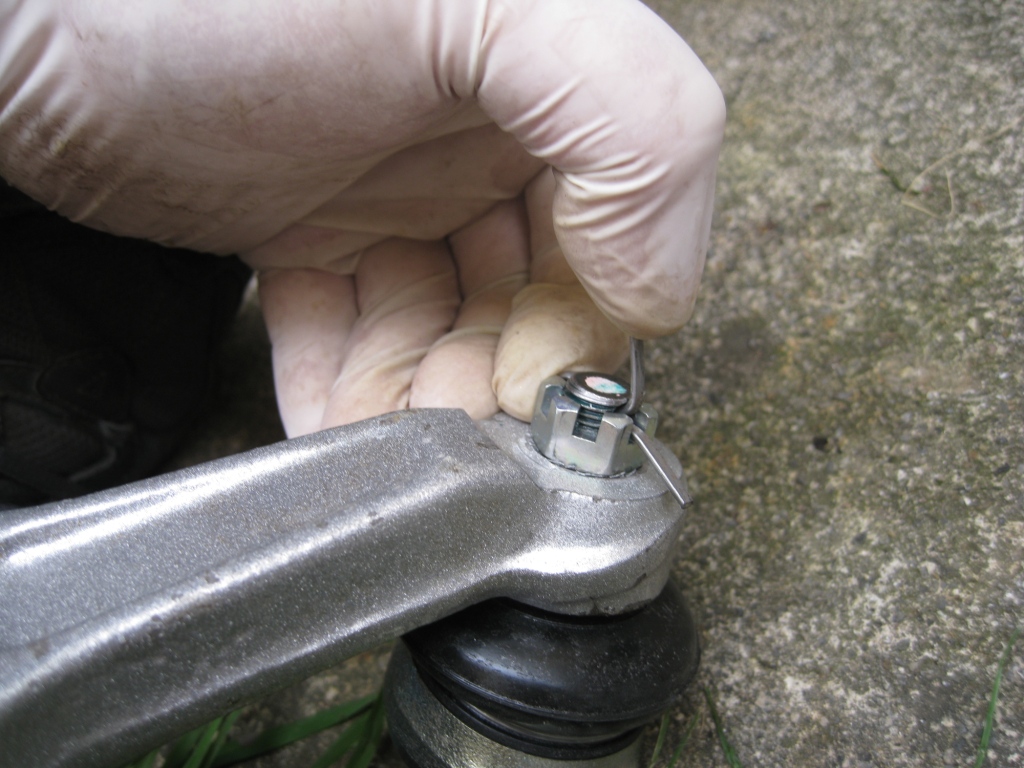
Push through and open with a screw driver

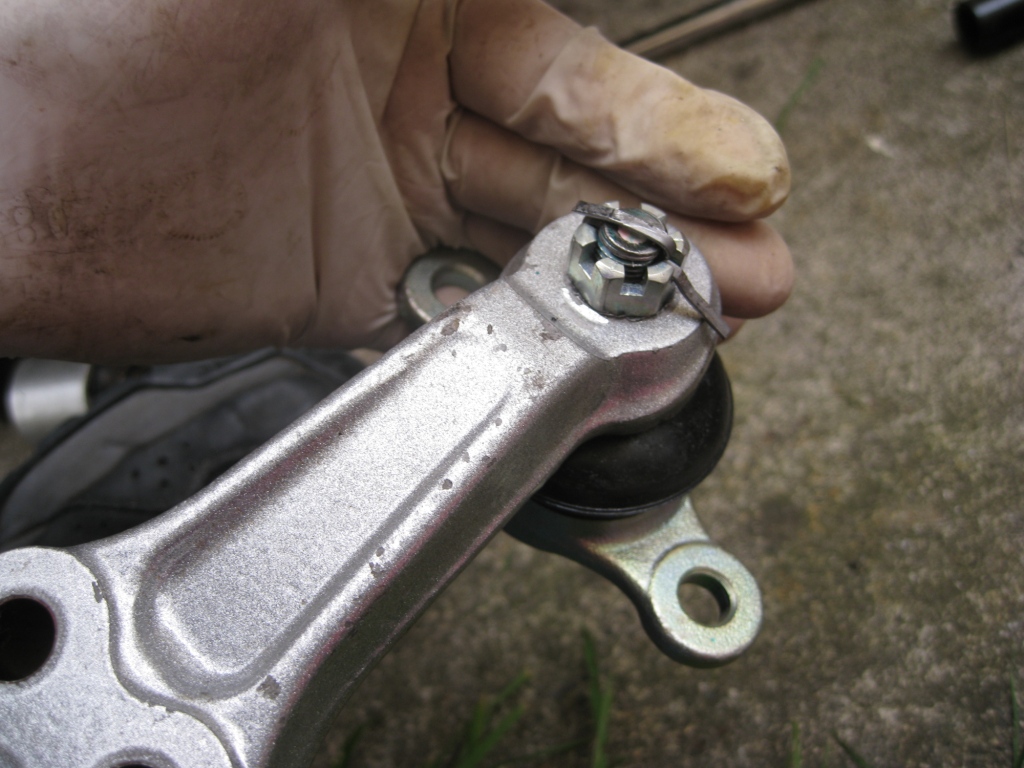
Pull it back over the centre thread
Hammer down both sides and you're good to go
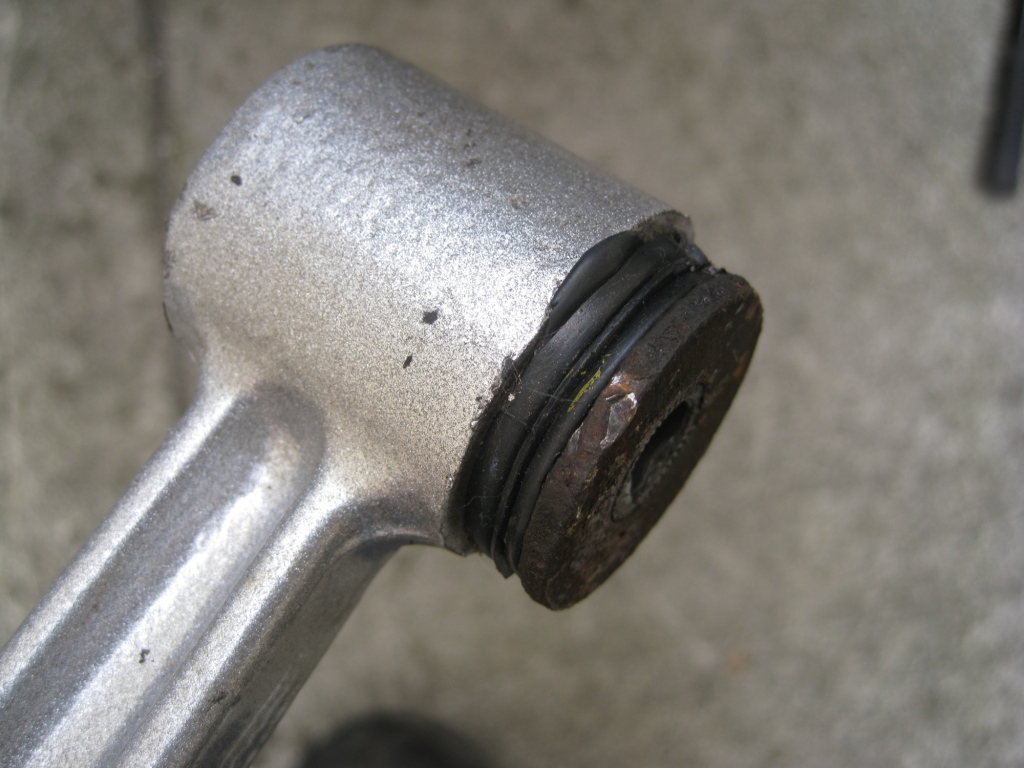
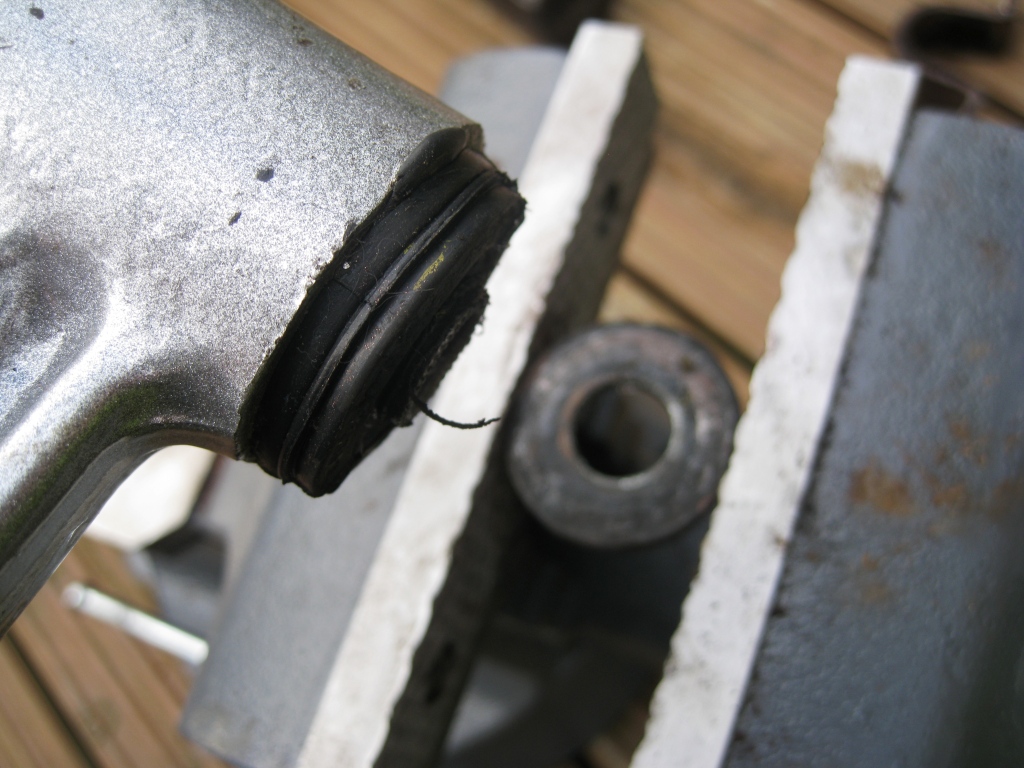
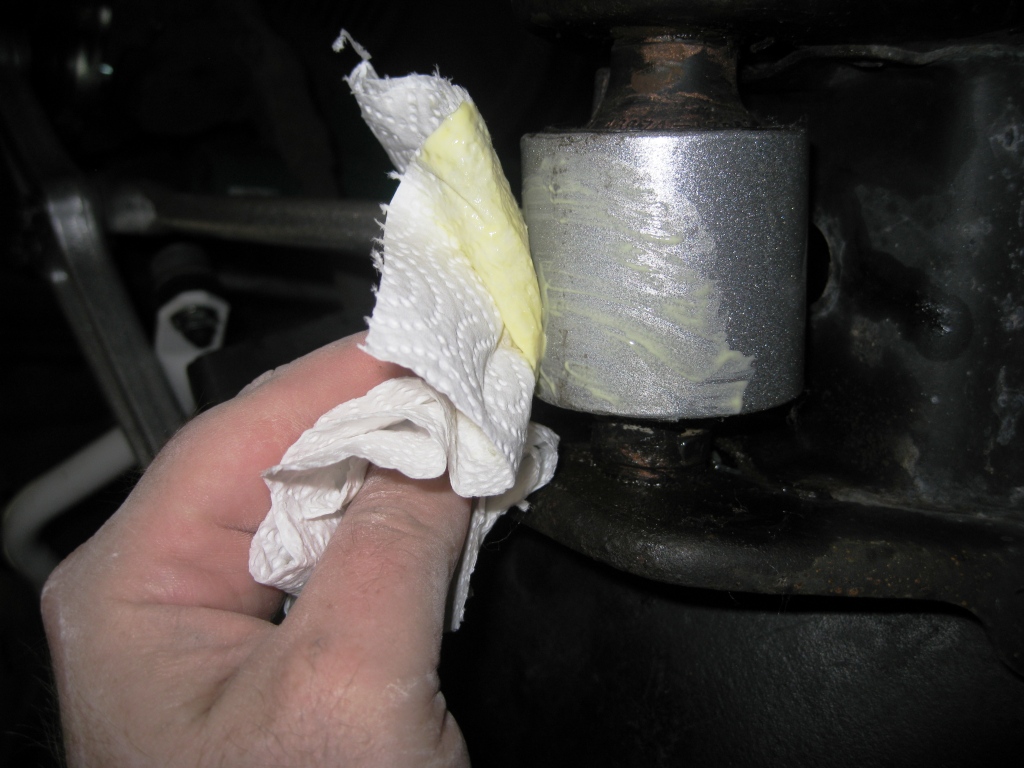
More work today as I found out that I pushed in a bush the wrong way around for the other side.... uh oh...
ok so this is the offending article with the bush in the wrong way around :

That was quite a mistake on my part but easily made. Hopefully by documenting it here it will help others who might trip in to the same pitfall in the future.
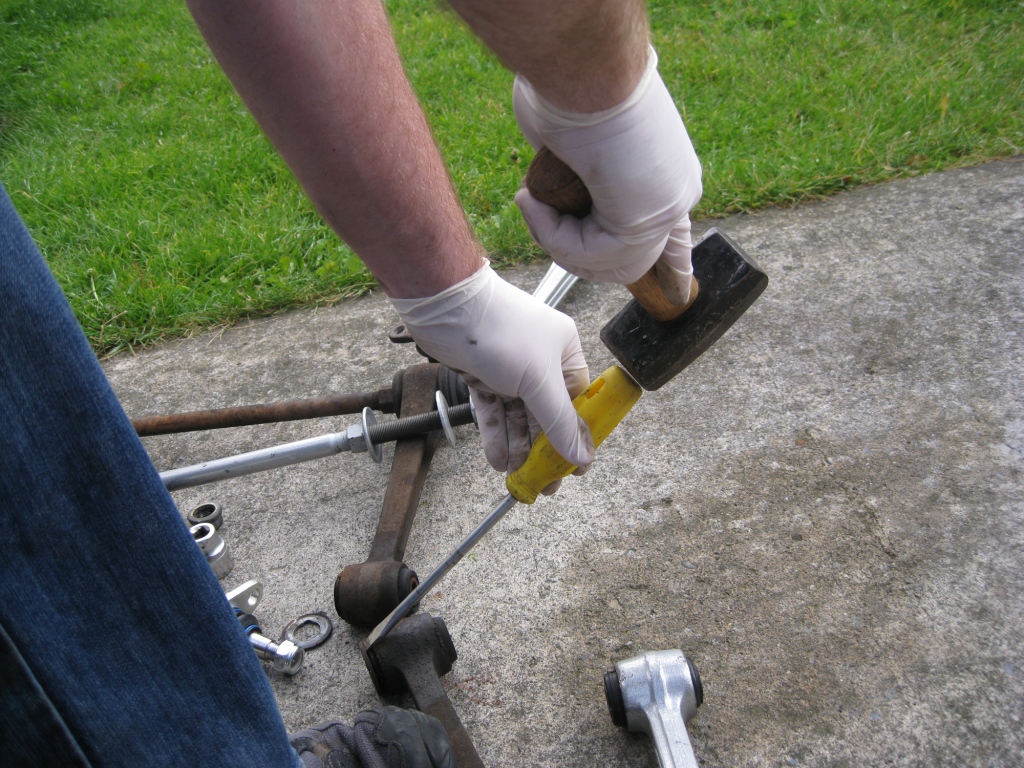
Anyway, the job at hand was to pull the bush and put it around the other way without wrecking the rubber, or arm or both lol.

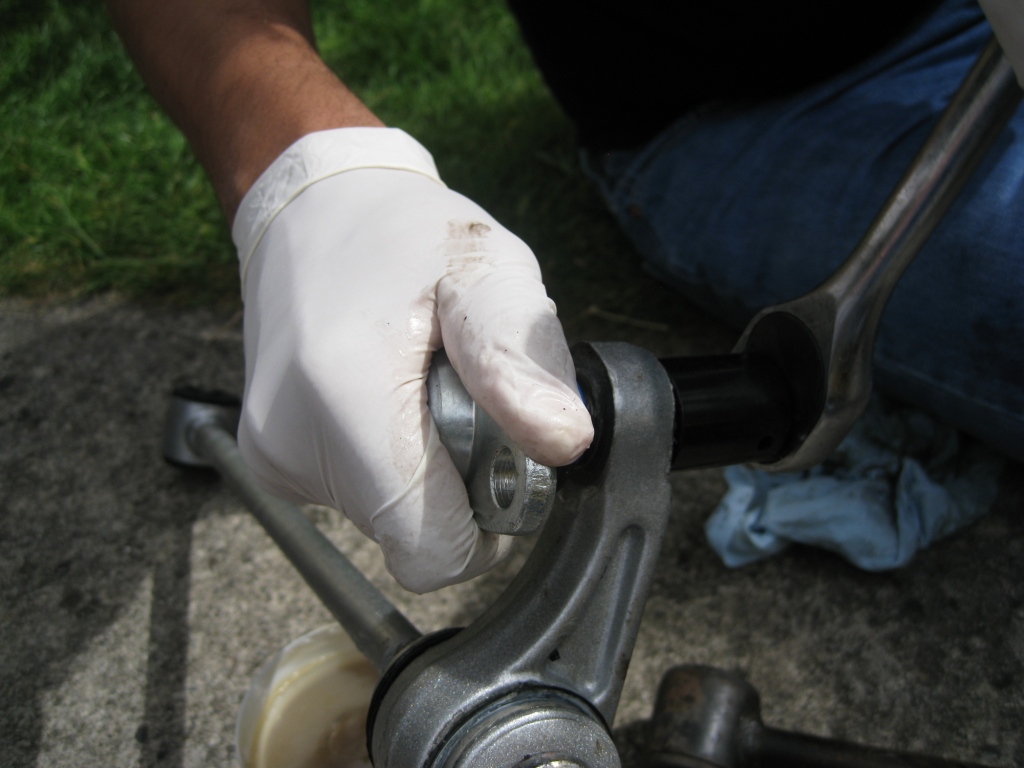
First and easiest step is to pull the washer that I only installed yesterday
Then I needed to find a drift (?) to push the bush out of the housing, I rustled around my tool box a bit and came up wiht this spark plug wrench.
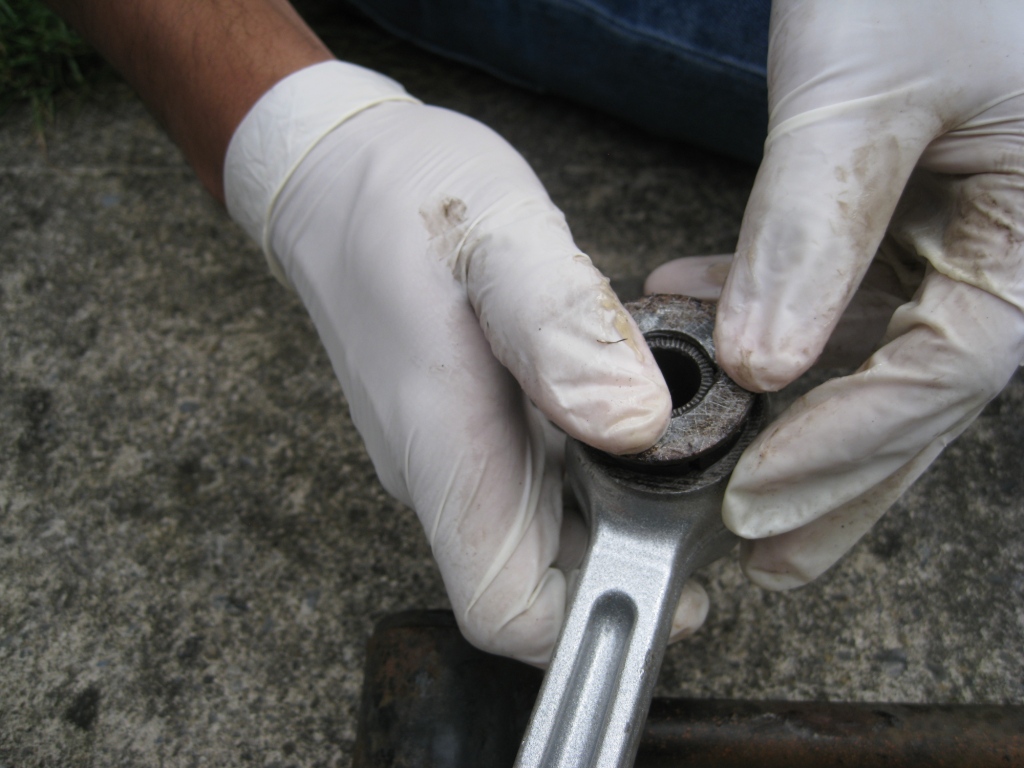
And on the other side I need a socket that has room to hold the whole bush. This was a bit tricky as I didn't have any pipe big enough. Then I saw the tension arm that I took off yesterday and checked it for size.

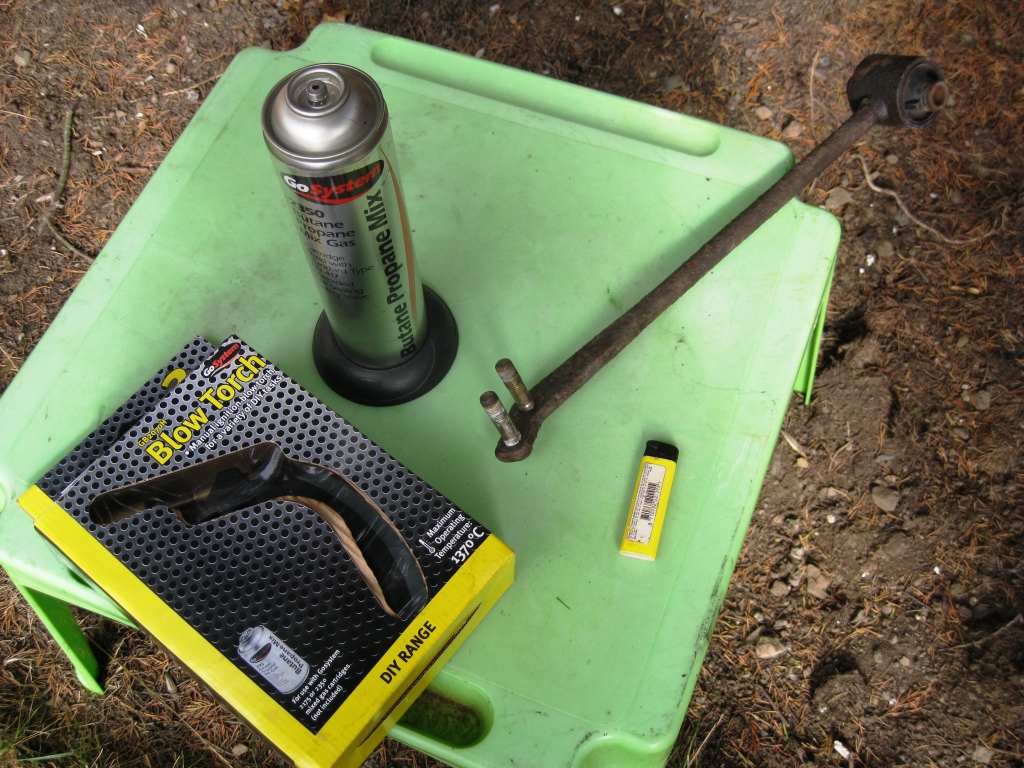
It looked like a match, however because it has a bush in it, now I have two bushes to remove! Anyway because I don't want to reuse this one I can use one of my favourite tools...
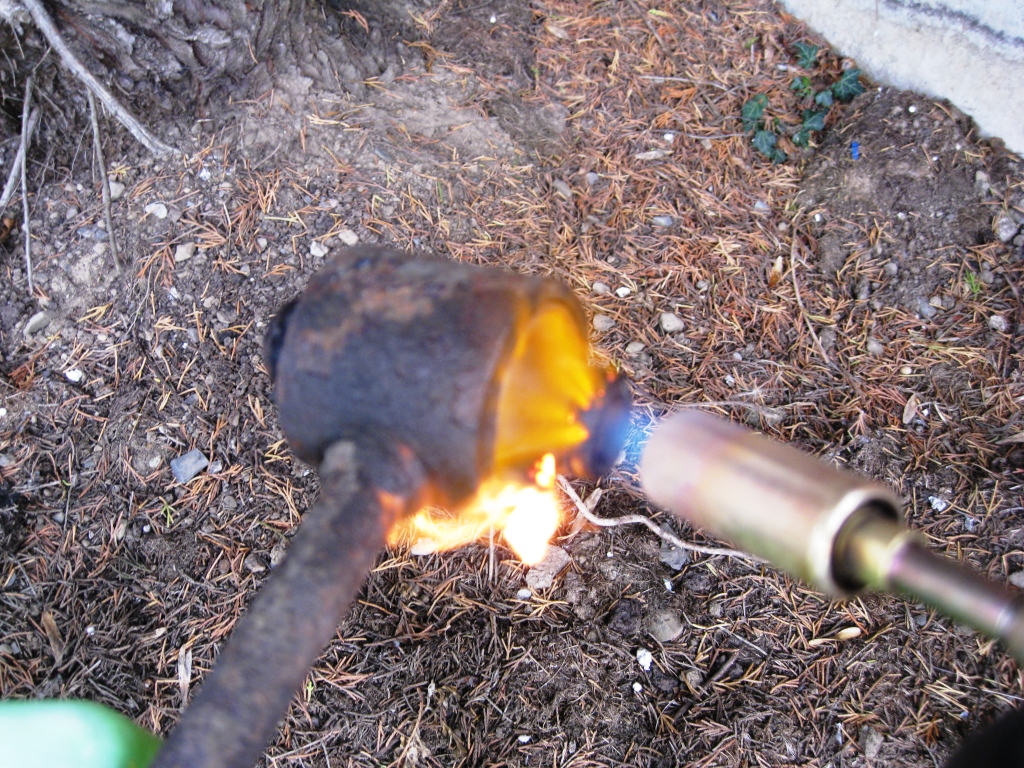
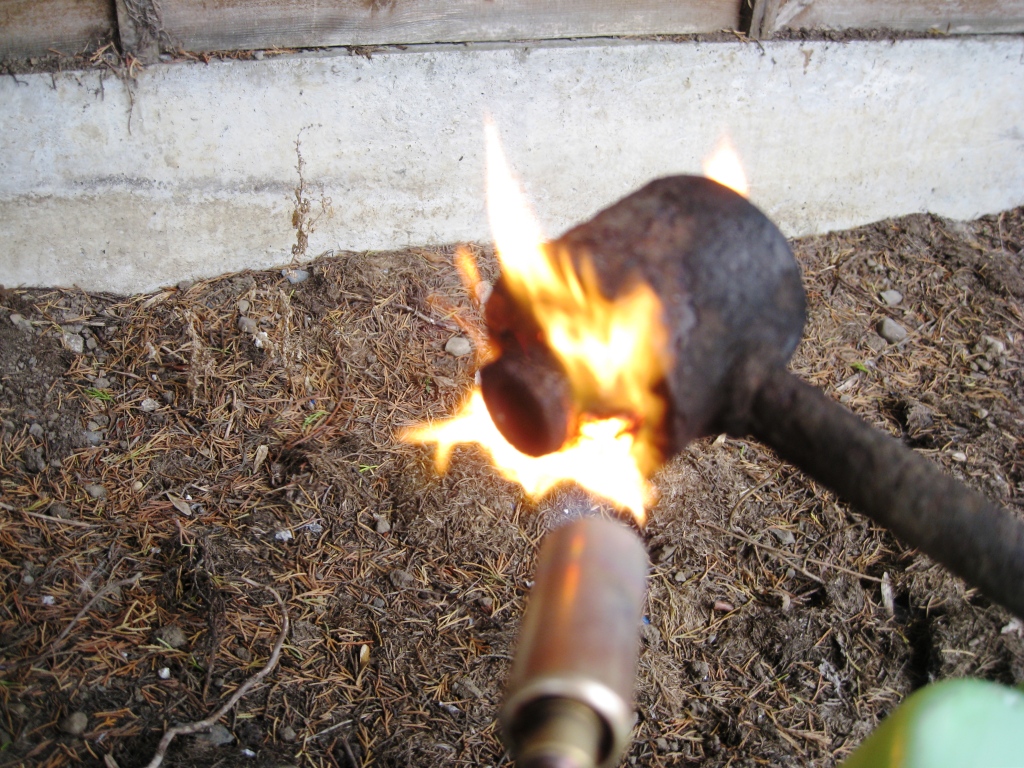
After a minute of two of heating up the centre sleeve and cooking the rubber, the rubber starts to peel away from the sleeve

Then you can let gravity do its thing
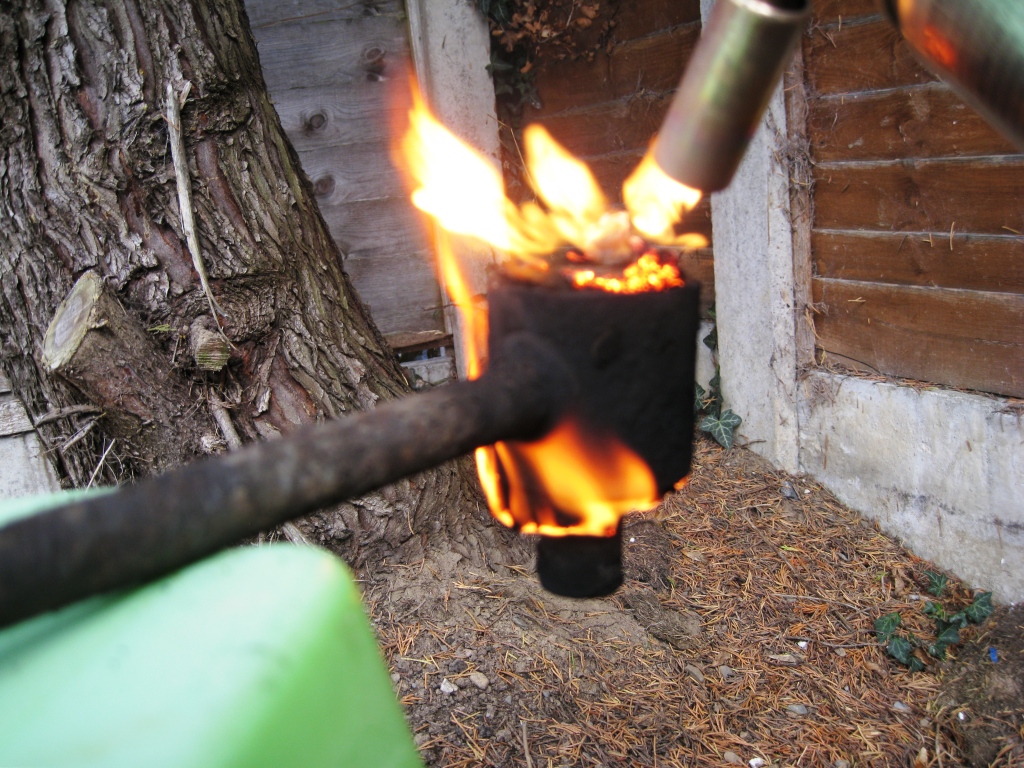
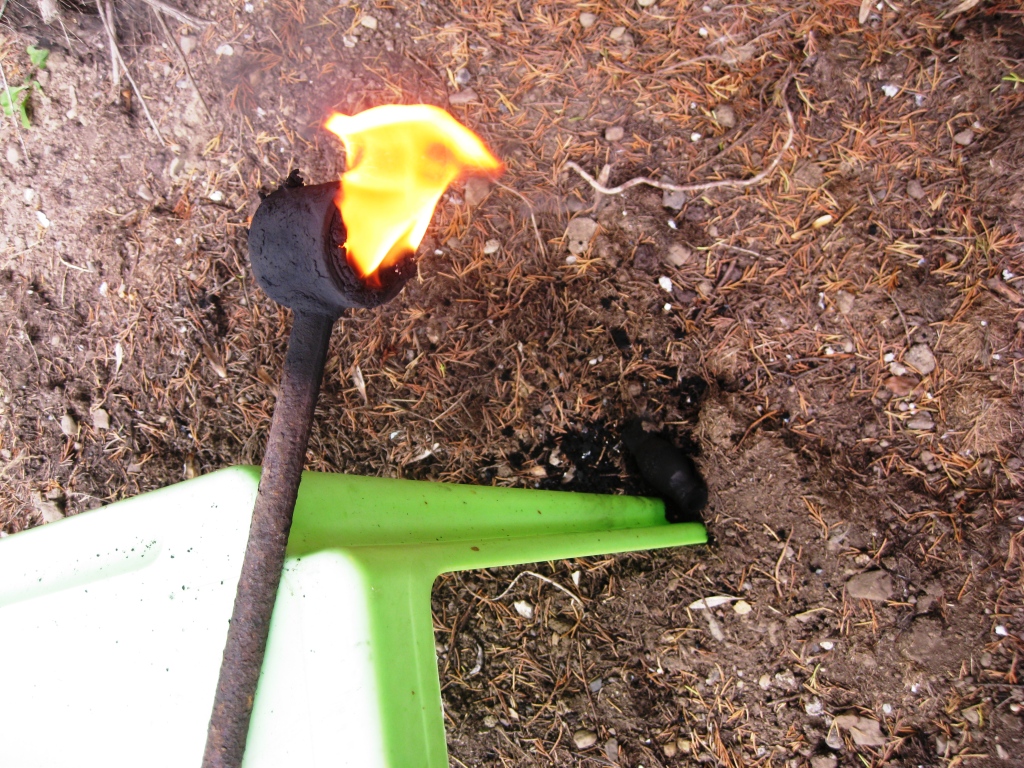
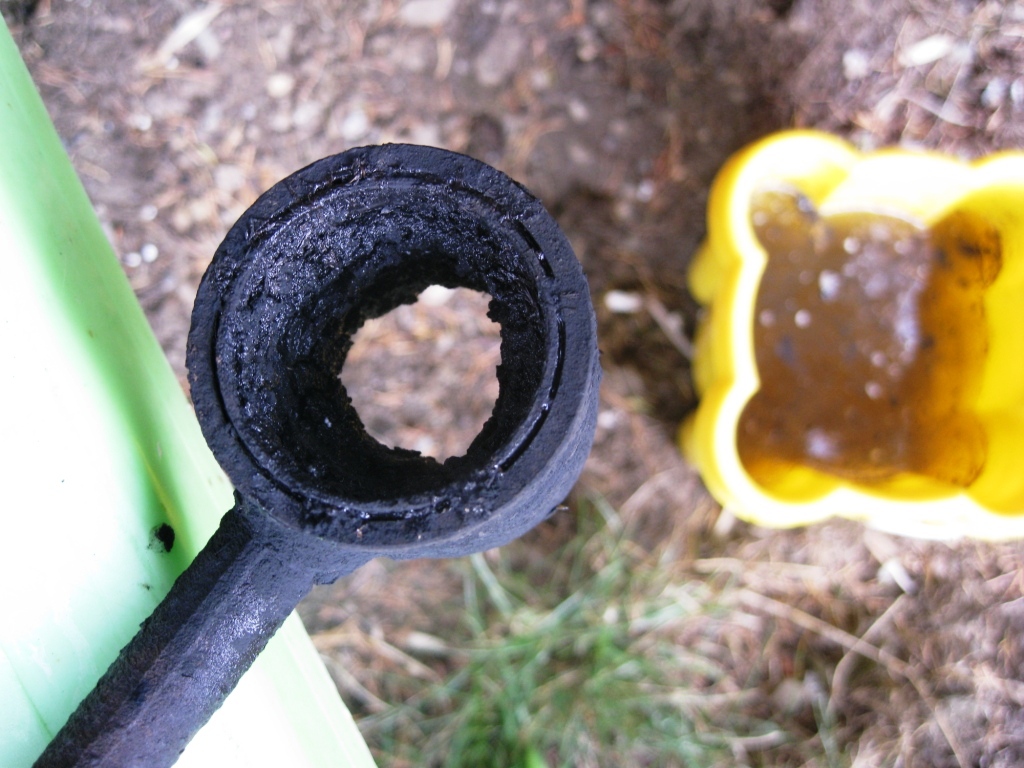
I'm not going to reuse this arm so I put it straight in to water for a sizzle sizzle effect, and then it's time to clean out the rubber which is easy when the sleeve is gone.
Safety tips when burning out bushings:
* Have a bucket of water ready
* Work in an open area as they smoke pretty bad and fumey
* Work over the top of dirt and not near anything flamable as you get some hot rubber flying out here and there.
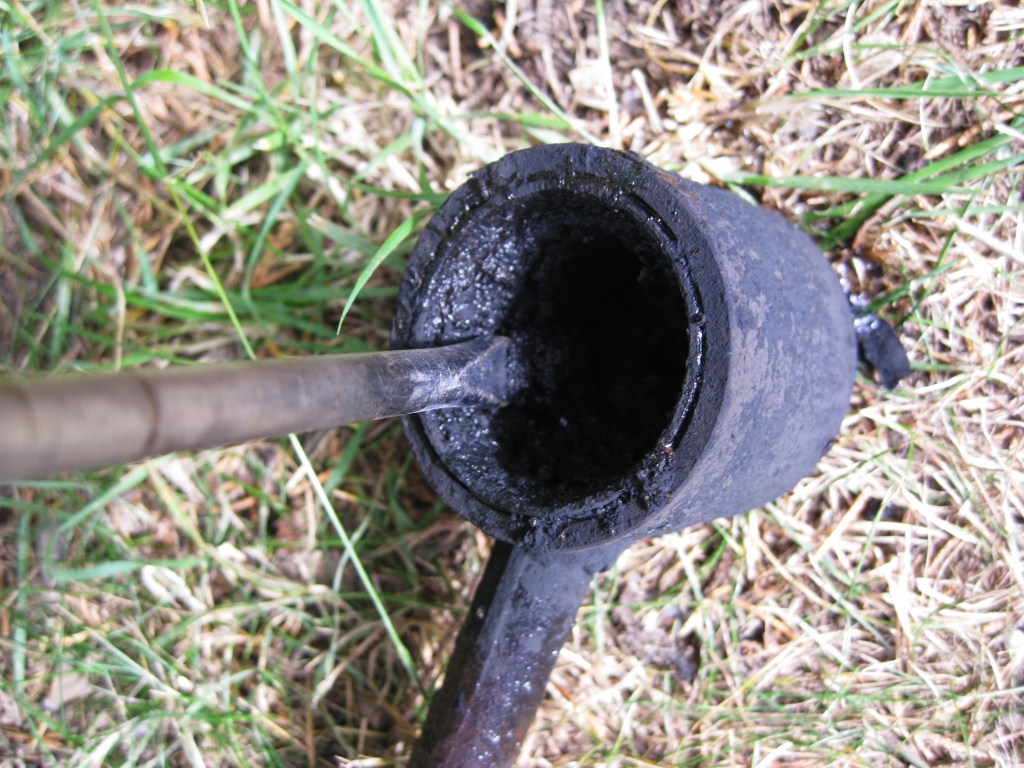
Next I checked against the arm to confirm that we're looking like it's going to work as planned:
Now for the hard part! Those TRD rubber bushes are super stiff and took major torque to push them in to the housing so I was not looking forward to getting them out. Thankfully this particular one has a different flange on either end. On one side there's only a very thin lip holding the bush on the housing, on the other side there is a thick one. I did remember from when I put them in there that they went reasonably easy compared to the other ones.
Time for more heat - grabbing a pan and kettle from the kitchen I submerged the arm and the bush completely in just sub boiling water. I then left it to heat up for 10 minutes and made a cup of coffee
The reason I didn't use the blow torch was that it would dull off the powdercoat, or possibly even burn it off altogether.

Putting the assembly in the vice, I could start to work the bush out of the heated housing.
The socket pushed through the bush a bit, however it looked like it was stressing the rubber as it was only really pushing on the centre of the bush, I hunted around a bit more for a bigger washer etc, however no luck. But then I came across this big nut which did the job nicely:


So with a bit of leverage and the pipe,
Out came the bush, a little bit beat up, but definately workable and ready to put in the right way around.

Then it was just a matter of applying some LM grease to the bush and gently winding it in to the housing
Using the spare arm once again to make sure the bush is pushed home fully
Then it's on once more with the thick washer and then we're ready again for fitting.
I put plenty of grease in and around the mount points
and it pushed up in to place nice and tight
Then it was a matter of fitting the ball joint, tension arm and other assembly the same as yesterday and I had it all in place.
The next thing I wanted to do was to give some further protection to the powdercoat so it's out with the meguiars!

Rubbed it in to al the new parts, then a gentle buff
Now looks great

I took the car for a drive to bed in the rubber and I noticed that it's much more direct now in the corners. The steering is quicker to respond yet still some give from the rubber. Then I torqued up the bolts in accordance with the BGB.
BACK END
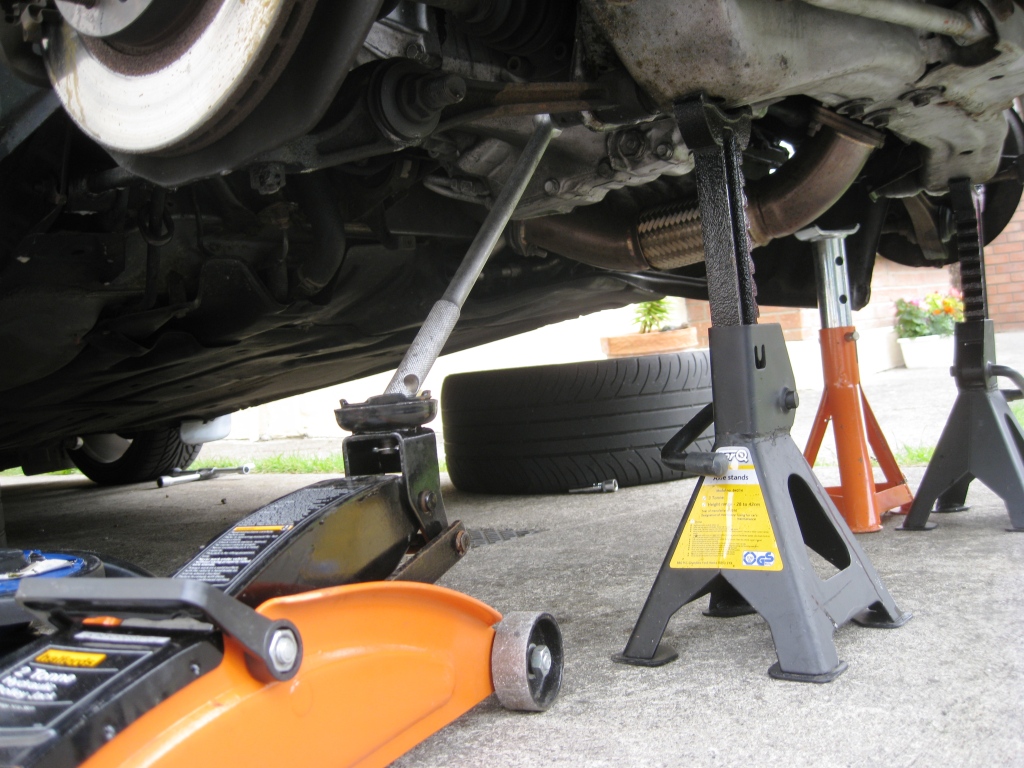
Moving on to the back end, it's important to get the car nice and high as there are some TIGHT bolts under here and you want room to swing breaker bars
Because you're often putting a lot of torque on critical parts, it's important to make sure you do this job on a level surface and that the car is very secure on the axle stands. You will see that I slid my wheels under the sills also. To think of the car crashing down on the wheels gives me shivers, but I would rather wreck a set of alloys than wreck myself under the car!

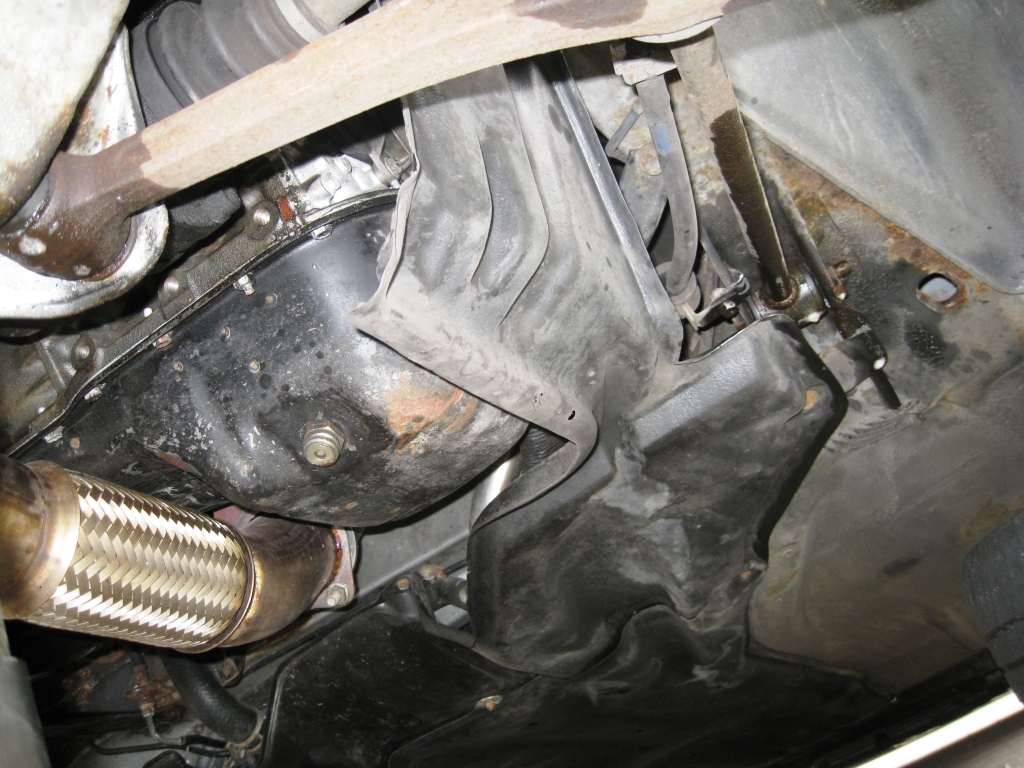
There's plastic covers underneath the car that need to be removed out of the way to get to the frontmost bolts properly.
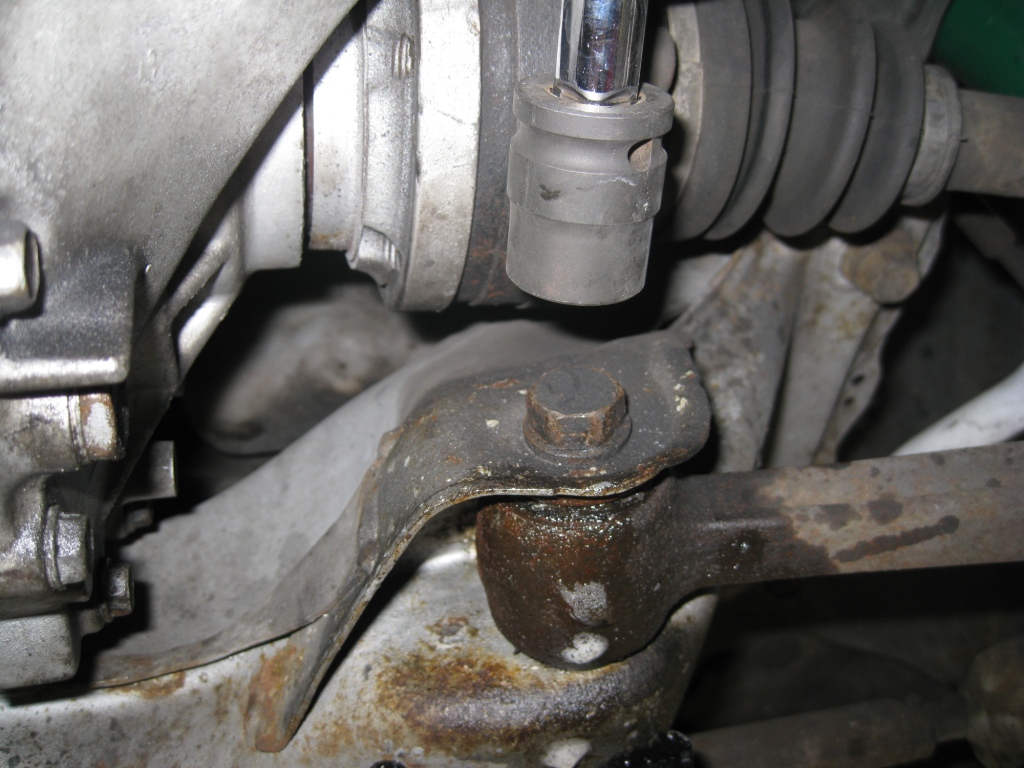
One of the more tricky bolts is a 19mm that is on the cross member arm. The passengerside axle is a little close to this and I found it easiest to get to with a stubby extension on the socket.
Basically I had a bit of trouble with these bolts and also the front most bolts, overall they were tight as hell and my 240v impact wrench was no match for them. So I had to 'crack' them with the bar+jack technique, and crack they did. Once they were cracked it was easy enough to whistle them out with the impact wrench.
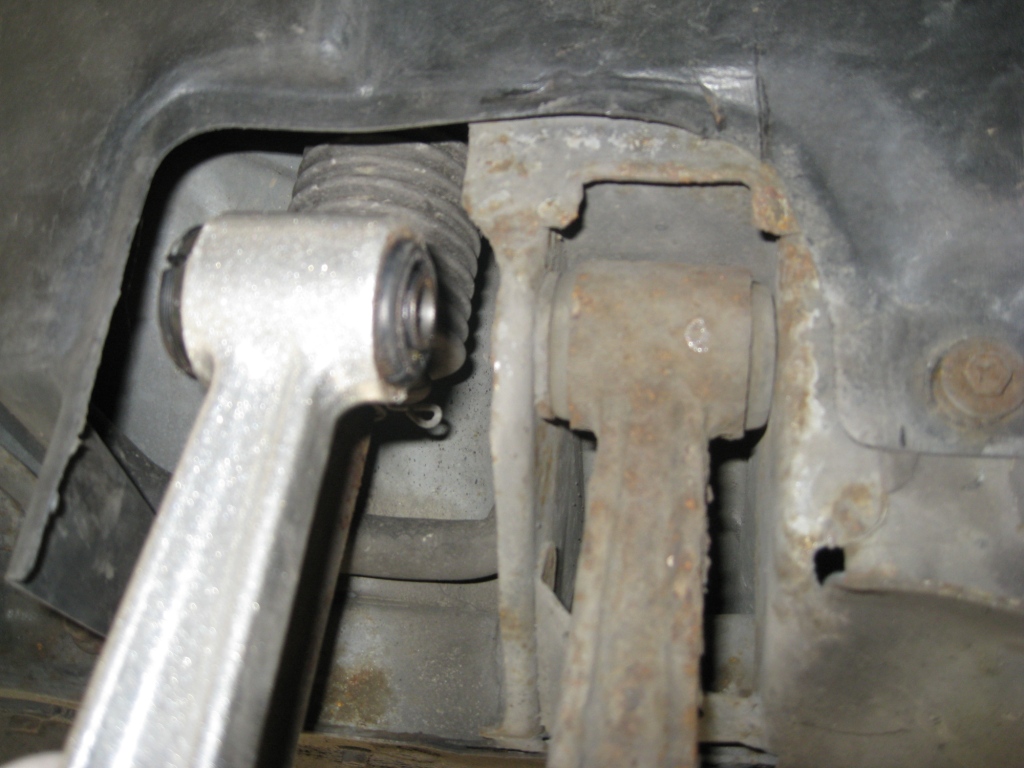
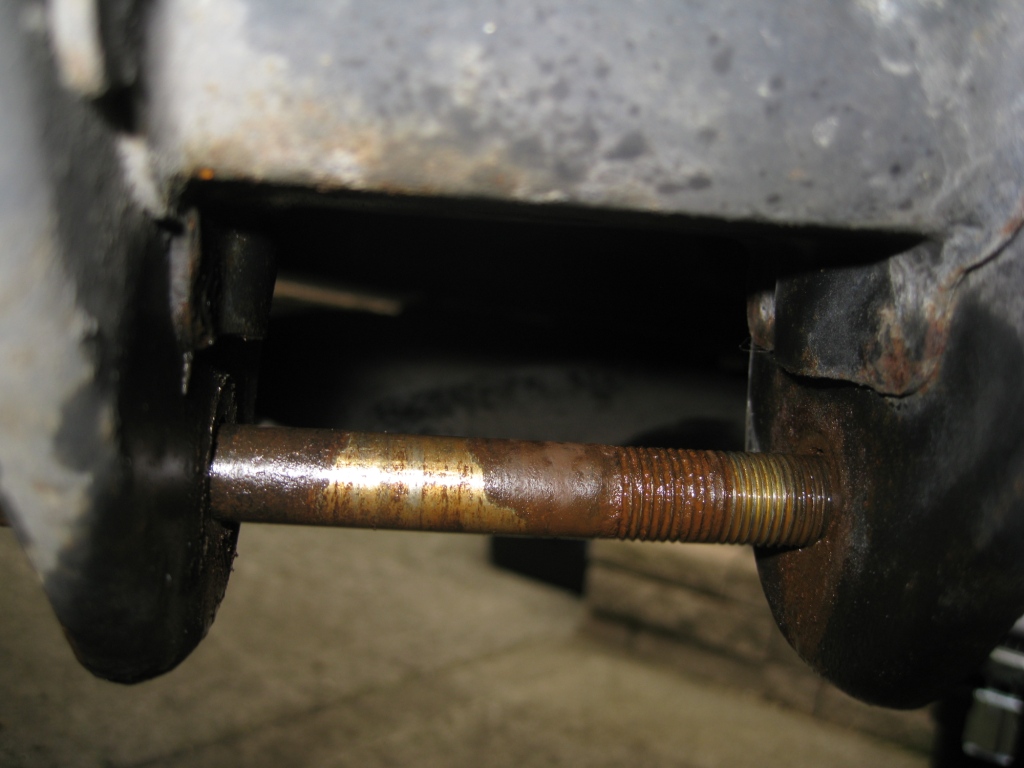
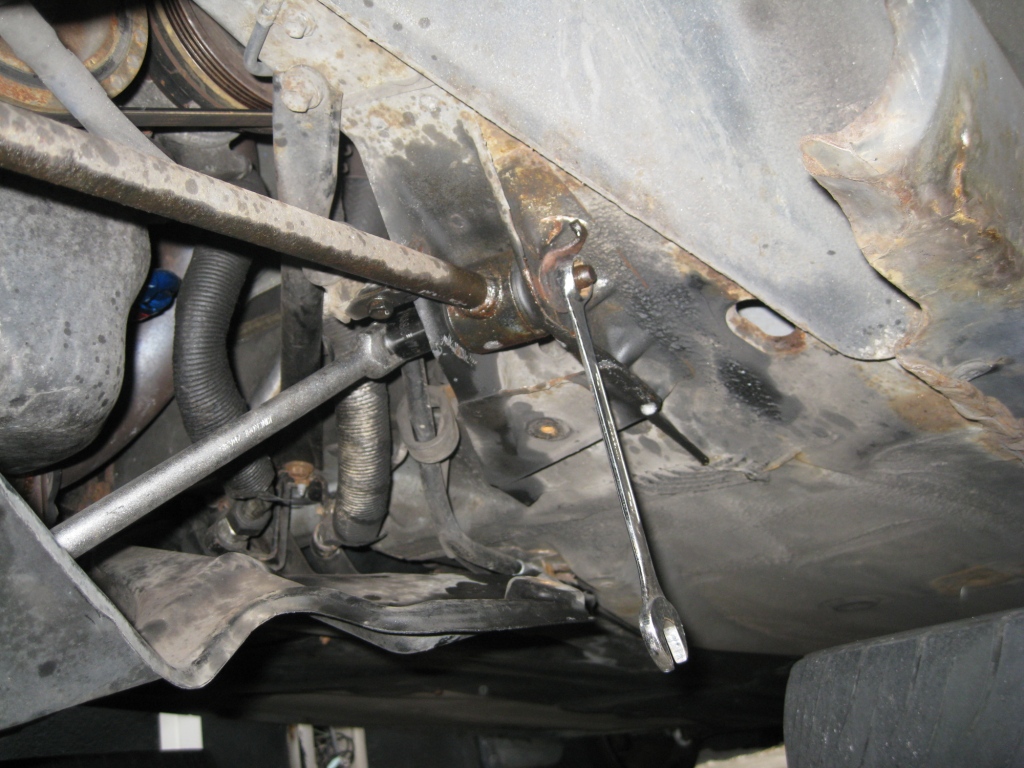
The front most (17mm) bolts are slightly different on the back in that they don't have a captive nut. The nut itself has a keeper tab which grabs on to the suspension mount. On one side this did the job for me just fine and I was able to undo the bolt no problem, on the side shown in this picture you will see that the tab has bent up and out of the way and I had to use a spanner also. That gives you an idea of how tight those bolts are. Granted this was turned by using the jack + breaker bar trick, I landed up having to use a foot on the spanner aswell!
Not shown in photos were also the four bolts used to hold the ball joint to the bottom of the axle hub. These are a 17mm bolts and were reasonably tight. The impact wrench was able to shift them however after a quick blat.
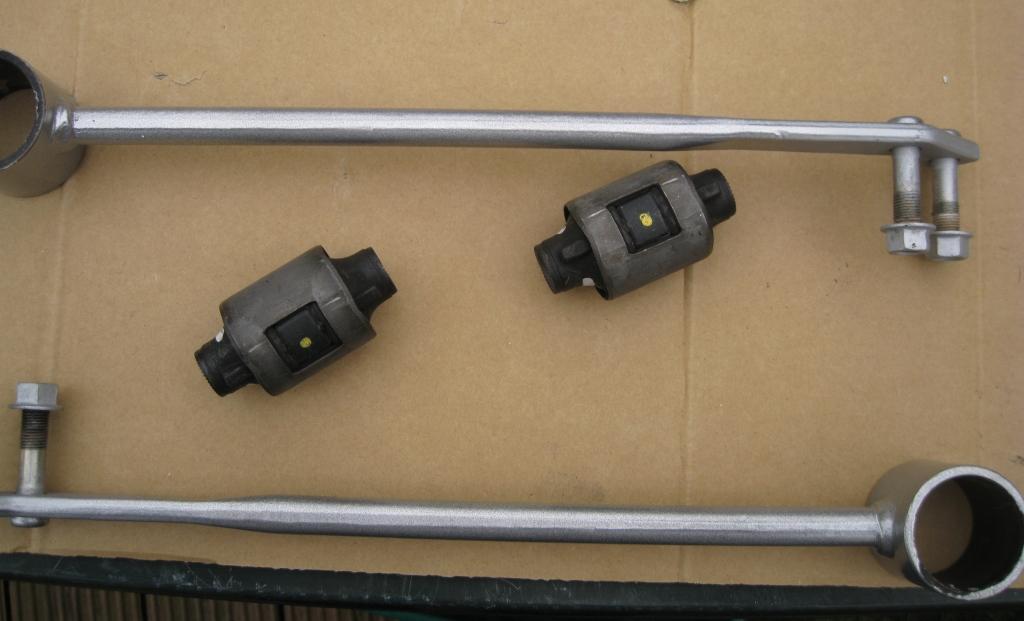
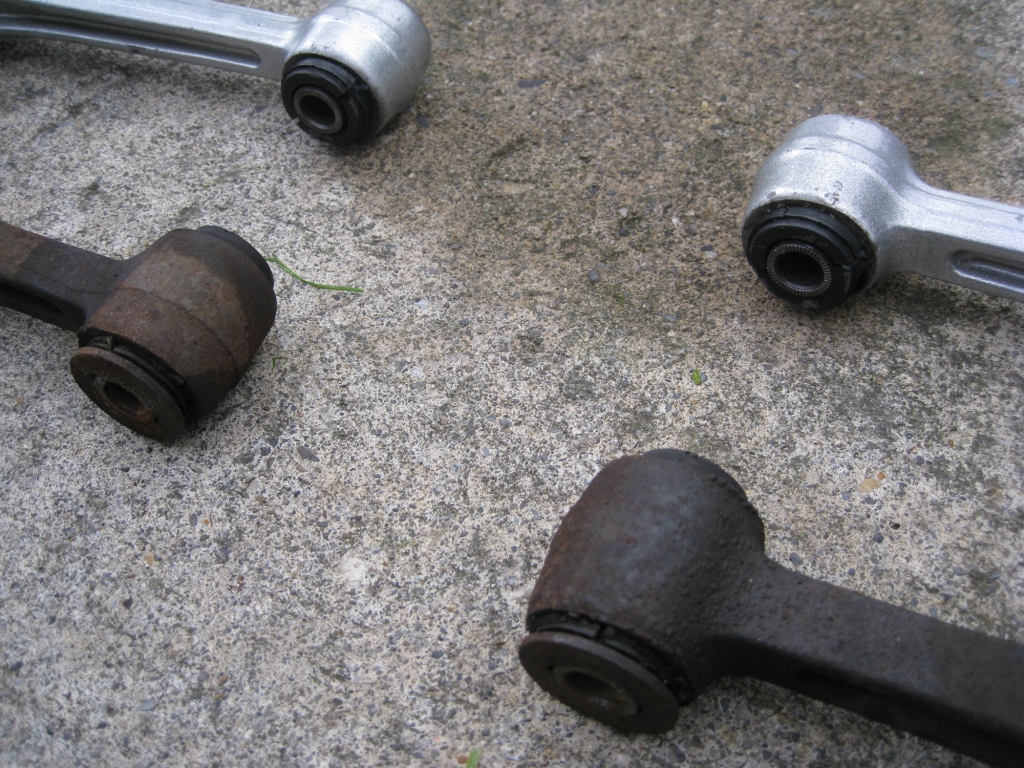
Here I have lined up the old + refurbished parts to show the difference. Apart from the orange paint on the arms, these are actually in ok shape for sandblasting, powdercoating and rebushing. The bushes look like marshmallow however so they couldn't be used as they are!

Rear ball joints ready to fit. I figured the back ones don't need to turn much so saved a couple of bucks and went with Camskill OEM ones in this case.
They do however use a nyloc nut lock which I don't really like. I prefer split pin style but did not realise this when I bought them.
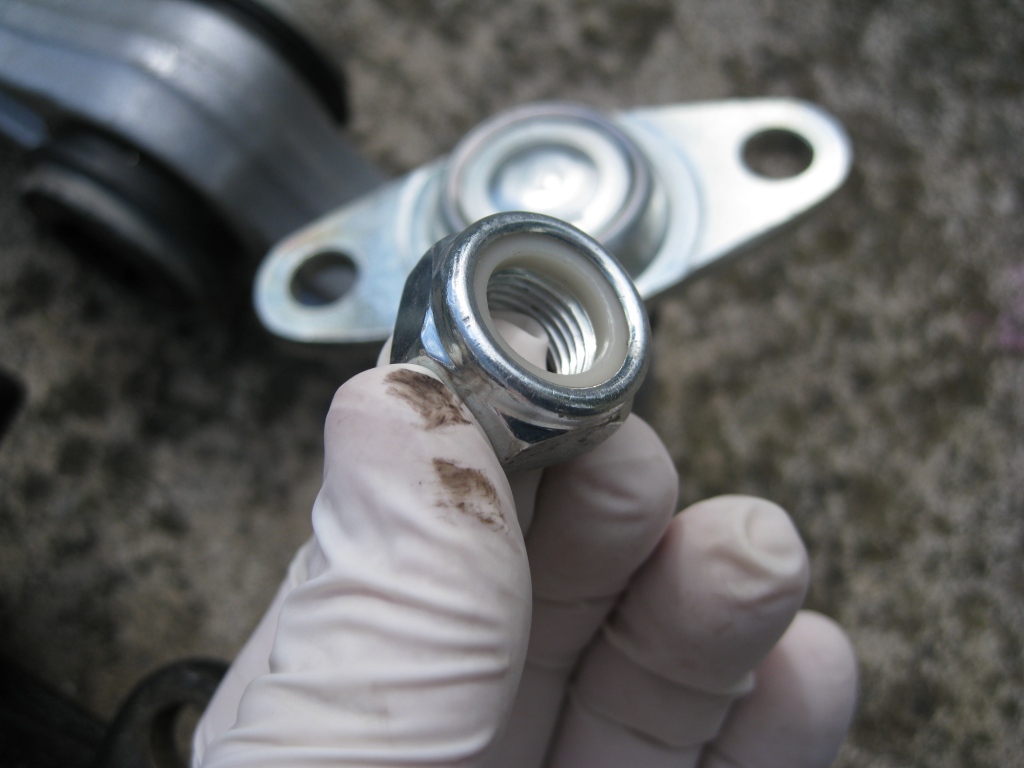
Still fits perfectly though!

Just like on the front, the rear arms have a thick washer at the front of the bush, this needs to be removed to fit to the new arms or else they won't fit properly. To do a 'super clean' install, you could order new ones of these from Toyota however I would not recommend powdercoating them as it would make it extrememly tight to fit the arms due to the width of the mount. As it was I had to use a jack to push the arm up in to place...
A swiftly and carefully placed tap removes these easy enough.
The washer/spacer shows signs of aging..
However an old trick is to rub the rusty part in a eliptical orbit on concrete/cement, and you will find that the outer rust surface is machined off..
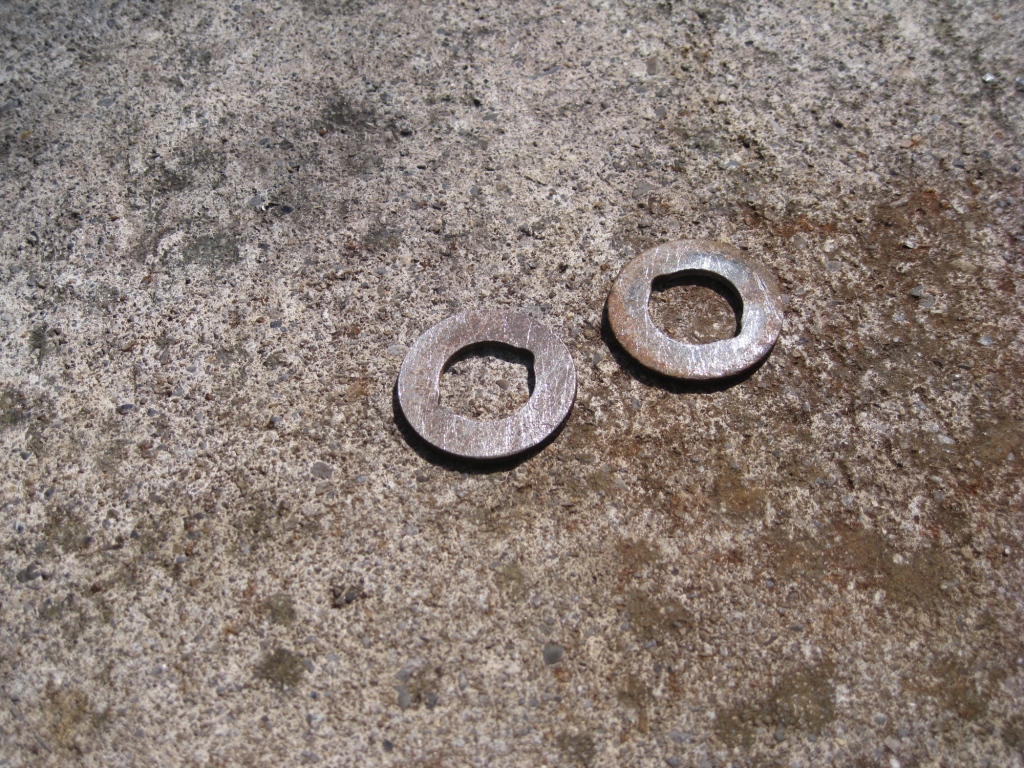
Then apply some grease or paint and you can sleep well at night knowing your spacer is not rusting to bits.
Prior to assembling everything I wanted to check that all the measurements looked right. It's not going to be exactly the same (that's what the adjustment is for) but is close enough.
Step one, taking the tension rod in hand, set the front nut to be as close as possible to the arm that you have removed, then apply some LM grease to the thread and adjustment nut.

Step two, drop the first bush holder washer on and grease it up pretty good also.

Step three, slide the suspension arm in place, apply some grease on the rubber bushes, put on the rear holder washer and then start the bolt.
Strangely, I found that the big bolt is a 15/16 imperial? That's weird for Toyota as they normally only use metric (i thought), however both sets of the arms I had are using this imperial size.
You might need to put a screwdriver through the front bush and have someone hold the arm while you start doing up the bolt, it gets pretty tight pretty quick.
Then tighten it up with a ring spanner as unless you have a deep socket the thread is going to bottom out on your ratchet.
Now its time to grease up the bottom of the ball joint and also the suspension arm. Even if you don't have surfaces moving against each other, you're going to be saving that area from corrosion in the future.

Pop on the bottom nut, and then tighten it to 'a little tight' by hand using (in this case) a 22mm socket

As the last step, apply some grease to our friend the washer/spacer, and push it on to the bush. I did not need to use the vice for this part but it was fairly tight anyway.

Right about this time it started a downpour and as I was working on the car outside I wanted to get done as quickly as possible so no more photos from this point. However just to note that after assembling everything hand tight I took the car for a drive around the block then broke out the torque wrench to tighten up the bolts to the BGB specs.
Hopefully I can get a four wheel alignment done tomorrow!
And here's a copy for convenience
I guess another option is to go out and buy stainless steel nuts, however I want to save up for some TRD engine mounts so painted ones will have to do!
So I wanted to crack on with fitting my TRD bushings as I spent so much time getting to the point of having them ready to fit, and also that the old arms are looking pretty rusty and won't pass our yearly roadworthy test here.
With my trusty Clarke electric rattle gun in hand, I headed in to what I thought would be a 20minute job...
This is the corner I started in, front drivers side
I'll be going for a de-rust and underseal treatment soon by the look of these pics..
New arm is the right length/shape (always a good start), looks much nicer and will be a lot firmer in the corners
I chose to start at the front, wow the tension rod was SERIOUSLY hard to remove. I broke a few tools on this guy. Basically I think it's had 20 years in there at the front of the car collecting every bit of grit grime, water, heating up/cooling off etc. so the main bolt was almost coated in muddy rust by the time I got it out. My only regret was that I did not spray it in WD40 overnight to let it sit. Thankfully the back arms were out when I did my engine swap so hopefully they should not be anywhere near as hard. I found that by disconnecting the underarm from the tension rod and strut and swinging it down out of the way I had a lot more space to work with and this helped me get 'the demon arm' off the car finally.
not happy...
happy
Old arm versus new arm. Note the thick metal washer on the front
This job would have been easier if I had ordered new washers from Toyota, however I didn't do my research well enough and did not know they were there. So I had to make a plan to remove the existing ones and fit them on my new arms. Well this is easier said than done, as you can see after nearly 20 years they are practically chemically welded with rust on to the bushing centre insert. So I figured that to remove them would require either blow torch, a hammer, vice, or possibly all three
The guy we want to get off is on the outer RHS
Chomp chomp, MR vice is hungry today
Then with some twisting, turning, and a good whack with the hammer... Success!
Putting the washer in place I was able to press fit it on to the centre with the vice. It would be nice to have it colour coded and to protect it from further rust but I will be greasing the hell out of it to install it anyway so hopefully it should be ok.
I also took the opportunity to switch out the ball joints, opting for genuine Toyota courtesy of tcb spares
Some LM automotive grease to smooth the install
Ball joint in place and torqued up to BGB specs, it's time to retain the castle nut with the cotter pin.
Push through and open with a screw driver
Pull it back over the centre thread
Hammer down both sides and you're good to go
More work today as I found out that I pushed in a bush the wrong way around for the other side.... uh oh...
ok so this is the offending article with the bush in the wrong way around :
That was quite a mistake on my part but easily made. Hopefully by documenting it here it will help others who might trip in to the same pitfall in the future.
Anyway, the job at hand was to pull the bush and put it around the other way without wrecking the rubber, or arm or both lol.
First and easiest step is to pull the washer that I only installed yesterday
Then I needed to find a drift (?) to push the bush out of the housing, I rustled around my tool box a bit and came up wiht this spark plug wrench.
And on the other side I need a socket that has room to hold the whole bush. This was a bit tricky as I didn't have any pipe big enough. Then I saw the tension arm that I took off yesterday and checked it for size.
It looked like a match, however because it has a bush in it, now I have two bushes to remove! Anyway because I don't want to reuse this one I can use one of my favourite tools...
After a minute of two of heating up the centre sleeve and cooking the rubber, the rubber starts to peel away from the sleeve
Then you can let gravity do its thing
I'm not going to reuse this arm so I put it straight in to water for a sizzle sizzle effect, and then it's time to clean out the rubber which is easy when the sleeve is gone.
Safety tips when burning out bushings:
* Have a bucket of water ready
* Work in an open area as they smoke pretty bad and fumey
* Work over the top of dirt and not near anything flamable as you get some hot rubber flying out here and there.
Next I checked against the arm to confirm that we're looking like it's going to work as planned:
Now for the hard part! Those TRD rubber bushes are super stiff and took major torque to push them in to the housing so I was not looking forward to getting them out. Thankfully this particular one has a different flange on either end. On one side there's only a very thin lip holding the bush on the housing, on the other side there is a thick one. I did remember from when I put them in there that they went reasonably easy compared to the other ones.
Time for more heat - grabbing a pan and kettle from the kitchen I submerged the arm and the bush completely in just sub boiling water. I then left it to heat up for 10 minutes and made a cup of coffee
The reason I didn't use the blow torch was that it would dull off the powdercoat, or possibly even burn it off altogether.
Putting the assembly in the vice, I could start to work the bush out of the heated housing.
The socket pushed through the bush a bit, however it looked like it was stressing the rubber as it was only really pushing on the centre of the bush, I hunted around a bit more for a bigger washer etc, however no luck. But then I came across this big nut which did the job nicely:
So with a bit of leverage and the pipe,
Out came the bush, a little bit beat up, but definately workable and ready to put in the right way around.
Then it was just a matter of applying some LM grease to the bush and gently winding it in to the housing
Using the spare arm once again to make sure the bush is pushed home fully
Then it's on once more with the thick washer and then we're ready again for fitting.
I put plenty of grease in and around the mount points
and it pushed up in to place nice and tight
Then it was a matter of fitting the ball joint, tension arm and other assembly the same as yesterday and I had it all in place.
The next thing I wanted to do was to give some further protection to the powdercoat so it's out with the meguiars!
Rubbed it in to al the new parts, then a gentle buff
Now looks great
I took the car for a drive to bed in the rubber and I noticed that it's much more direct now in the corners. The steering is quicker to respond yet still some give from the rubber. Then I torqued up the bolts in accordance with the BGB.
BACK END
Moving on to the back end, it's important to get the car nice and high as there are some TIGHT bolts under here and you want room to swing breaker bars
Because you're often putting a lot of torque on critical parts, it's important to make sure you do this job on a level surface and that the car is very secure on the axle stands. You will see that I slid my wheels under the sills also. To think of the car crashing down on the wheels gives me shivers, but I would rather wreck a set of alloys than wreck myself under the car!
There's plastic covers underneath the car that need to be removed out of the way to get to the frontmost bolts properly.
One of the more tricky bolts is a 19mm that is on the cross member arm. The passengerside axle is a little close to this and I found it easiest to get to with a stubby extension on the socket.
Basically I had a bit of trouble with these bolts and also the front most bolts, overall they were tight as hell and my 240v impact wrench was no match for them. So I had to 'crack' them with the bar+jack technique, and crack they did. Once they were cracked it was easy enough to whistle them out with the impact wrench.
The front most (17mm) bolts are slightly different on the back in that they don't have a captive nut. The nut itself has a keeper tab which grabs on to the suspension mount. On one side this did the job for me just fine and I was able to undo the bolt no problem, on the side shown in this picture you will see that the tab has bent up and out of the way and I had to use a spanner also. That gives you an idea of how tight those bolts are. Granted this was turned by using the jack + breaker bar trick, I landed up having to use a foot on the spanner aswell!
Not shown in photos were also the four bolts used to hold the ball joint to the bottom of the axle hub. These are a 17mm bolts and were reasonably tight. The impact wrench was able to shift them however after a quick blat.
Here I have lined up the old + refurbished parts to show the difference. Apart from the orange paint on the arms, these are actually in ok shape for sandblasting, powdercoating and rebushing. The bushes look like marshmallow however so they couldn't be used as they are!
Rear ball joints ready to fit. I figured the back ones don't need to turn much so saved a couple of bucks and went with Camskill OEM ones in this case.
They do however use a nyloc nut lock which I don't really like. I prefer split pin style but did not realise this when I bought them.
Still fits perfectly though!
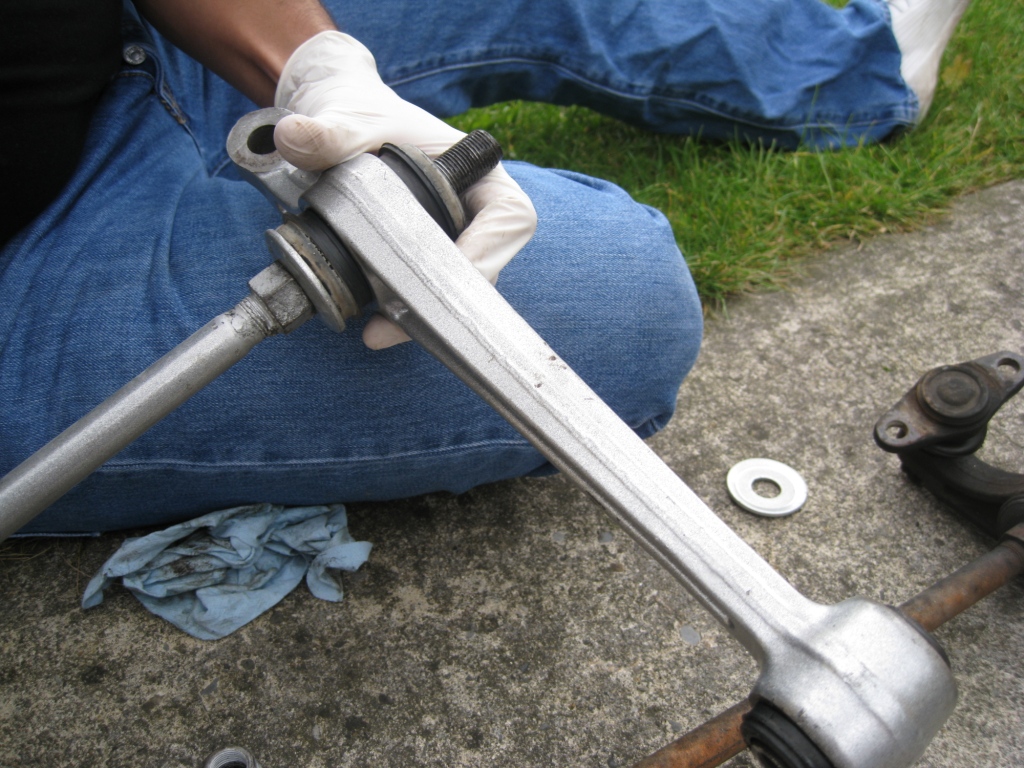
Just like on the front, the rear arms have a thick washer at the front of the bush, this needs to be removed to fit to the new arms or else they won't fit properly. To do a 'super clean' install, you could order new ones of these from Toyota however I would not recommend powdercoating them as it would make it extrememly tight to fit the arms due to the width of the mount. As it was I had to use a jack to push the arm up in to place...
A swiftly and carefully placed tap removes these easy enough.
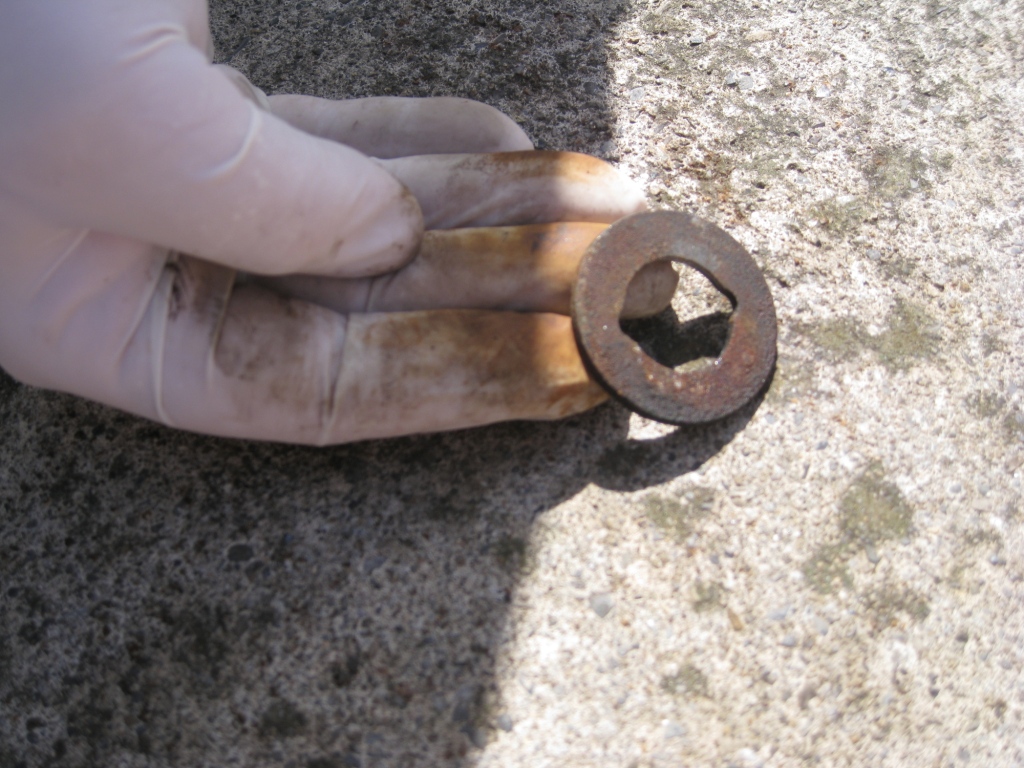
The washer/spacer shows signs of aging..
However an old trick is to rub the rusty part in a eliptical orbit on concrete/cement, and you will find that the outer rust surface is machined off..
Then apply some grease or paint and you can sleep well at night knowing your spacer is not rusting to bits.
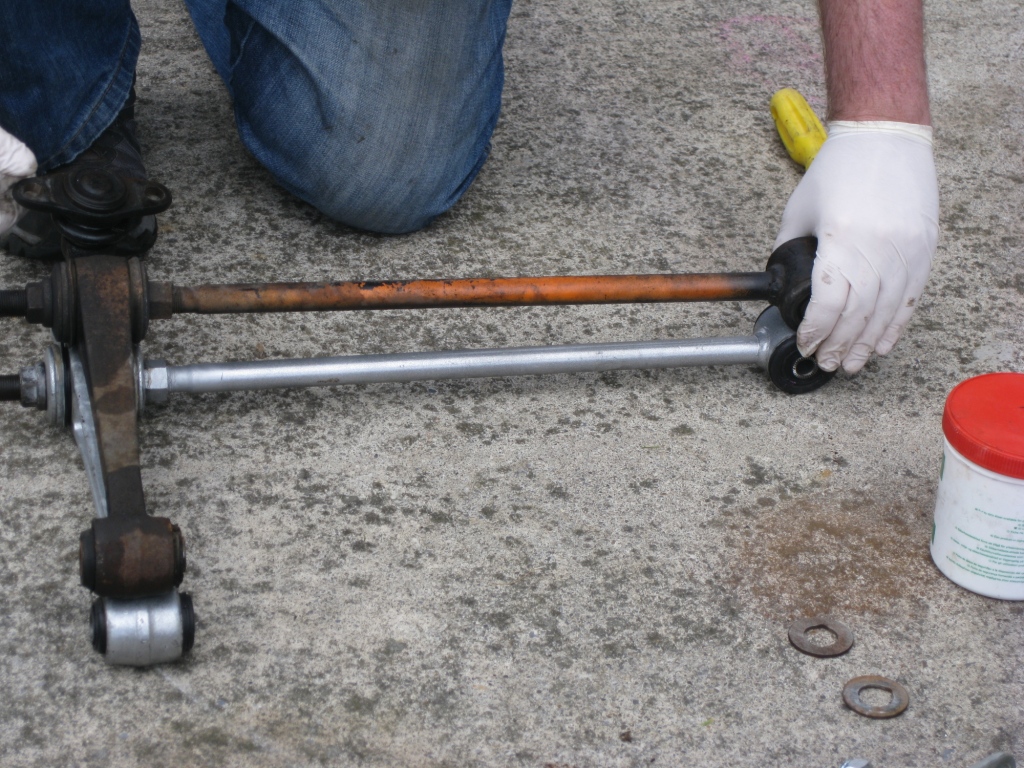
Prior to assembling everything I wanted to check that all the measurements looked right. It's not going to be exactly the same (that's what the adjustment is for) but is close enough.
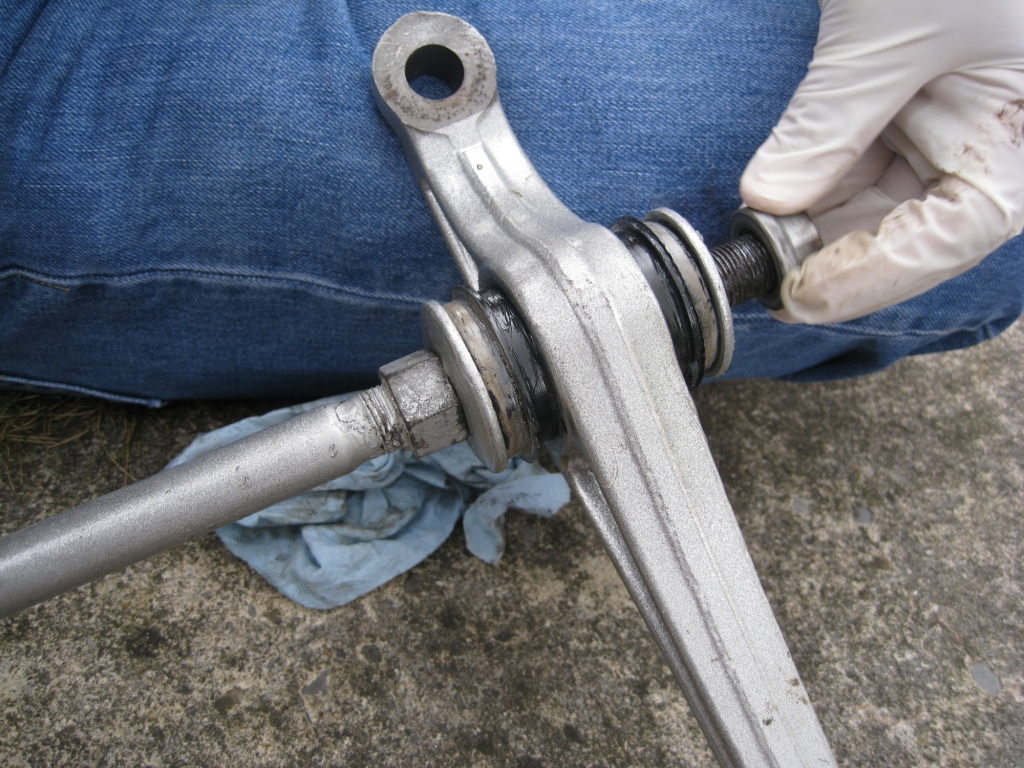
Step one, taking the tension rod in hand, set the front nut to be as close as possible to the arm that you have removed, then apply some LM grease to the thread and adjustment nut.
Step two, drop the first bush holder washer on and grease it up pretty good also.
Step three, slide the suspension arm in place, apply some grease on the rubber bushes, put on the rear holder washer and then start the bolt.
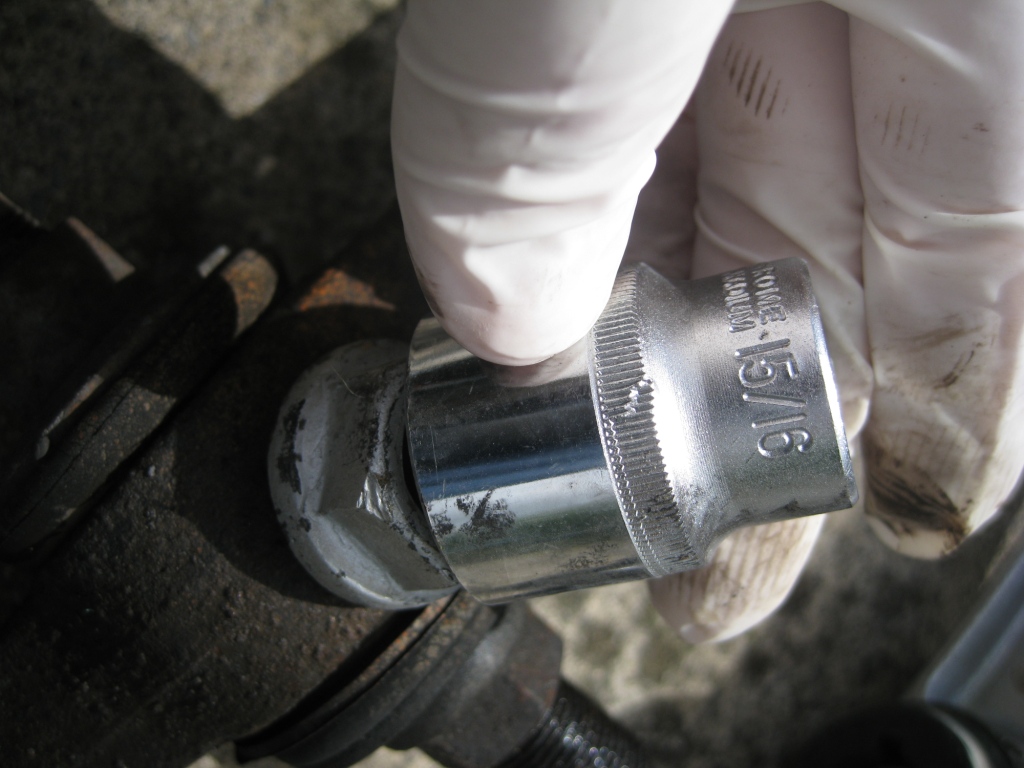
Strangely, I found that the big bolt is a 15/16 imperial? That's weird for Toyota as they normally only use metric (i thought), however both sets of the arms I had are using this imperial size.
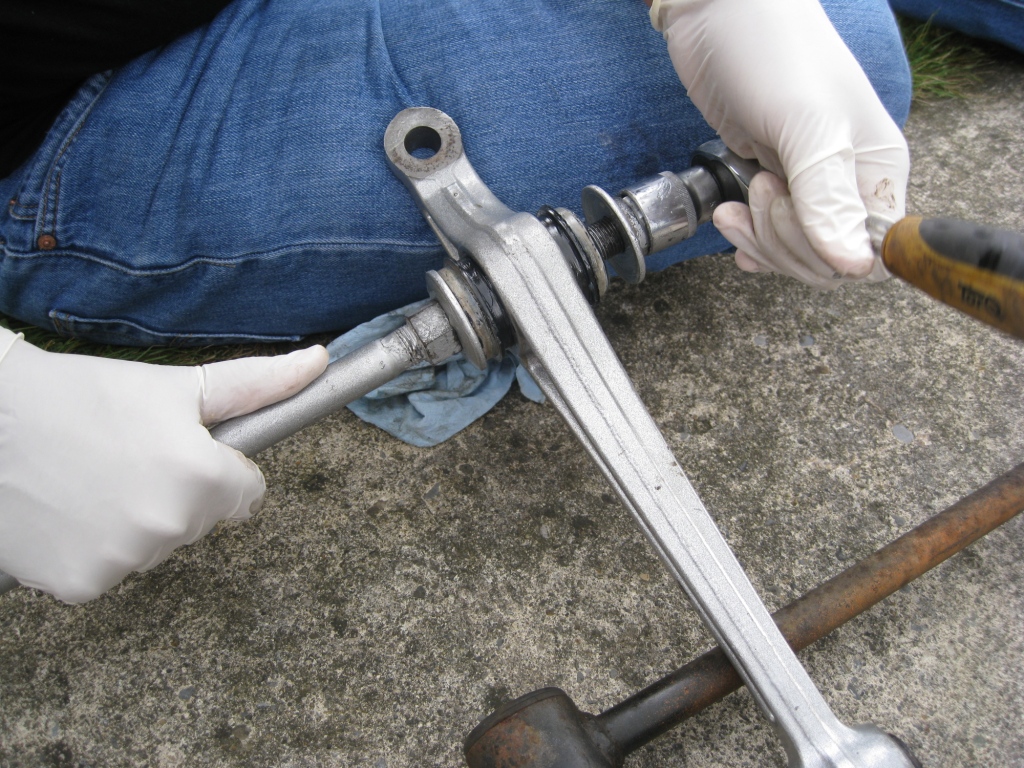
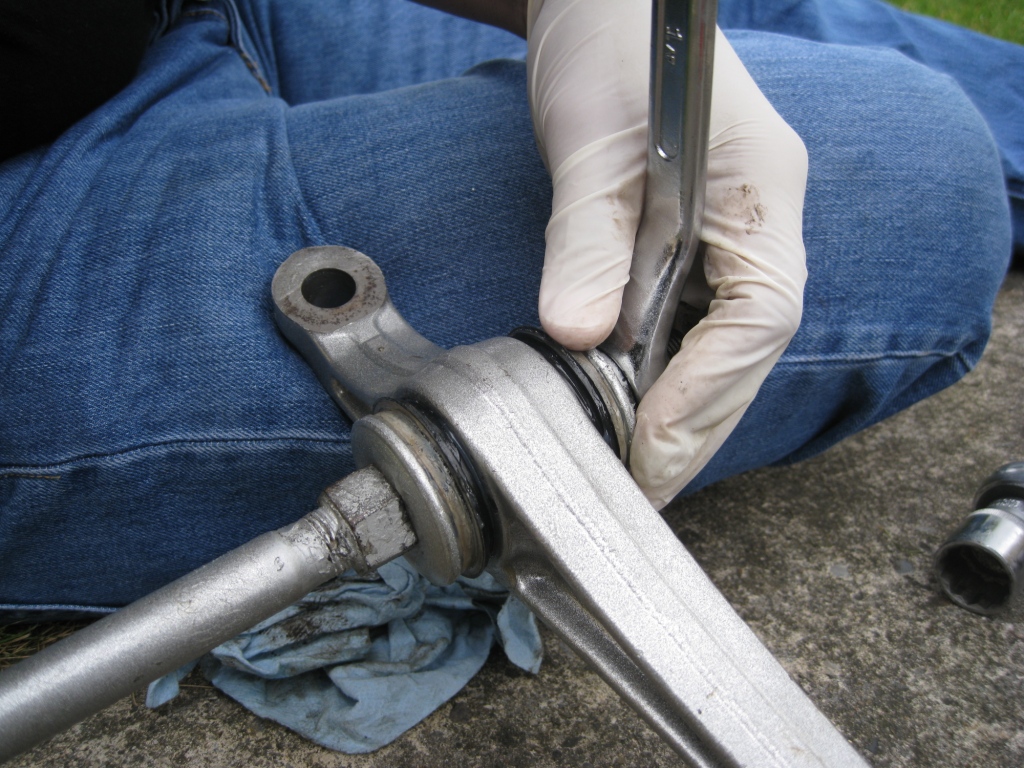
You might need to put a screwdriver through the front bush and have someone hold the arm while you start doing up the bolt, it gets pretty tight pretty quick.
Then tighten it up with a ring spanner as unless you have a deep socket the thread is going to bottom out on your ratchet.
Now its time to grease up the bottom of the ball joint and also the suspension arm. Even if you don't have surfaces moving against each other, you're going to be saving that area from corrosion in the future.
Pop on the bottom nut, and then tighten it to 'a little tight' by hand using (in this case) a 22mm socket
As the last step, apply some grease to our friend the washer/spacer, and push it on to the bush. I did not need to use the vice for this part but it was fairly tight anyway.
Right about this time it started a downpour and as I was working on the car outside I wanted to get done as quickly as possible so no more photos from this point. However just to note that after assembling everything hand tight I took the car for a drive around the block then broke out the torque wrench to tighten up the bolts to the BGB specs.
Hopefully I can get a four wheel alignment done tomorrow!
Quandry- Posts : 6
Join date : 2010-09-30
Location : Ireland -
Re: TRD Suspension Bushes - Fitting
![]() Admin Tue Aug 30, 2011 12:18 am
Admin Tue Aug 30, 2011 12:18 am
Really good write up there and excellent pics too! :-) You are a brave man LOL
Admin- Admin
- Posts : 438
Join date : 2009-02-17 -
» Suspension & Tyre advice
» Home Video Fitting a TRD Kit
» Front Wing - Fitting
» Petrol/Gas/Fuel Filler Cap - Fitting
» TRD Spider Red Including Closeup of Hood Fitting
» Home Video Fitting a TRD Kit
» Front Wing - Fitting
» Petrol/Gas/Fuel Filler Cap - Fitting
» TRD Spider Red Including Closeup of Hood Fitting
Page 1 of 1
Permissions in this forum:
You cannot reply to topics in this forum